 By
By Chapter 3:
Deploy your model
There are two ways to deploy our model and keep it available for our Anvil app to use.
Firstly, we can host the model on our own computer and connect our app to the model using the Anvil Uplink.
Here’s a full tutorial which shows you exactly how to do this for free:
The second solution is to deploy our model online with Anvil. This is the simplest way to deploy both our app and model - hosting the model online requires a paid account. Let me quickly show you how it works.
Step 1: Download your model
We’ll start by going back into our Colab notebook. At the end of the cell that builds and trains the iris classification model, we’ll import the joblib library and the files module from google.colab.
...
knn = KNeighborsClassifier(n_neighbors=10)
knn.fit(X,y)

import joblib
from google.colab import files

model = joblib.dump(knn, "knn.skmodel")[0]
files.download(model)
Downloading the iris model from the Colab notebook
Step 2: Upload the model to our app
Now, back in the Anvil Editor, let’s add the Data Files service. Select the blue ‘+’ button in the Sidebar Menu and add Data Files.
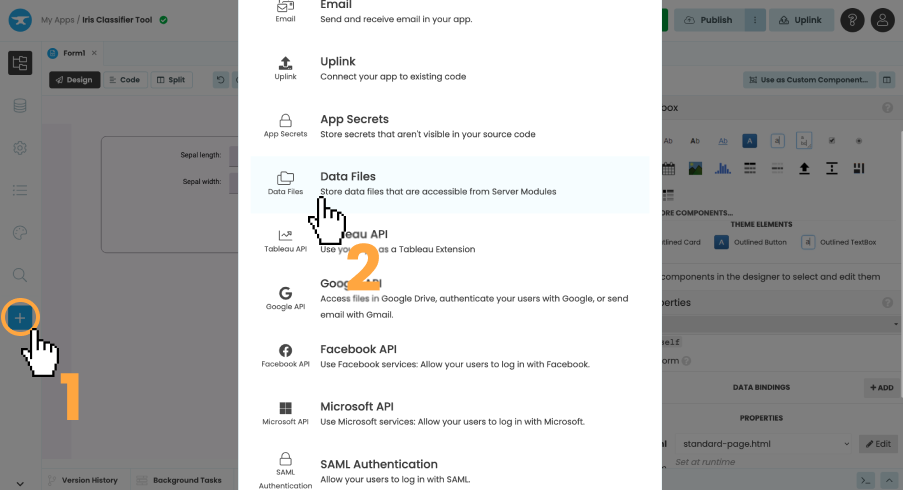
Adding the Data Files service
Next, we can upload our model as a file by clicking the ‘Upload’ button and selecting the model we downloaded earlier.
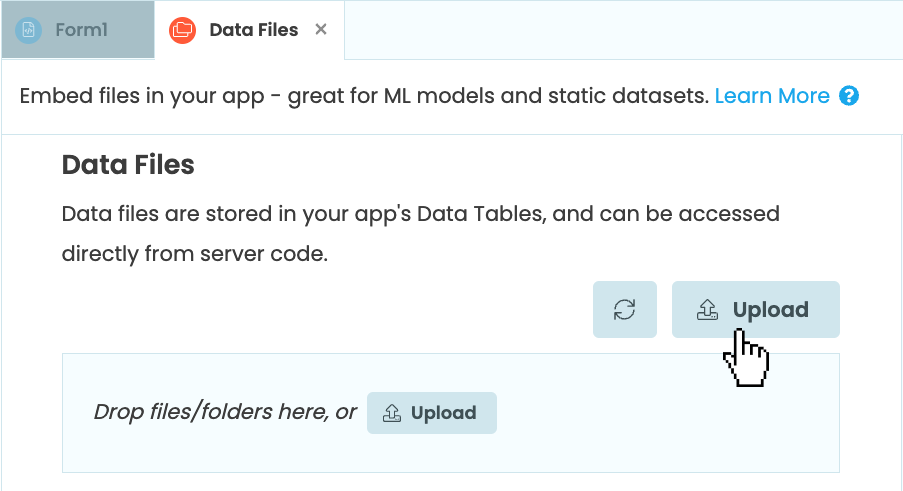
Click the ‘Upload’ button
Here’s a Gif of the full process for uploading your model:
Adding the Data Files service and uploading our model
Step 3: Configure your server environment
With our model uploaded, we need to configure our app’s server environment to include all the packages we need to use the model.
We’ll start by selecting settings icon ![]() from the Sidebar Menu and opening ‘Python versions’.
from the Sidebar Menu and opening ‘Python versions’.
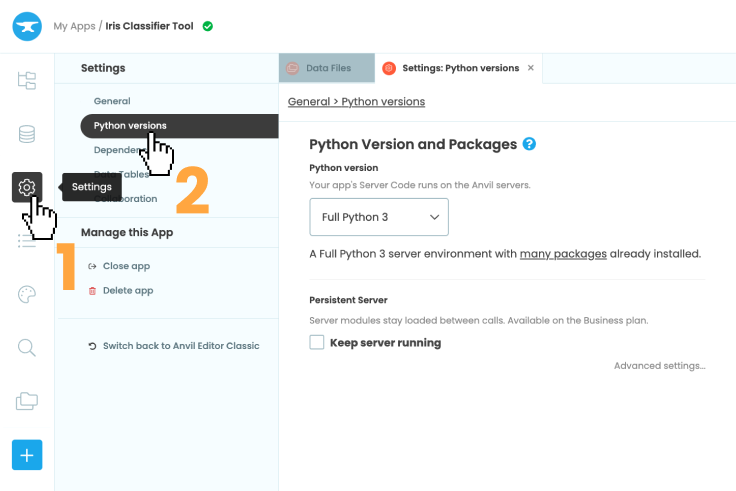
Opening the settings menu
Then, in the Python version dropdown, select ‘Python 3.10’. Under ‘Base packages’, choose the ‘Machine Learning’ base image. This includes all of the packages we’ll need to run the model.
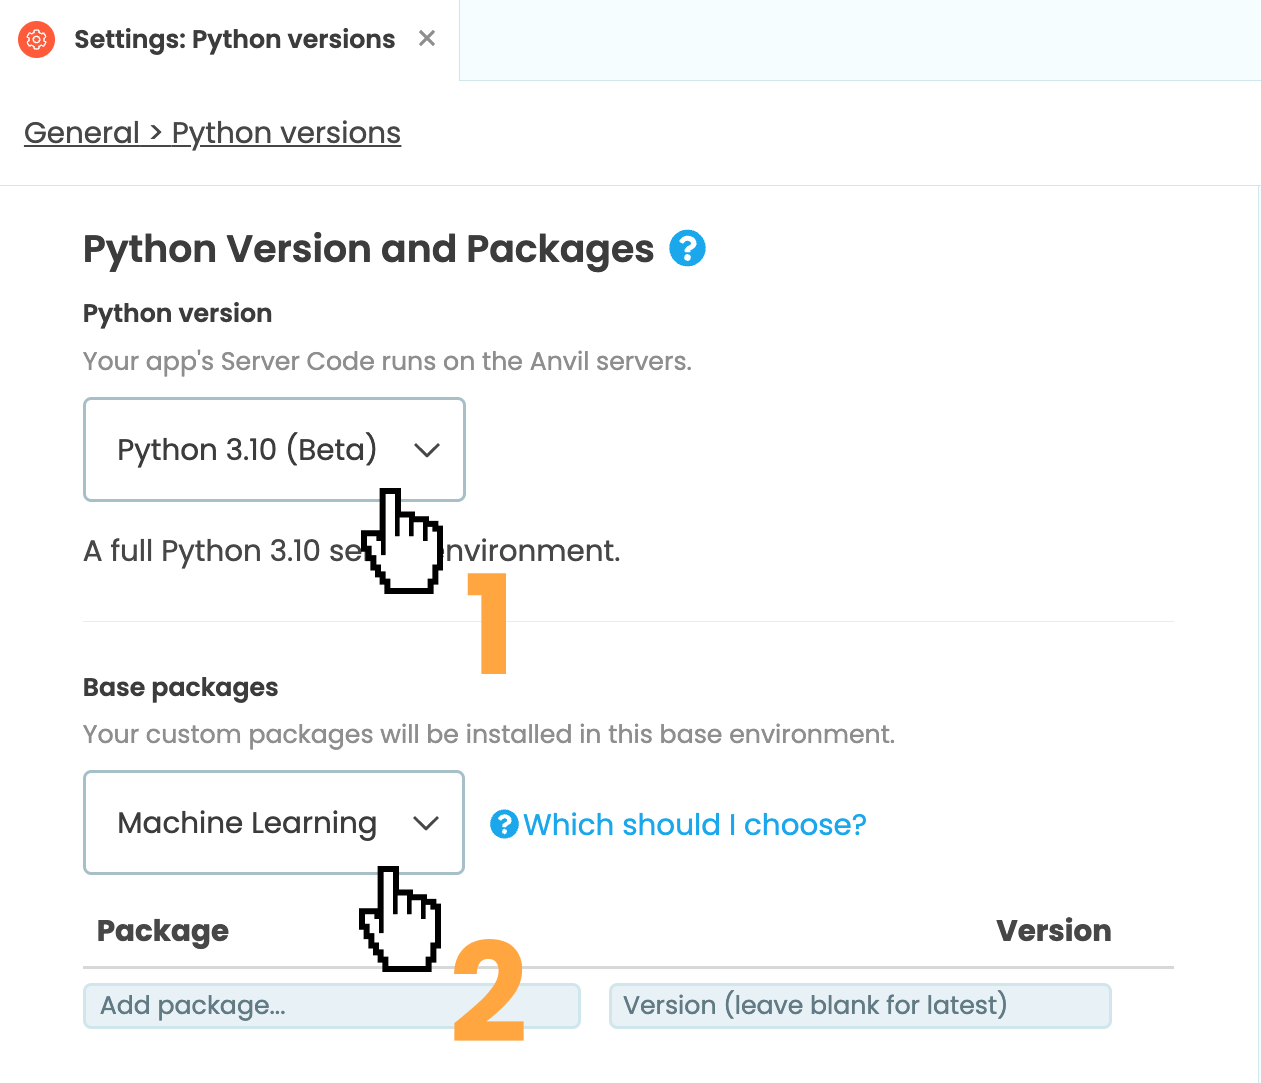
Changing the Python version to ‘Python 3.10’
and the base package to ‘Machine Learning’
With our server environment configured, it’s time to start using our model.
Step 4: Use your hosted model
Create a Server Module by selecting the App Browser ![]() in the Sidebar Menu and clicking ‘+ Add Server Module’.
in the Sidebar Menu and clicking ‘+ Add Server Module’.
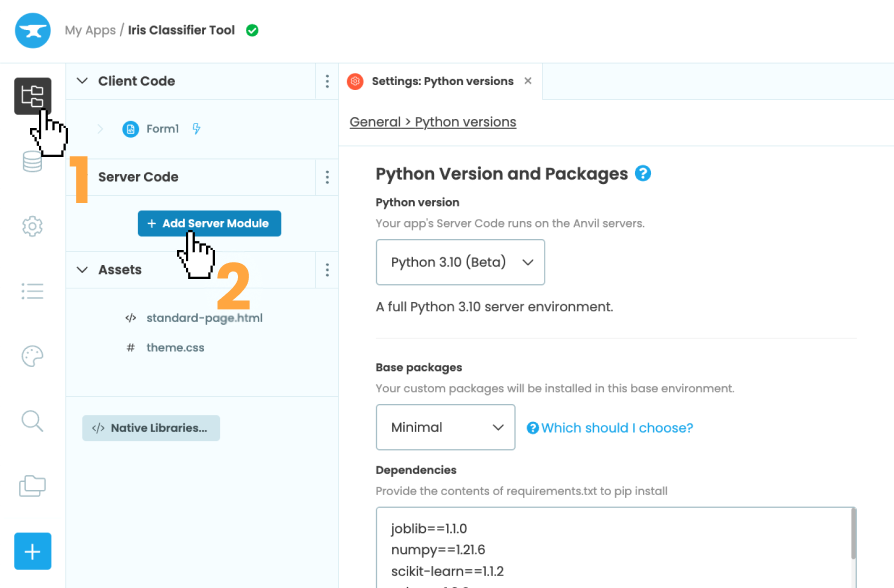
Opening the settings menu
At the top of our server module, let’s import the joblib library we need to load our model and import load_iris from sklearn’s built-in iris dataset.
import joblib
from sklearn.datasets import load_iris

iris = load_iris()
The same as we did in our Colab notebook, let’s define the predict_iris function that takes the flower measurements.
@anvil.server.callable
def predict_iris(sepal_length, sepal_width, petal_length, petal_width):
Inside the predict_iris function, we’ll reconstruct our model using joblib.load(). We will get the path to the model file on disk using data_files['knn.skmodel']. Lastly, we’ll get the classification using the same code we used in our Colab notebook.
@anvil.server.callable
def predict_iris(sepal_length, sepal_width, petal_length, petal_width):
  # Reconstruct our model
  model = joblib.load(data_files['knn.skmodel'])

  # Get the classification of the iris
  classification = model.predict([[sepal_length, sepal_width, petal_length, petal_width]])
return iris.target_names[classification][0]And that’s it! If we go to our app’s URL now and enter some iris measurements, our app will use our Machine Learning model that’s deployed online with Anvil.
Using the finished app and
model - both deployed with Anvil
Click the following link to clone the source code and explore it yourself.
Clone the App
For those of you who want to see the source code for this app:
New to Anvil?
If you’re new here, welcome! Anvil is a platform for building full-stack web apps with nothing but Python. No need to wrestle with JS, HTML, CSS, Python, SQL and all their frameworks – just build it all in Python.
Yes – Python that runs in the browser. Python that runs on the server. Python that builds your UI. A drag-and-drop UI editor. We even have a built-in Python database, in case you don’t have your own.
Why not have a play with the app builder? It’s free! Click here to get started: