
Storing Data in Data Tables
Every Anvil app comes with a built-in database. Each database stores tables of information for your Anvil app. It’s a full database system built on top of PostgreSQL.
If you’re not familiar with databases, it’s also similar to a spreadsheet - data is stored in tables with rows and columns.
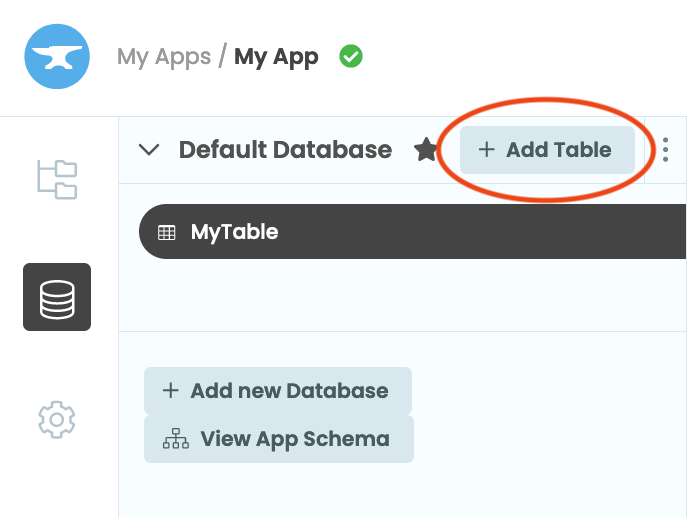
To add a data table to your app’s Default database, open the database window ![]() from the Sidebar Menu. Then click
from the Sidebar Menu. Then click + Add Table button. Check the Quickstart to see how to get up and running.
Editing Data Tables in the Anvil Editor
Each table contains columns and rows. Columns define the type of data you’re storing, while each row represents a single item. For example, in a table of people for an organisation, you might have columns for name, age, and employment status, with each row representing one person.
Here’s an example table in the app editor:
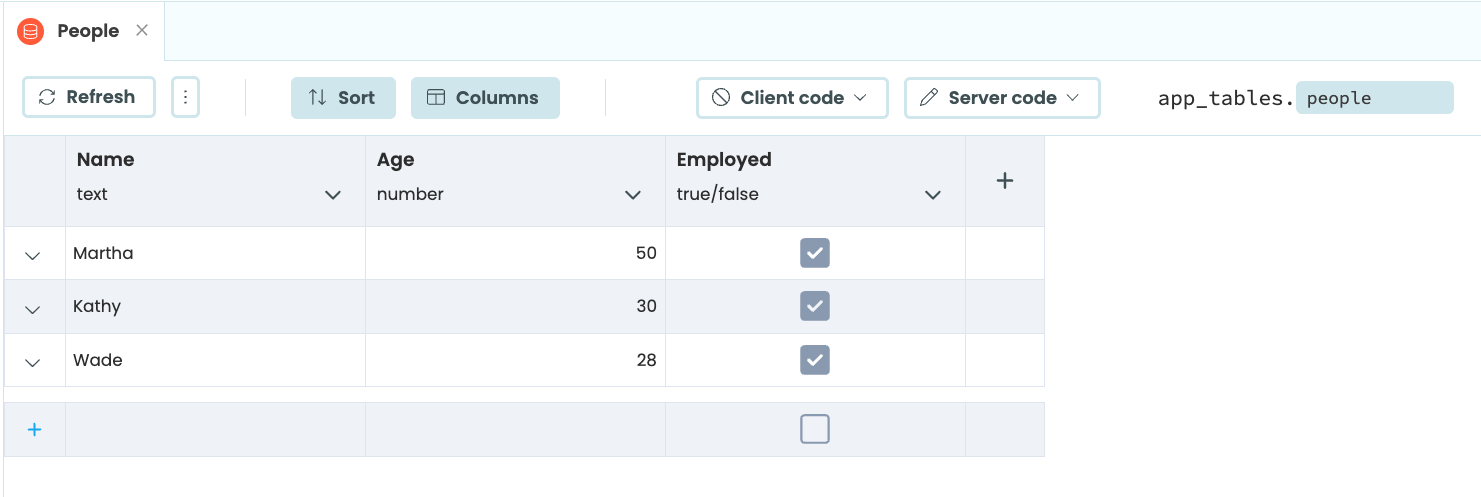
Each column can contain data of a particular type. For example, in the table above, Name is always a string, Age is always
a number, and Employed is always a boolean value (either True or False). Any column can also be empty (None in Python).
Click to edit any data in the table (just like a spreadsheet). To add a new row, click the ‘+’ button at the bottom of the table, or click in the blank row, and start typing! You can add more columns with the ‘+’ button at the top right of the table.
To change a table’s title, double click on its name in the data tables list on the left.

Sharing Databases and Data Tables Between Apps
You can add existing Data Tables and Databases from other apps in your account.
Adding an Existing Table
To add an existing table to your app:
- Click the three-dot menu on the database you want to add the table to, then select “Add Existing Table”.
- In the dialog that appears, select the table you want to add.
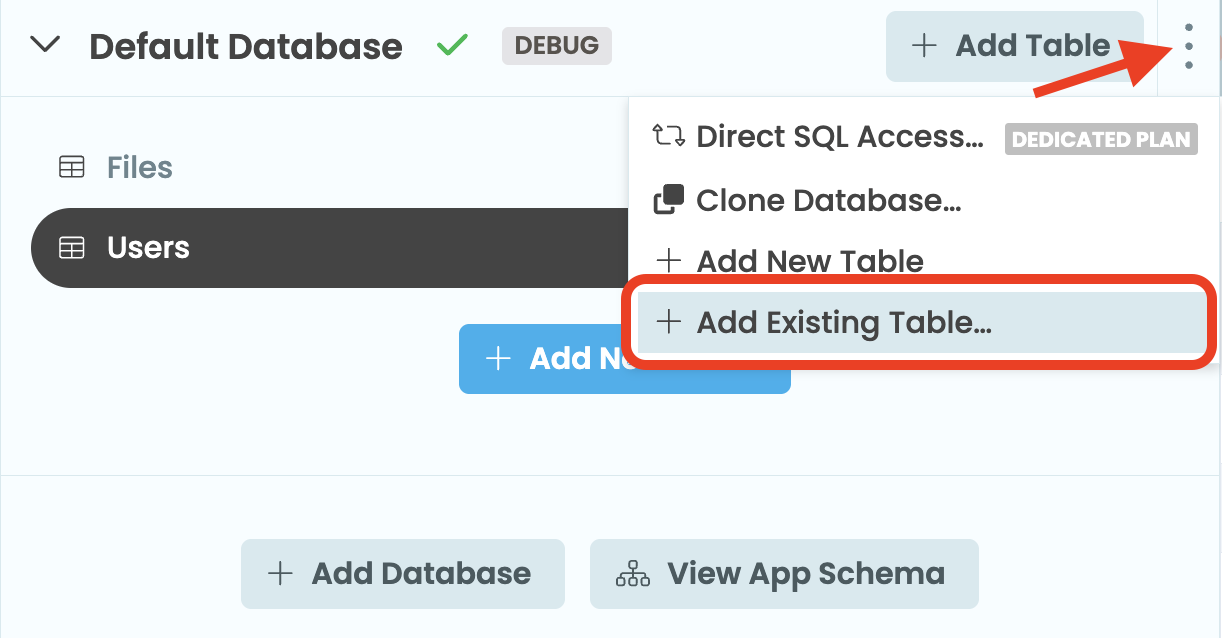
Adding an existing table to your database
Adding an Existing Database
To add an existing database to your app:
- Click the “+ Add Database” button and select “Add Existing Database”.
- In the dialog that appears, select the database you want to add.
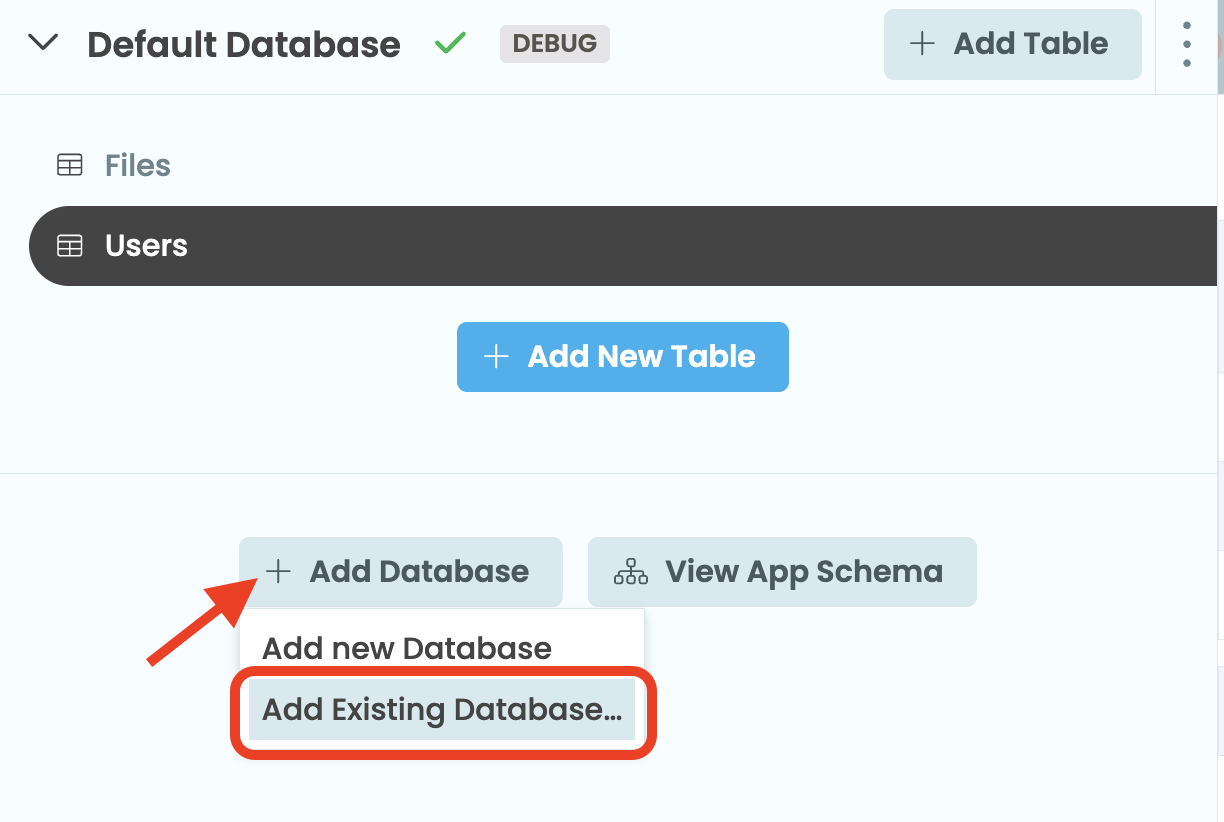
Adding an existing database to your app
Adding an existing table or database does not create a copy. Instead, it creates a shared connection.
Changes made to a shared table will be visible in all databases that contain that table. Similarly, changes made to a shared database will be visible in all apps connected to it.
Downloading a Data Table as CSV
To export a data table in CSV format, click the  Download button in the Data Tables editor.
Using Data Tables from Python
Add, search, update and delete rows, query, and export your Data Tables with Python.
Data Security
You can control which code can read or write each table, using permissions and views.
Static Data Files
Attach static files such as datasets or text files to your app and access them from your Server Module.
Links Between Tables
You can store references to one table in another table, and traverse those relationships in Python.
Using Multiple Databases
Add extra databases to your Anvil app and assign them to different deployment environments.
Transactions
You can group Data Table operations so they succeed or fail together, with automatic conflict retry.
Buffering Changes
Use buffered changes to defer changes to the database until the save() method is called.
Model Classes
Add extra logic directly to your table rows as Python classes.
SQL Access and Indexing
Query your data tables directly with SQL and add custom indexes for advanced queries.
CSV and Excel Import
Import data from CSV or Excel files into your Data Tables using Data Files or the Uplink.
Do you still have questions?
Our Community Forum is full of helpful information and Anvil experts.