Chapter 4:
Adding automated emails using a Trello webhook
Let’s start by enabling the Anvil Email service.
Step 1: Enabling the Anvil Email service
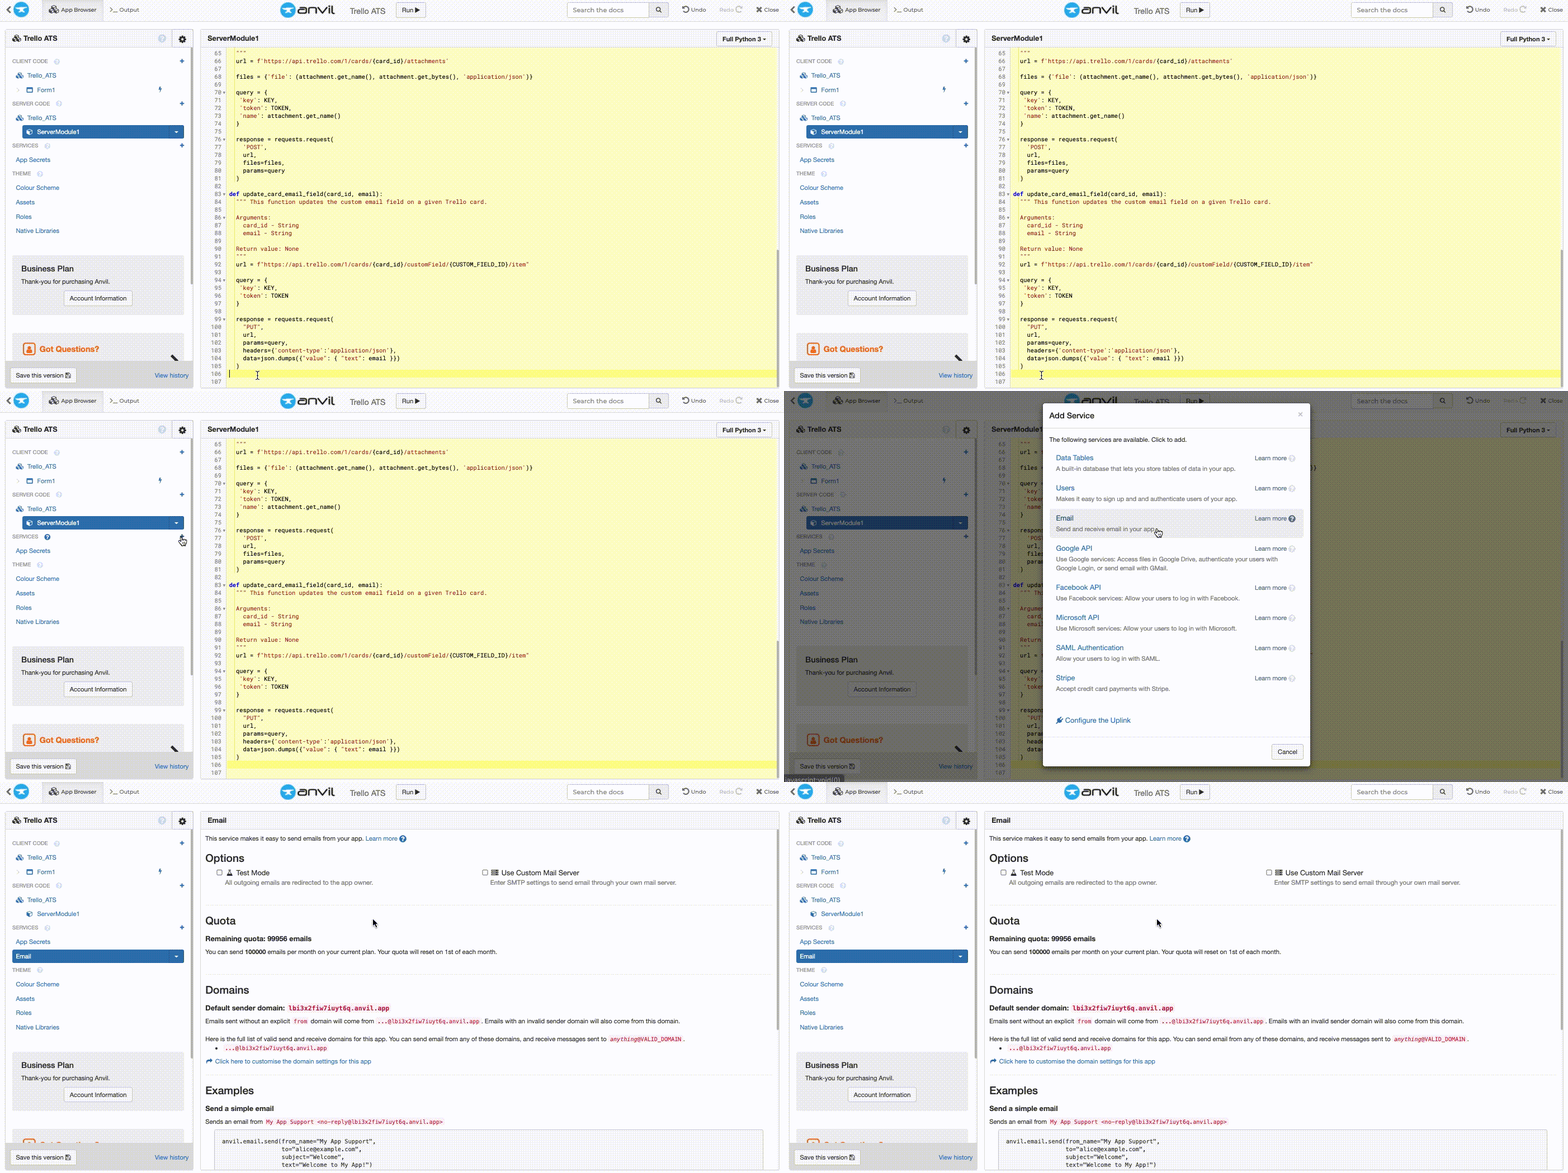
Let’s enable the Email service in the App Browser by clicking the + next to “Services” and selecting Email.

Adding the Anvil Email service
That’s it! We can now send emails from our app.
Step 2: Create a HTTP endpoint for Trello’s webhook
We need to create an endpoint that our Trello webhook can call whenever a change to our rejected list happens - i.e. when an applicant’s card is added to the list.
Creating HTTP endpoints is simple with Anvil. In our server module, all we need to do is create a function. Then give that function the @anvil.server.http_endpoint() decorator with two arguments. The first argument is the path we want our server function to be available at. The second is which methods are available on this endpoint.
@anvil.server.http_endpoint('/ats/reject_card/list',  methods=["POST", "HEAD"])
def reject_applicant():
  pass
Trello webhooks send two requests to an endpoint. First, when the webhook is created, it sends a HEAD request to check the endpoint is available. Then, each subsequent time Trello calls the endpoint, it sends a POST request containing the information of the change that took place on the Trello board.
To handle the HEAD request, we’ll start by checking the incoming request method and return an empty object to confirm the endpoint is working.
@anvil.server.http_endpoint('/ats/reject_card/list',  methods=["POST", "HEAD"])
def reject_applicant():
  if anvil.server.request.method == "HEAD":
    return {}
That’s the HEAD request handled. Now, let’s get the data we need from the incoming POST request.
A POST request will be sent to our endpoint every time a change to our Rejected list occurs, including when a card is added to or removed from the list.
When a card is added or removed, the webhook will send data about the card which includes what list the card was moved from. If the card’s previous list was not the Rejected list, then we know the card has been added to our Rejected list and an email should be sent. In our reject_applicant() function, let’s add a conditional to check the card has been added to our rejected list.
As we did with NEW_APPLICATIONS_LIST_ID in chapter 3 - step 2, let’s navigate to the JSON version of our Trello board and search for our rejected list ID - it will be nested something like: "list":{"id":"5ffd89bd7b22517c91d8aa73","name":"Rejected"}}. We will store this in a variable, REJECT_LIST_ID, at the top of our server module.
REJECT_LIST_ID = '5ffd89bd7b22517c91d8aa73'We can get the old list ID using a series of get() calls on the requests.body_json. Then we can check it doesn’t match our REJECT_LIST_ID.
@anvil.server.http_endpoint('/ats/reject_card/list',  methods=["POST", "HEAD"])
def reject_applicant():
  # Trello sends two requests, first HEAD then POST. Checking for head request stops 505 on first request.
  if anvil.server.request.method == "HEAD":
    return {}

  # Get the old list ID or return a falsy object if an old list ID isn't found.
  previous_list_id = anvil.server.request.body_json.get('action', {}).get('data', {}).get('old', {}).get('idList')
  # Check if card is being moved onto rejected list
  if previous_list_id and previous_list_id != REJECT_LIST_ID:
    pass
Now we know that the card is definitely being moved onto our rejected list, we need to get the details of the applicant, specifically their email.
We can write a quick function which gets the custom fields from the card and then finds the email address. Let’s define a function called get_email_address_from_card() with the argument card_id.
def get_email_address_from_card(card_id):
  pass
We’ll create a URL using an f string and the expression {card_id}. Then we can call the request with the GET method, "application/json" headers and query parameters containing our API key and token.
def get_email_address_from_card(card_id):
  url = f"https://api.trello.com/1/cards/{card_id}/customFieldItems"

  headers = {
    "Accept": "application/json"
  }

  query = {
    'key': KEY,
    'token': TOKEN
  }

  response = requests.request(
    "GET",
    url,
    headers=headers,
    params=query
  )
The fields are returned as a list and each field is a dictionary. Here is an example of what it will look like:
[
  {'id': '602c33b95b45fc3173f690c8', 'value': {'checked': 'true'}, 'idCustomField': '602c33b7f123451e61114bd6', 'idModel': '602bd9f07329953499425cbc', 'modelType': 'card'},
  {'id': '602bd9f046532772bedca523', 'value': {'text': 'test@mail.com'}, 'idCustomField': '600062fc591ccb535af2e328', 'idModel': '602bd9f07a99953497825cbc', 'modelType': 'card'}
]
We can then iterate over each field in the response to find the email field using it’s ID. Once the email field is found, we can return the email using field['value']['text'].
def get_email_address_from_card(card_id):
  url = f"https://api.trello.com/1/cards/{card_id}/customFieldItems"

  headers = {
    "Accept": "application/json"
  }

  query = {
    'key': KEY,
    'token': TOKEN
  }

  response = requests.request(
    "GET",
    url,
    headers=headers,
    params=query
  )

  # Get email from cards custom fields
  for field in response.json():
    if field['idCustomField'] == EMAIL_FIELD_ID:
      return field['value']['text']
Now back to our reject_applicant() function. We can get the card ID from the requests.body_json and use the new get_email_address_from_card() function to get our applicant’s email address from the card ID.
@anvil.server.http_endpoint('/ats/reject_card/list',  methods=["POST", "HEAD"])
def reject_applicant():
  """ This function sends an email to the applicant if their card is moved to the rejected Trello list.

  Arguments: None

  Return value: None
  """
  # Trello sends two requests, first HEAD then POST. Checking for head request stops 505 on first request.
  if anvil.server.request.method == "HEAD":
    return {}

  previous_list_id = anvil.server.request.body_json.get('action', {}).get('data', {}).get('old', {}).get('idList')
  # Check if card is being moved onto rejected list
  if previous_list_id and previous_list_id != REJECT_LIST_ID:
    card_id = anvil.server.request.body_json['action']['data']['card']['id']
    email_from_card = get_email_address_from_card(card_id)
Sending emails with Anvil is simple. We can use the anvil.email.send() function, passing in data as keyword parameters.
@anvil.server.http_endpoint('/ats/reject_card/list',  methods=["POST", "HEAD"])
def reject_applicant():
  """ This function sends an email to the applicant if their card is moved to the rejected Trello list.

  Arguments: None

  Return value: None
  """
  # Trello sends two requests, first HEAD then POST. Checking for head request stops 505 on first request.
  if anvil.server.request.method == "HEAD":
    return {}

  previous_list_id = anvil.server.request.body_json.get('action', {}).get('data', {}).get('old', {}).get('idList')
  # Check if card is being moved onto rejected list
  if previous_list_id and previous_list_id != REJECT_LIST_ID:
    card_id = anvil.server.request.body_json['action']['data']['card']['id']
    email_from_card = get_email_address_from_card(card_id)
    anvil.email.send(from_name="Coolest Company Ever",
                  to=email_from_card,
                  subject="Application for Chief of Cool at the Coolest Company Ever",
text="Sorry to say you aren't cool enough!")The last step in our applicant tracking system is creating the webhook in Trello. The webhook will call our apps endpoint whenever a change happens to our Rejected list.
Step 3: Create a webhook to call our app endpoint
We are going to create a webhook on our Rejected list. We can do this with a simple HTTP POST request using curl. The URL requires our API key, API token, rejected list ID and app’s callback URL. We can find the callback URL at the bottom of our Server Module:

Substitute the {path} with the /ats/reject_card/list we defined in the @anvil.server.http_endpoint() decorator of our reject_applicant() function.
Our curl request will look something like this:
$ curl --request POST \
    --url 'https://api.trello.com/1/webhooks/?key=<API-KEY>&token=<API-TOKEN>&callbackURL=<APP-CALLBACK-URL>&idModel=<REJECT-LIST-ID>' \
    --header 'Accept: application/json'
Open your command line and run the curl request. It should return something like this:
$ {"id":"5fff24489e433a34gd62da54","description":"","idModel":"5fft69bd7b22517e51d8aa73","callbackURL":"https://tyahg53gmklkhfac.anvil.app/debug/5WI5XLSCY7IATHOM6YCSRFKFPOJYZSOK%3DPUVOJRBDGPPBFMOWVW5EU/_/api/ats/reject_card/list","active":true,"consecutiveFailures":0,"firstConsecutiveFailDate":"2020-01-15T11:46:13.177Z"}To check the webhook has been setup correctly, run the curl request again and Trello’s API will respond with:
$ A webhook with that callback, model, and token already existsWell done! You now have a fully functioning ATS which you can use to track your applications and, as a bonus, it will automatically email rejection emails.
Step 4: Publishing our app
Now we have our app and Trello board ready to go, all we have to do is publish our app for people to start applying for our job vacancy.
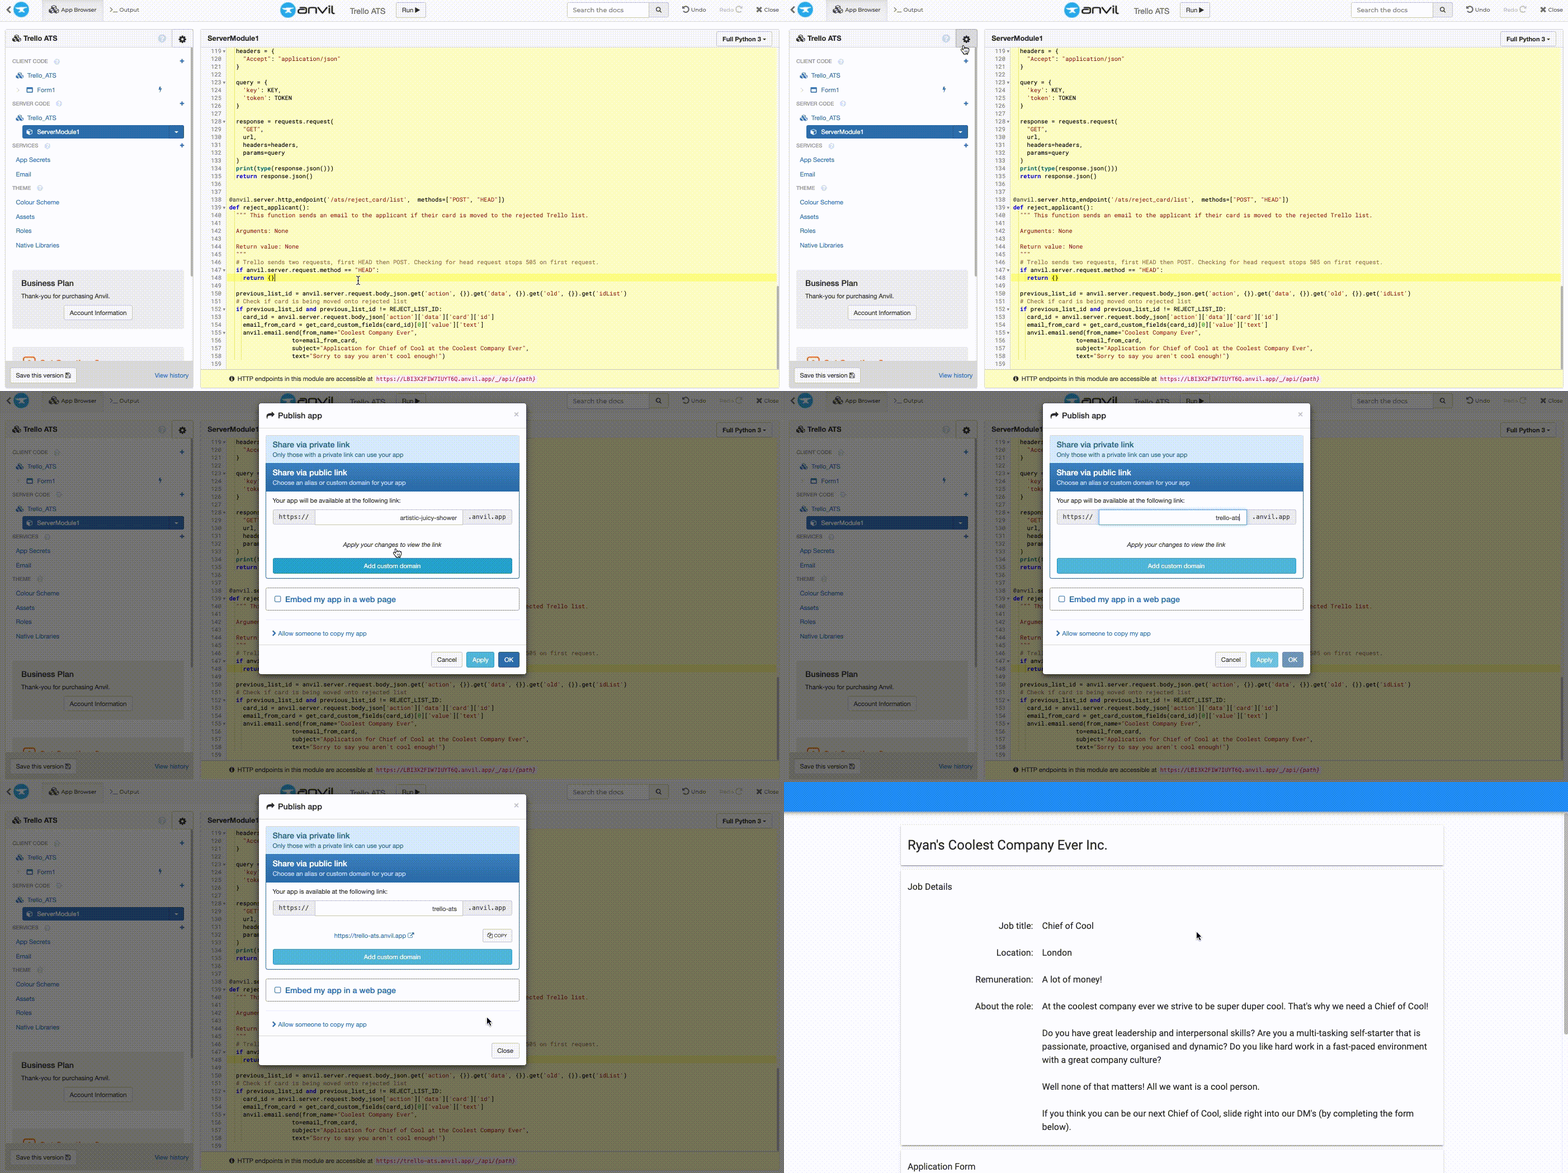
From the IDE, open the Gear menu ![]() in the top left of the IDE, then select
in the top left of the IDE, then select Publish app and then Share via public link. Enter your desired URL and then click apply.

That’s it, our app is now ready to accept applications on your very own URL!
The next step is optional but the best way to learn any new technology is to challenge your understanding. Why not challenge yourself to reinforce what you’ve learnt and learn more?
 By
By