 By
By Chapter 4:
Store edits to the Data Table
Step 1: Update the Data Table
Because we are not allowing the client to write to our Data Table, we cannot use writeback as we have been. Instead, we’ll use a server function to update the Data Table.
Anvil’s Server Modules are a full server-side Python environment. Unlike client code, Server Modules cannot be edited or seen by the user, so we can trust them to do what we tell them. This is why we’ll use a Server Module to write to the Data Table.
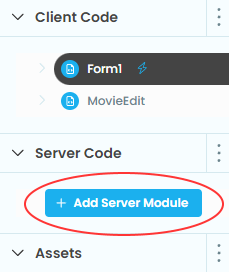
Let’s create a Server Module. In the App Browser, click the blue ‘+ Add Server Module’ button underneath ‘Server Code’. This will open up a code editor.
Our server function will be taking in a dictionary from the client and updating the Data Table with its contents. We’ll decorate it with @anvil.server.callable so that we can access it from client code. Remember that we’re still dealing with just the single row in the Data Table.
@anvil.server.callable
def update_movie(movie_data):
    row = app_tables.movies.search()[0]
    row['director'] = movie_data['director']
    row['movie_name'] = movie_data['movie_name']
    row['summary'] = movie_data['summary']
    row['year'] = movie_data['year']
Server functions also give us a place to put any data validation we need. In the case of the movie data, we probably don’t want to allow any of the fields to be empty.
@anvil.server.callable
def update_movie(movie_data):
    if not movie_data['director']:
        return

    if not movie_data['movie_name']:
        return

    if not movie_data['summary']:
        return

    if not movie_data['year']:
        return

    row = app_tables.movies.search()[0]
    row['director'] = movie_data['director']
    row['movie_name'] = movie_data['movie_name']
    row['summary'] = movie_data['summary']
    row['year'] = movie_data['year']
The exact validation you do depends on your app and the server function, but it’s the spot to do last minute validation before you write changes to the Data Table.
Step 2: Make a copy of the Data Table row
Switch to the Code view for Form1 and look at the edit_click function.
We can no longer pass self.item directly to the MovieEdit form, since self.item is a read-only Data Table row and writeback will not work with it. What we can do instead is convert the item to a dictionary, effectively making a copy of it. Modify the edit_click function to do so.
    def edit_click(self, **event_args):
        item = dict(self.item)
        editing_form = MovieEdit(item=item)
        alert(content=editing_form, large=True)
Writeback data bindings will work fine on the dictionary, since it’s no longer a Data Table row, but a dictionary with copies of the values that were in the Data Table row.
Step 3: Update the Data Table row
After the alert is closed, we must call the server function to update the Data Table row and pass it the item dictionary. We do that by using anvil.server.call to call our update_movie server function.
    def edit_click(self, **event_args):
        item = dict(self.item)
        editing_form = MovieEdit(item=item)
        alert(content=editing_form, large=True)
anvil.server.call('update_movie', item)Step 4: Update `self.item`
Now that the server function has been called, we must update the main Form’s data. We’ll reset self.item by getting the now updated row from our Data Table.
def edit_click(self, **event_args):
    item = dict(self.item)
    editing_form = MovieEdit(item=item)
    alert(content=editing_form, large=True)
    anvil.server.call('update_movie', item)
    self.item = app_tables.movies.search()[0]
Note that this time, we do not need to call self.refresh_data_bindings because we are setting self.item directly, which prompts a refresh of our data bindings automatically.
Now, edits to the app will persist when you re-run the app. All users will see the edits that any users make.
Run the app, edit the movie information, and then stop the app and verify the data in the Data Tables has changed.

And that’s it! We have built a simple app to showcase data for your favorite movie. From here, you could extend your app’s functionality, for example by allowing users to have their own separate favorite movies. Check out our other tutorials to learn how to do this and more!
You can use the following link to clone the finished app and take a look at the source code:
What next?
Head to the Anvil Learning Centre for more tutorials, or head to our examples page to see how to build some complex apps in Anvil.