 By
By Introduction to Client-Server Architecture
When you write code in an Anvil app, there are two different places it can run: the client or the server. Client code runs on the user’s browser while server code runs on a central computer that you control. If you are new to web development, the distinction between client and server can be confusing at first. When you use Anvil, you don’t need to worry about the messiness of traditional web development, but you still need to separate out where your code runs.
The purpose of this article is to provide an introduction to the client-server architecture and to explain why we need to write code for Anvil apps in two different places. We’ll then use the Feedback Form Tutorial as an example to better understand why we need to use both client-side and server-side code.
In this article, we will cover:
- The client and client-side code
- The server and server-side code
- Communication between the client and server in Anvil
- The Feedback Form app as an example
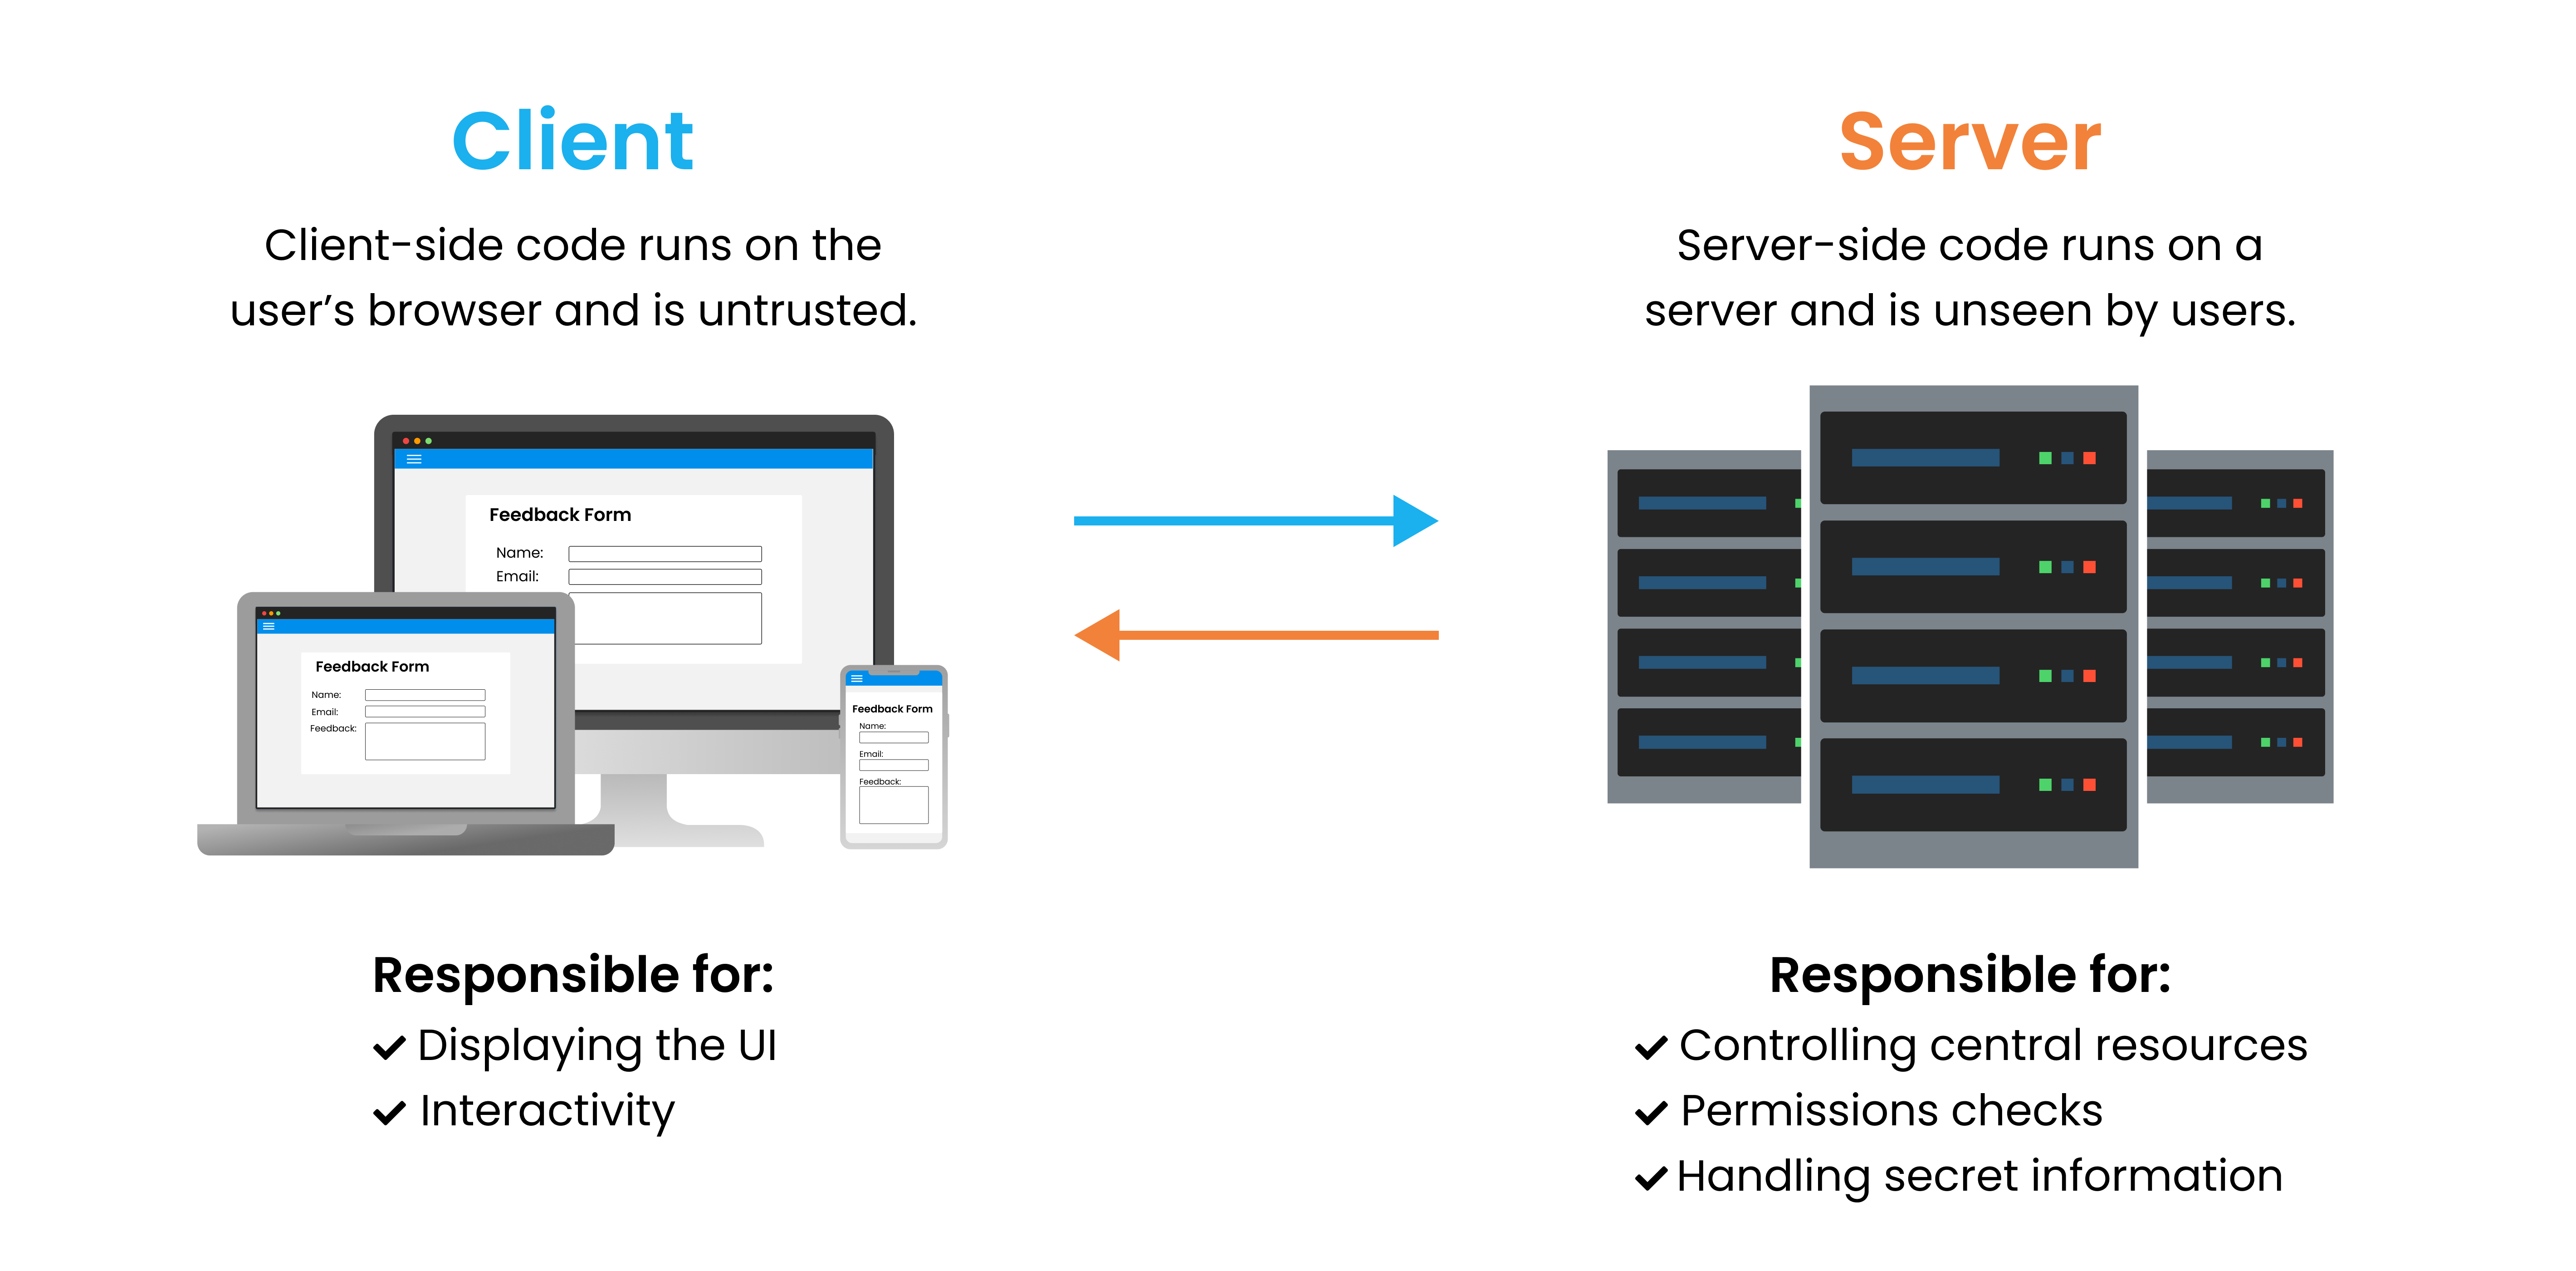
The Client
The front-end
Client-side code runs in the user’s browser and is responsible for showing the visual components of an app as well as interacting with the user. This code running on the client makes up the front-end of a web app. In Anvil, your app’s front-end is made up of Forms where you can drag and drop Python components to build a user interface and write client-side Python code.
When a user opens a web app, all of the front-end code is downloaded to the browser, which means that the user has full control over that code. Because of this, client code is untrusted. This is the reason we want some code to run elsewhere on a server. We don’t want the user to have access to code that authenticates users or processes payments, for example.
Client-side Python
In traditional (non-Anvil) web apps, front-end code is written in HTML and JavaScript because those are the languages that browsers can understand. Anvil lets you write all your front-end code in Python. This works because Anvil translates the Python code in your client-side Forms and Modules into JavaScript for the browser to execute. Not every Python library can be translated, which means that there are certain Python libraries that cannot be used on the client-side in Anvil. Server-side Python does not run in the browser, so there is no need for it to be translated into JavaScript. This is why extra Python libraries can be used in server code or via the Uplink. If you’re interested, Anvil uses the Skulpt Python-to-JavaScript compiler. It’s an open-source project, and we contribute heavily to it.
Server-side code
The back-end
Unlike client code, which runs in the user’s browser, server-side code runs on a computer that is separate from the user’s device. This is the back-end of a web app. Code written in an Anvil app’s Server Module will never be seen by your app’s users. This means that it can act as a gatekeeper for central resources (such as data in your app’s Data Tables) and enforce permissions checks (for example, checking if a user is an admin before showing information).
In Anvil, we provide the server to run your server-side code, so you don’t have to worry about where to host it. In your Anvil apps, you just write code in a Server Module, and we provide the computer where it executes. This is called the Cloud, or serverless computing.
The Uplink
However, your server-side code doesn’t need to live on Anvil’s servers. If you want to run your server-side code locally or on a different server, you can use the Anvil Uplink. The Uplink is a way to connect an Anvil app to Python code running on a script somewhere else. For example, you could connect a script running in a Google Colab notebook to your web app via the Uplink. In this case, the Google Colab notebook would be your app’s back-end, and Google would be providing the server.
You can also use your own computer as the server by hosting your code locally and connecting it to your app with the Uplink. However, once you shut your computer off or set it to sleep, the Uplink will disconnect and the script will no longer be running. To keep the script running so that your app continues to work properly, you can host your Uplink scripts on a virtual private server such as AWS Lightsail or Digital Ocean Droplets. For more information on hosting your Uplinks scripts on an external server, see our guide on using Docker to containerise and run your scripts.
Communicating between the client and server
In Anvil, your app communicates by calling server-side functions from client-side code. You can make a server function available to the client using the @anvil.server.callable decorator, and then call it from client code using anvil.server.call. We’ll see an example of this in the next section.
The client-server architecture
The Feedback Form: Putting it all together
Let’s take the Feedback Form Tutorial as an example of a simple web app that uses the client-server architecture. The app has a simple user interface for taking user input and storing it in a Data Table.
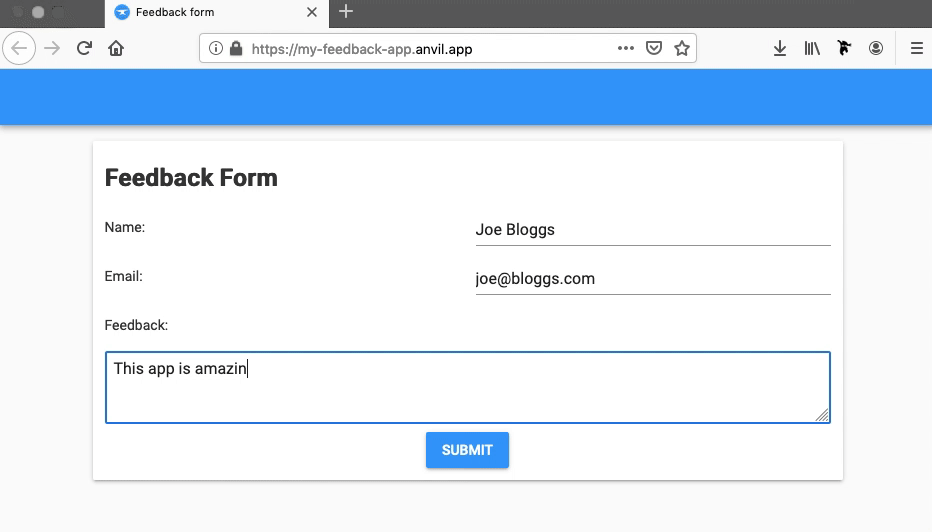
Submitting feedback in the Feedback Form Tutorial app.
Client-side
The front-end of the app is the user interface and the client-side code that collects user input. This code lives on the client because the user is interacting with it. After the user enters input and clicks the “submit” button, we use anvil.server.call() to call a server function to add this input to the Data Table:
  def submit_button_click(self, **event_args):
    name = self.name_box.text
    email = self.email_box.text
    feedback = self.feedback_box.text
    # Call the 'add_feedback' server function
    # pass in name, email and feedback as arguments
    anvil.server.call('add_feedback', name, email, feedback)
Server-side
The server function and the Data Table are the back-end of our app. Because the server is separate from the user’s device, we can use it to run code we don’t want to expose to the user. In the case of the Feedback Form, we don’t want users to have access to code that modifies the Data Table since it contains other users’ data. By default, only server-side code has permission to access a Data Table. We can pass the user input to a server function that then updates the Data Table:
@anvil.server.callable
def add_feedback(name, email, feedback):
  app_tables.feedback.add_row(
    name=name,
    email=email,
    feedback=feedback,
    created=datetime.now()
  )
Summary
In this article, we looked at why we need to write code in two different places in Anvil apps. We covered why we write code on both the client and server, and how to communicate between the two in Anvil. Finally, we saw how the client-server architecture works in the Feedback Form Tutorial app.
More about Anvil
If you’re new here, welcome! Anvil is a platform for building full-stack web apps with nothing but Python. No need to wrestle with JS, HTML, CSS, Python, SQL and all their frameworks – just build it all in Python. Get started with one of our tutorials or check out an example app. For more help, we have detailed developer documentation and a friendly Community Forum.
Learn More
Get Started with Anvil
Turn a Google Colab Notebook into a Web App

Generate PDF Invoices with Python
Why Python in the Browser Isn’t Enough