 By
By Keep your deadlines up to date
Asana organises work so teams know what to do, why it matters, and how to get it done. Anvil makes it easy to build web apps, by letting you do it all in Python (no HTML or JS required!). In this post, I’m going to show you how to use them together and teach you how to use Asana’s API.
Asana’s API is a powerful tool and in this post you’ll learn how to use it by assuming the role of a manager who wants a simple way to update their teams deadlines if there is an absence. We’re going to build an app to log a team member’s absence and automatically update all of their task deadlines with one button.
Our app is going to:
- Provide a web form where you can enter a team member’s absence
- Use the Asana API to postpone all their assigned tasks until they’re back
Let’s get started.
Create a web form to submit absences
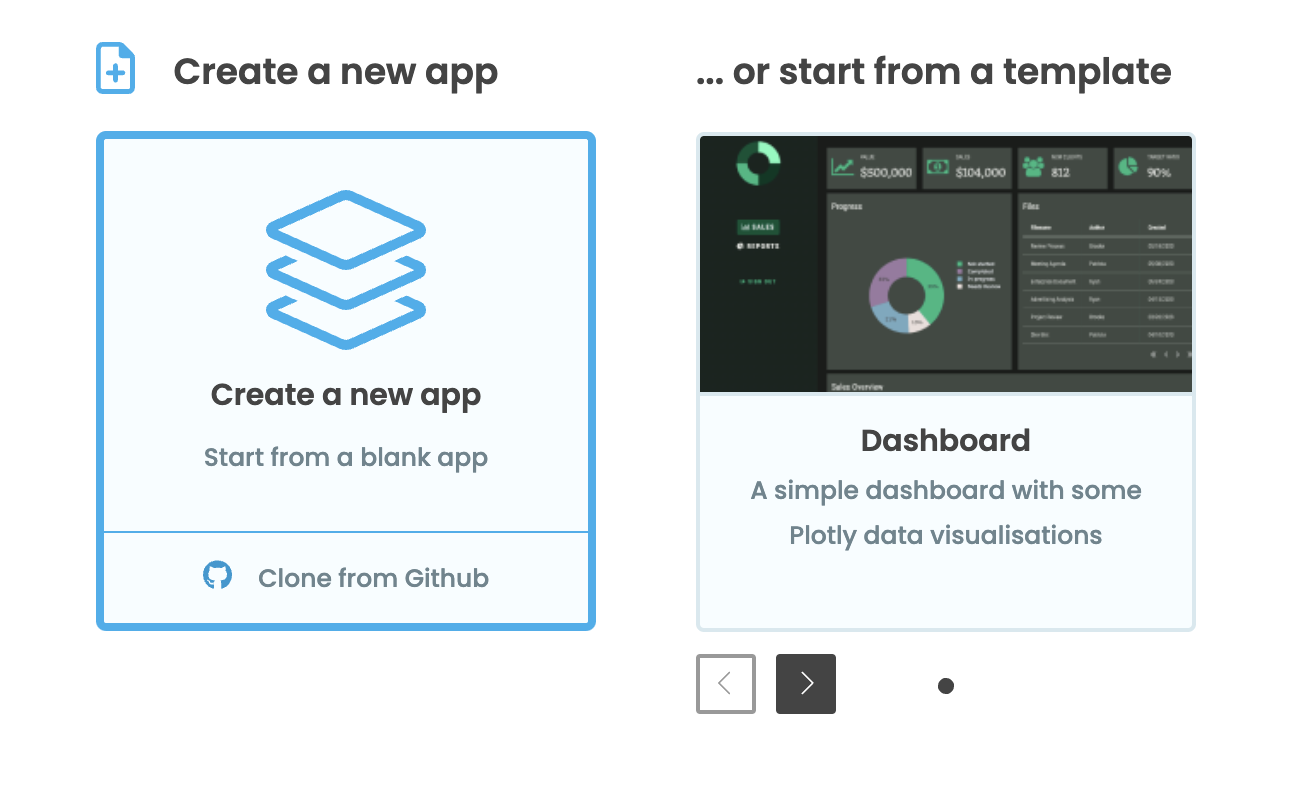
Step 1 - Create an Anvil app
Creating web apps with Anvil is simple. No need to wrestle with HTML, CSS, JavaScript or PHP. We can do everything in Python.
Log in to Anvil and click ‘New Blank App’. Choose the Material Design theme.
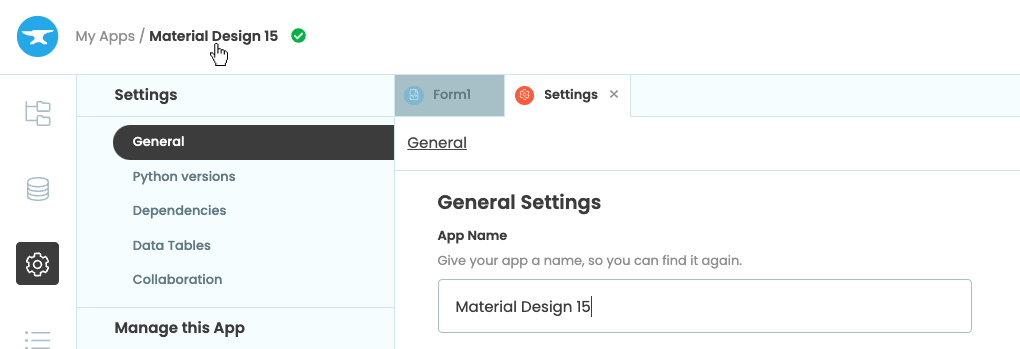
First, name the app. Click on the name at the top of the screen and give it a name.
Step 2 - Creating an absence form
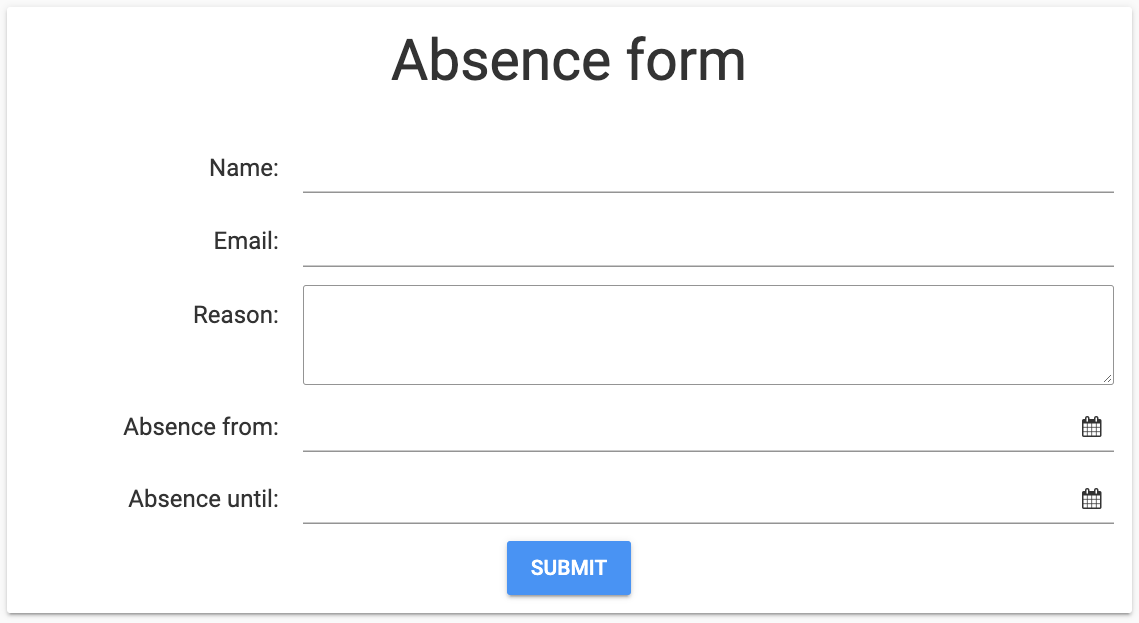
We need to create a form for us to log our team’s absences. Our finished form will look like this:
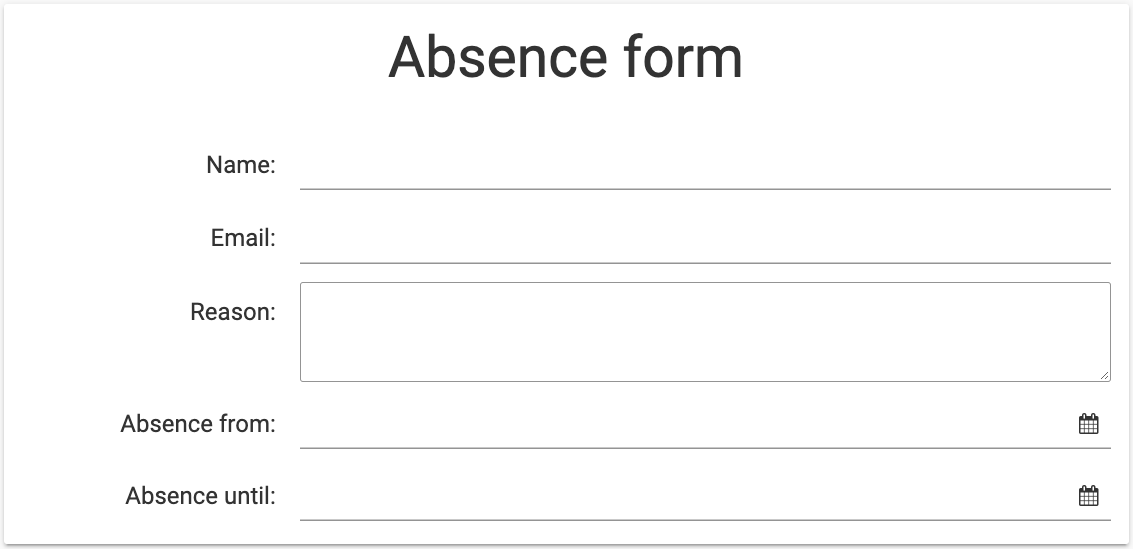
Finished absence form
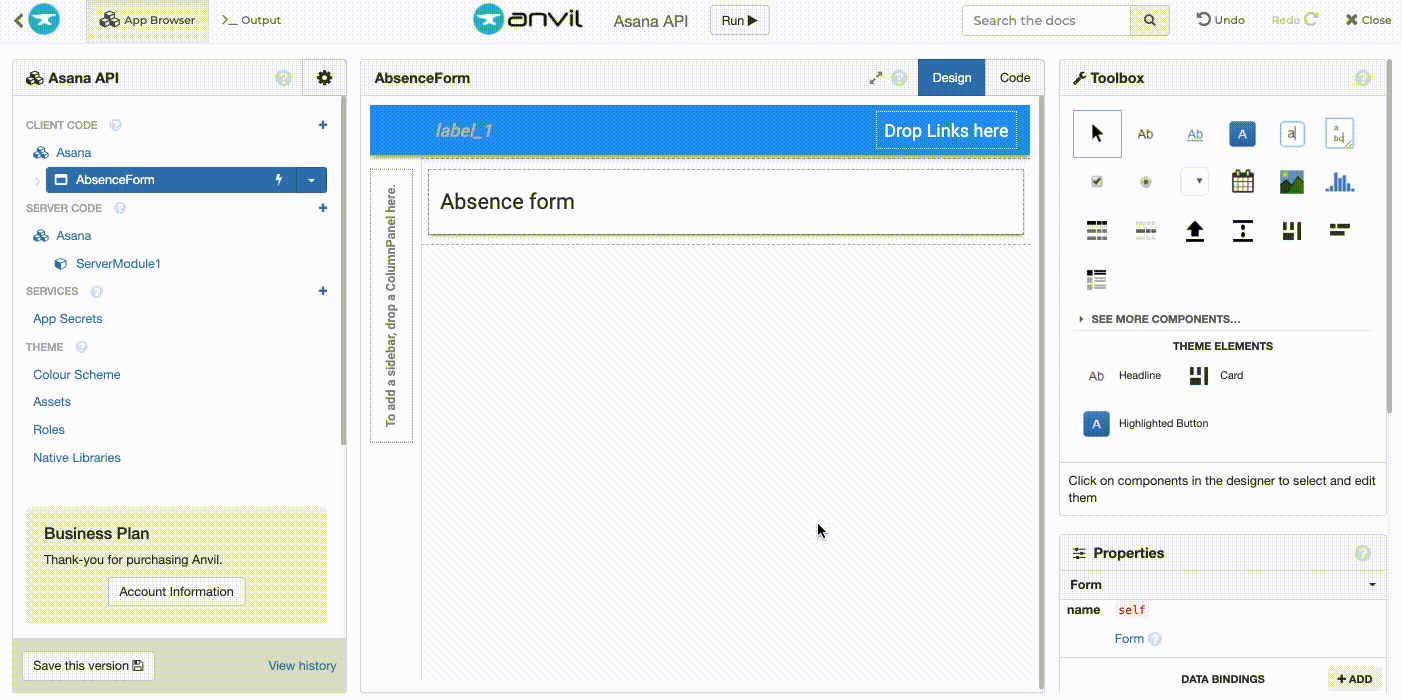
We construct the form by dragging-and-dropping components from the Toolbox. Let’s start by dropping a Card  into our form – card components provide neat containers for other components. Then let’s add a Label
 ![]() to act as the title of our form. Select the Label and, in the properties panel on the right, change the name of the component to
to act as the title of our form. Select the Label and, in the properties panel on the right, change the name of the component to title, then text to Absence form and finally change the role to Headline.
Note: This guide includes screenshots of the Classic Editor. Since we created this guide, we've released the new Anvil Editor, which is more powerful and easier to use.
All the code in this guide will work, but the Anvil Editor will look a little different to the screenshots you see here!
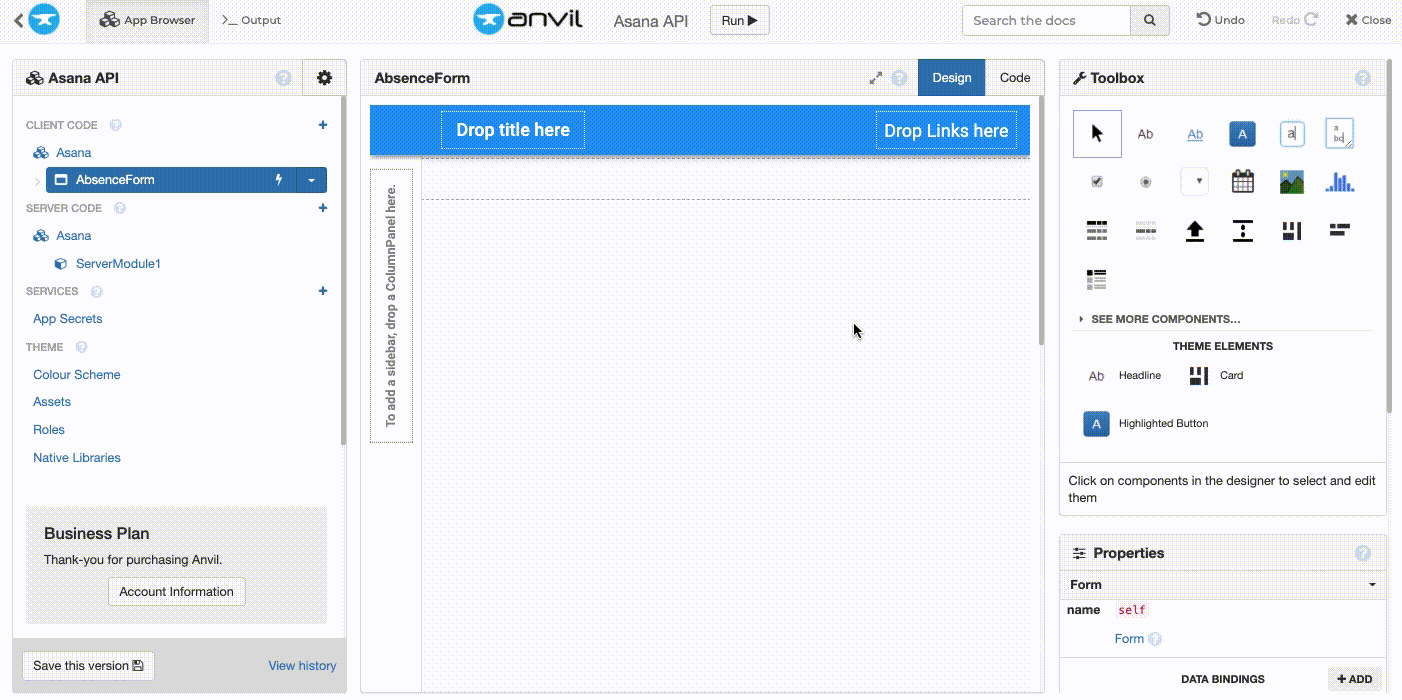
Adding a title
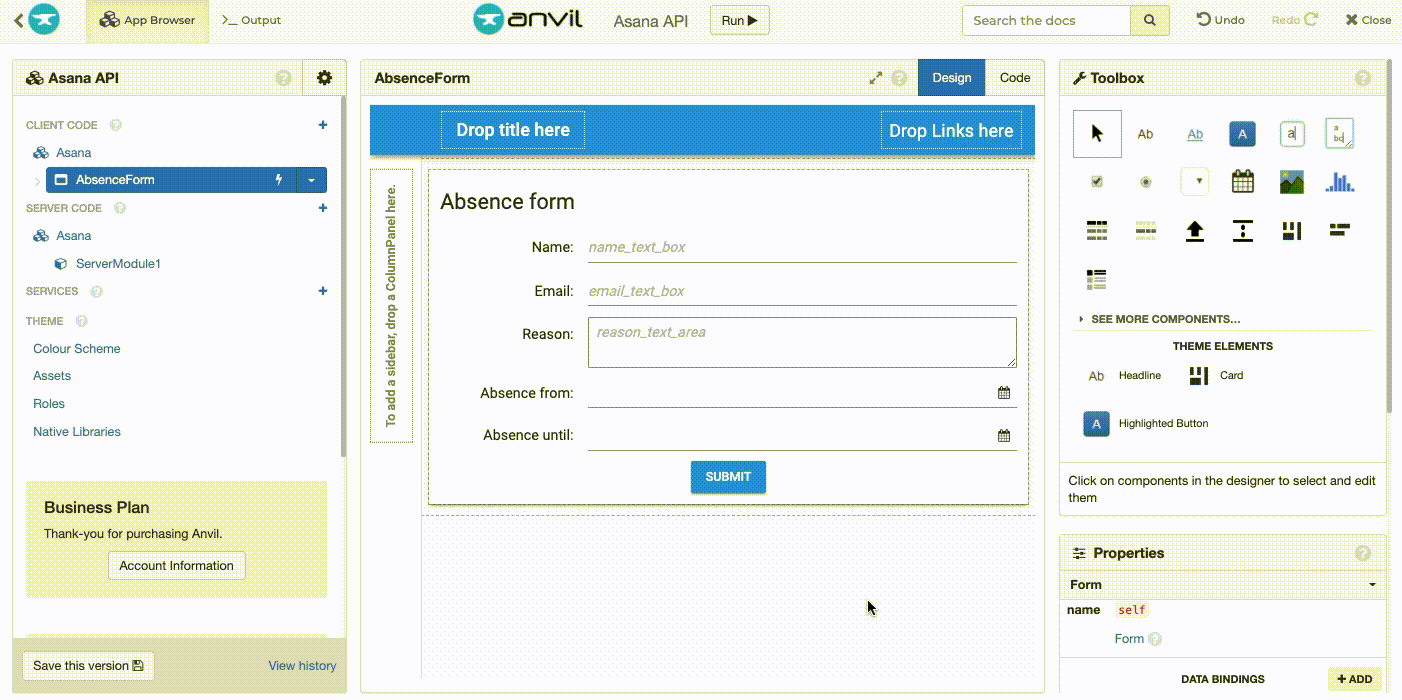
We need to be able to enter the details of our team member’s absence, so let’s add input fields to our form.
Add a Label and add a TextBox ![]() component to the right of the label. Select the Label and change the Label’s text to
component to the right of the label. Select the Label and change the Label’s text to Name:, align it to the right and set its role to input-prompt. Select the TextBox and change its name to name_text_box. Repeat this process adding the following fields:
- An
Email:Label next to a TextBox namedemail_text_box, set the TextBox’s type toemail. - A
Reason:Label next to a TextArea namedreason_text_area. - An
Absence from:Label next to a DatePicker namedabsence_from_datepicker. - An
Absence until:Label next to a DatePicker namedabsence_until_datepicker.
Adding input fields
Now our form can collect all the data we need to log an absence. Next, let’s add a submit button which will update the team member’s task deadlines in Asana.
Step 3 - Adding a submit button
Start by adding a Button ![]() underneath our input fields. In the buttons properties, rename the button to
underneath our input fields. In the buttons properties, rename the button to submit_button, change the text to Submit and change the role to primary-color.
Absence form with submit button
Then scroll down to the bottom of the buttons properties and click the blue chevron button ![]() next to the
next to the click event handler box. This will open the code view for our form.

Adding a submit button
That submit_button_click() function was created automatically, and will be called every time the button is clicked. Let’s begin writing code that uses the information we enter into our absence form to update the team member’s Asana tasks.
In the submit_button_click() function, let’s start by getting the information entered into our input fields. We can do this using the text property of each of the Text/TextArea components and the date property from our DatePickers.
def submit_button_click(self, **event_args):
  """This method is called when the submit button is clicked"""
  name = self.name_text_box.text
  email = self.email_text_box.text
  reason = self.reason_text_area.text
  absent_from = self.absence_from_datepicker.date
  absent_to = self.absence_until_datepicker.date
Now we have our information, we can pass it to a server function that will use the data to update the team member’s Asana tasks (we will create the server function in step 8). Our server function will be called submit_absence() and will take the arguments name, email, reason, absent_from and absent_to.
def submit_button_click(self, **event_args):
  """This method is called when the submit button is clicked"""
  name = self.name_text_box.text
  email = self.email_text_box.text
  reason = self.reason_text_area.text
  absent_from = self.absence_from_datepicker.date
  absent_to = self.absence_until_datepicker.date

  anvil.server.call('submit_absence', name, email, reason, absent_from, absent_to)
Next, we will give ourselves a notification to confirm the absence has been logged.
To add a notification, we can call Anvil’s built in Notification() function in our submit_button_click() function. We will pass it the string we want to display and set it to disappear after 5 seconds with the timeout argument.
def submit_button_click(self, **event_args):
    """This method is called when the button is clicked"""
    name = self.name_text_box.text
    email = self.email_text_box.text
    reason = self.reason_text_area.text
    absent_from = self.absence_from_datepicker.date
    absent_to = self.absence_until_datepicker.date

    anvil.server.call('submit_absence', name, email, reason, absent_from, absent_to)

    Notification("Thanks for telling us about your absence. Your calendar for this period has been updated.", timeout=5).show()
We now have a submit button that will trigger the process of updating the team member’s Asana tasks.
That’s it, we’ve created a form for us to log our team’s absences. Next up, let’s get our Asana API credentials so we can start using the API.
Using the Asana API
Asana uses user gids (global IDs) to track who is assigned to each task, so to find our team member’s tasks we first need to use their email to get their user gid. Once we have their user gid, we’ll get a list of all of their tasks. We’ll then iterate over each task in the list and push the task’s due_on date back by the amount of days the team member’s absence lasts for.
Let’s get started.
Step 4 - Getting and storing our Asana API credentials
For our Anvil app to call the Asana API it will need to use our Asana account’s Personal Access Token.
We can create our secret token by logging into our Asana account and navigating to https://app.asana.com/0/developer-console. Then, select + New access token, enter the name anvil-app-token, tick I agree to the API terms and conditions and select Create. The next screen will show you your token, make a copy of it.
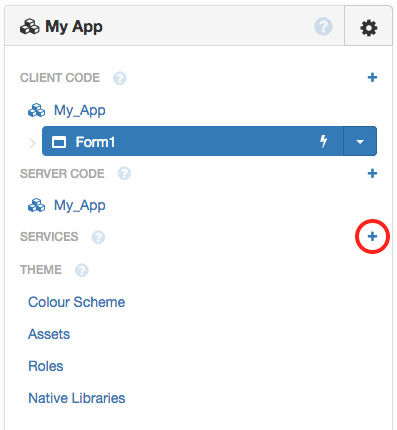
Anvil’s App Secrets service provides easy-to-use encrypted storage we can use for our token. Let’s enable the App Secrets service in the App Browser:
In the secrets section, create a new secret called asana_personal_token and set its value to your token.
Storing the Asana API token
That’s it, now when we need the token, we can get them in our app’s code with anvil.secrets.get_secret('asana_personal_token').
Now we have our API credentials stored securely within our Anvil app, let’s start writing the functions that will call the Asana API when an absence is submitted.
Step 5 - Getting our team member’s Asana details
We’ll be accessing the Asana API with our (secret) API token, so this needs to happen from trusted code rather than in the browser. So let’s add some server side code to our app.
In the App Browser, click the + next to Server Code to add a new Server Module.

Adding a server module
Next, we’ll import both the Requests and datetime libraries at the top of our server module.
import requests
import datetime
Each call to Asana’s API will require the personal access token we stored earlier in our App Secret service. To make it easier for ourselves, let’s create a variable for the token at the top of our server module. Then, as we will use the token in the headers argument for each API call, let’s create a HEADERS variable.
PERSONAL_ACCESS_TOKEN = anvil.secrets.get_secret('asana_personal_token')
HEADERS = {'Authorization':f'Bearer {PERSONAL_ACCESS_TOKEN}'}
Now we have everything we need to call the Asana API, let’s create a function to get our team member’s user gid. We’ll start by defining a function called get_user_gid_by_email and pass it the argument email.
Then we can send a GET request to Asana’s /users endpoint with the parameter ?opt_fields=email. This will return our team member’s Asana user details including their email.
We can then iterate through the list of users, checking each user’s email against the email that was passed to the function. If we find a match, we can return the user’s gid. If we don’t find a matching email, we can return an error letting our app user know the email is incorrect.
def get_user_gid_by_email(email):
  # Getting user list from Asana endpoint
  response = requests.get(f"https://app.asana.com/api/1.0/users?opt_fields=email", headers=HEADERS)

  # Asana returns a json with a key of 'data' and a value which is a list of user emails and gids. We'll get the user list on it's own.
  user_list = response.json().get('data')

  # Checking the user list for a matching email
  for user in user_list:
    if email == user['email']:
      # If we find a matching email, return the gid
      return user['gid']

  # Raise an error if the email isn't found
  raise Exception('Incorrect email.')
Now we have the user gid, we can use it to find all the tasks in Asana that are assigned to that team member.
Step 6 - Getting our team member’s Asana tasks
To get our team member’s tasks with their due_on date, we can send a GET request to Asana’s /tasks endpoint with the following parameters:
- workspace={workspace_gid}
- assignee={user_gid}
- opt_fields=due_on
Our finished URL will look something like this:
https://app.asana.com/api/1.0/tasks?workspace=1129936432294875&assignee=1199976567612446&opt_fields=due_onLet’s start by getting our workspace gid.
We can get our workspace gid using Asana’s API explorer. In the top dropdown select Workspaces, in the next dropdown select GET /workspaces and click Submit. The data will be returned at the bottom of the screen including the gid of our workspace.
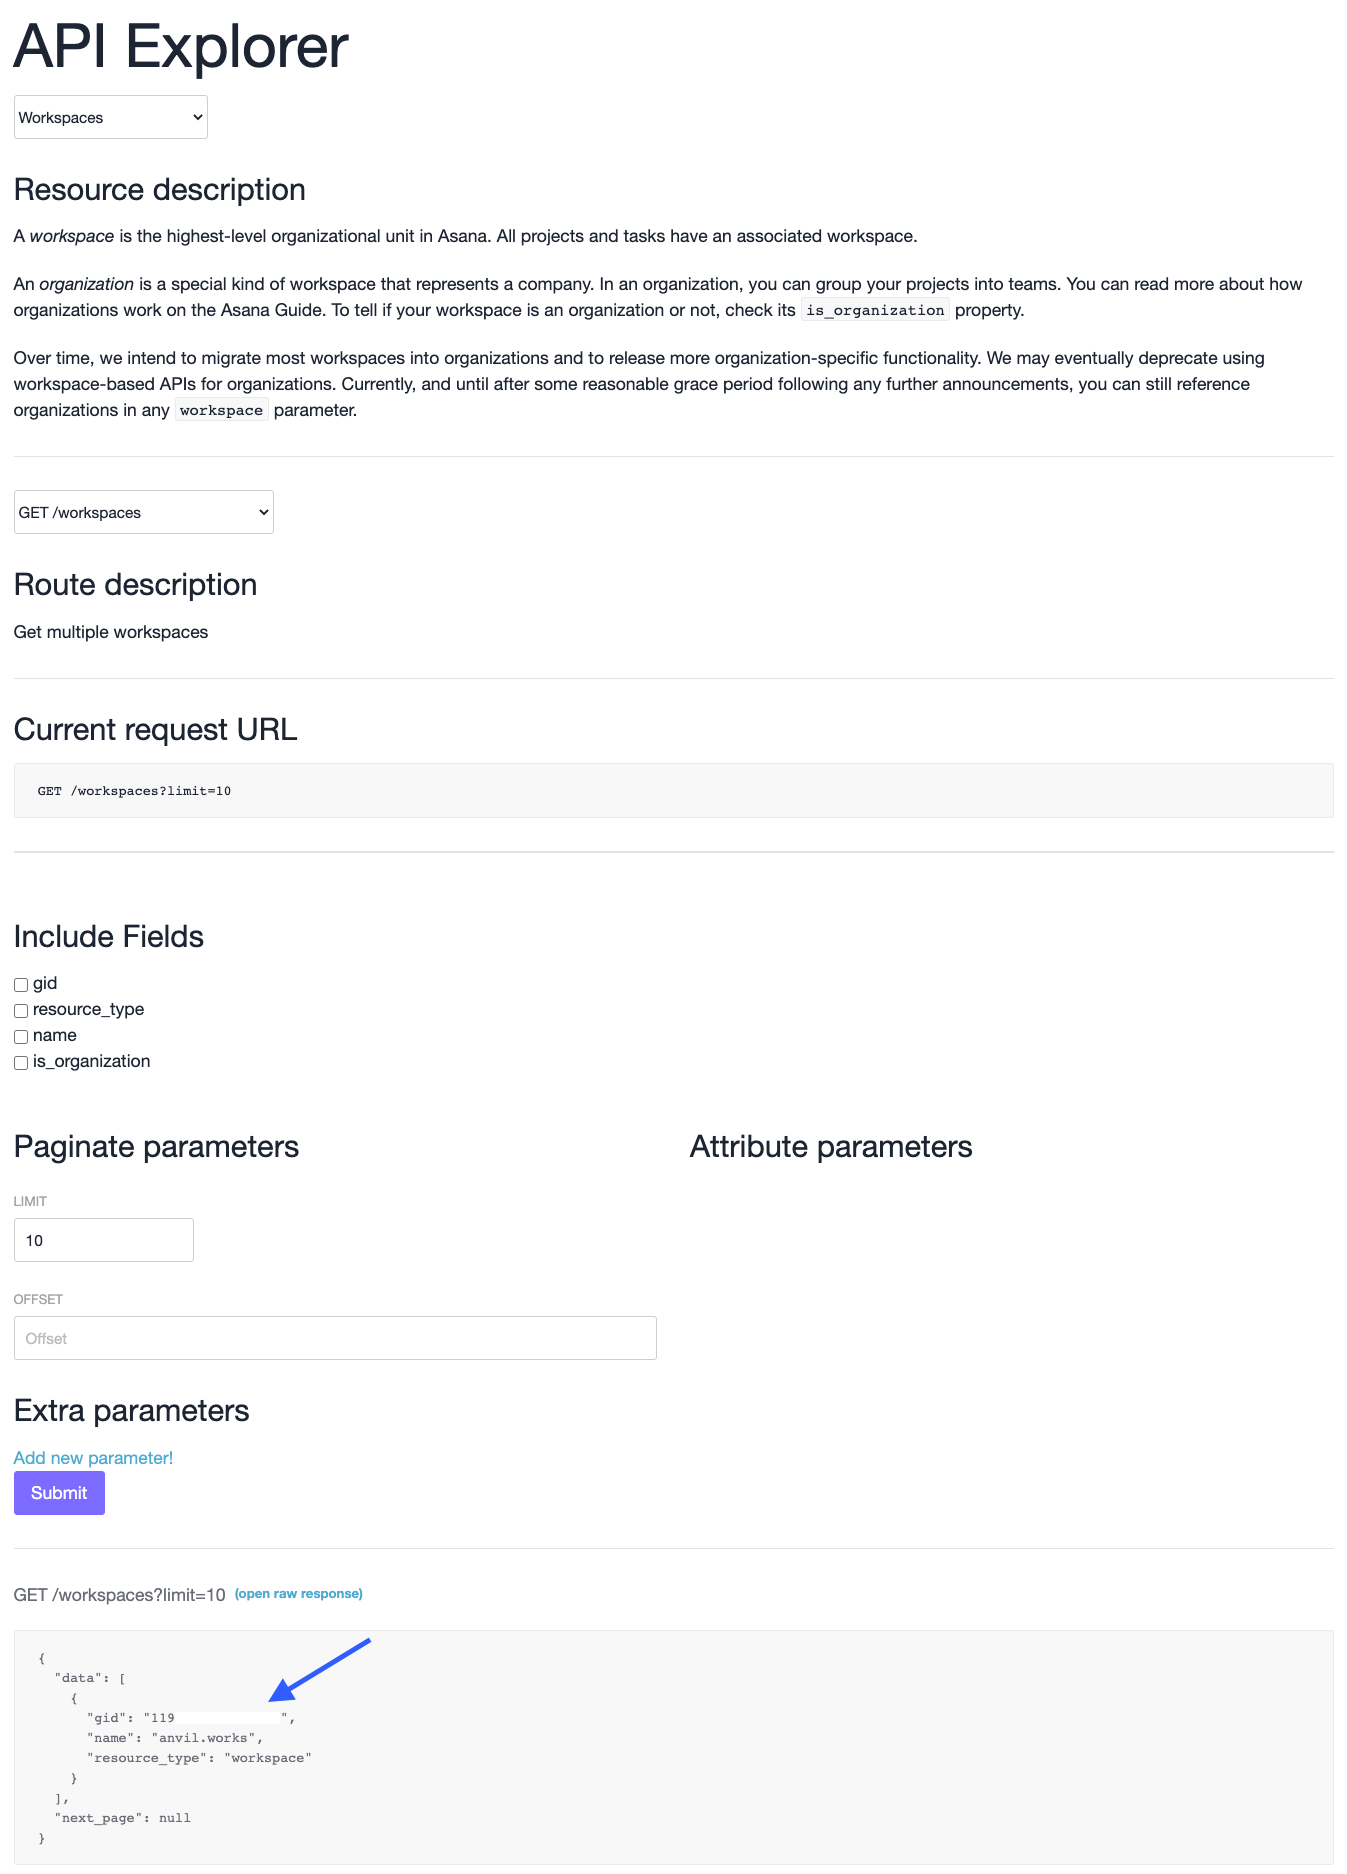
Asana’s API explorer
Let’s add the workspace gid to a variable at the top of our server module.
WORKSPACE_GID = '1199976432294864'That’s our workspace gid parameter sorted.
We will get the user gid parameter for the API call by having it as an argument for our function. Let’s create a function called get_user_tasks which we will pass the argument user_gid.
Then, in our function we’ll use requests.get() passing the Asana task’s endpoint URL with our parameters and the authorization headers we declared earlier in step 5. This will get all the tasks in Asana assigned to the given user. We can then return the tasks in a dictionary object at the end of our function with response.json().
def get_user_tasks(user_gid):
  response = requests.get(f'https://app.asana.com/api/1.0/tasks?workspace={WORKSPACE_GID}&assignee={user_gid}&opt_fields=due_on', headers=HEADERS)
  return response.json()
Great work! We now have a function for getting all the tasks assigned to our team member. Next, let’s write a function that will update each task’s due date.
Step 7 - Updating each user task
We’ll update our team member’s tasks using Asana’s update task endpoint. Let’s start by defining a new function update_task_date and pass it the arguments task, absent_from and absent_to.
Before we can call Asana’s endpoint, we need to work out how many days the user’s absence will move their task’s due_on date. As absent_from and absent_to are Python datetime objects, we can simply subtract them from each other to return a timedelta object - the time difference between the two dates. Then we can use the timedelta.days property to get the difference in days.
def update_task_date(task, absent_from, absent_to):
  day_difference = (absent_to - absent_from).days
We’ll start by checking if the task that is passed to our function has a due_on value, if it doesn’t we will skip this task.
Next, as Asana stores the task’s due_on date as a str object, we need to convert the task’s due_on to a date object before we can add the day difference. We can use the datetime.strptime() function to convert the string to a datetime object.
def update_task_date(task, absent_from, absent_to):
  day_difference = (absent_to - absent_from).days

  # Check the task has a due on date
  if 'due_on' in task:
    # Get the date_on `str` of task and convert it to a datetime object
    task_date = datetime.datetime.strptime(task['due_on'], "%Y-%m-%d").date()
Then, we’ll check if the task_date is after the absence_from to make sure we only update future deadlines.
To finish, we’ll add the difference in days to the current task date. Then, we can send a PUT request to Asana’s update task endpoint, passing the task gid and a data dictionary containing the new due_on date. In the data dictionary, we will convert the due_on date back to a str with strftime(). We will also pass the endpoint the headers for authorization.
def update_task_date(task, absent_from, absent_to):
  day_difference = (absent_to - absent_from).days

  # Check the task has a due on date
  if 'due_on' in task:
    # Get the date_on `str` of task and convert it to a datetime object
    task_date = datetime.datetime.strptime(task['due_on'], "%Y-%m-%d").date()
    if task_date >= absent_from:
      new_task_date = task_date + datetime.timedelta(days=day_difference)

      # Make PUT request to update the task due on date
      response = requests.put(f"https://app.asana.com/api/1.0/tasks/{task.get('gid')}", data={'due_on': new_task_date.strftime('%Y-%m-%d')}, headers=HEADERS)
We now have all the functions we need to get our team member’s Asana user details, get all their Asana tasks and update each task’s due date.
Step 8 - Connecting the absence form to our API calls
We’ve got the functions we need to update each user’s Asana tasks based on their absence. Now, let’s write the submit_absence function which our absence form’s submit button calls whenever it is clicked (see step 3).
We’ll pass this function all the information we submit as part of the team member’s absence - name, email, reason, absent_from and absent_to. Then, we can give the function the @anvil.server.callable decorator which allows us to call this function from client code.
@anvil.server.callable
def submit_absence(name, email, reason, absent_from, absent_to):
  pass
Inside the function, we will start by getting the user gid with get_user_gid_by_email. Then we’ll find all of the user’s Asana tasks with get_user_tasks. Once we have all their tasks, we will iterate over the list of tasks and call update_task_date for each task passing it the task, absent_from date and absent_to date.
@anvil.server.callable
def submit_absence(name, email, reason, absent_from, absent_to):
  user_gid = get_user_gid_by_email(email)
  tasks = get_user_tasks(user_gid)

  for task in tasks['data']:
    update_task_date(task, absent_from, absent_to)
We now have an absence form with which we can enter our team member’s absence details and know their Asana task deadlines will be automatically updated to reflect the absence. There’s one extra thing we can do to improve this app even further.
Step 9 - Updating the due dates in the background
The problem with this app is, if our team member has a lot of tasks, it will take a long time for the app to repeatedly call the Asana API updating each and every task. This will leave us waiting a while for the absence form to notify us that the tasks have been updated.
We can quickly solve this with Anvil’s Background Tasks. Background Tasks allow you to fire off a function to run in the background, leaving our absence form to notify us that the team member’s absence has been submitted without having to wait for every task to update.
In our server module, we’ll create another task called update_asana_tasks and pass it the arguments email, absent_from and absent_to. Then, we’ll give it the decorator @anvil.server.background_task. Next, we’ll remove the function calls from our submit_absence function and add them to the new update_asana_tasks function.
@anvil.server.background_task
def update_asana_tasks(email, absent_from, absent_to):
  user_gid = get_user_gid_by_email(email)
  tasks = get_user_tasks(user_gid)

  for task in tasks['data']:
    update_task_date(task, absent_from, absent_to)
Next, in our submit_absence function call the new update_asana_tasks function using anvil.server.launch_background_task(). We’ll pass launch_background_task() the function name update_asana_tasks and the arguments email, absent_from, and absent_to.
@anvil.server.callable
def submit_absence(name, email, reason, absent_from, absent_to):

  anvil.server.launch_background_task('update_asana_tasks', email, absent_from, absent_to)
Good work! Our team member’s Asana tasks will now be updated in the background, providing us with a slick user experience.
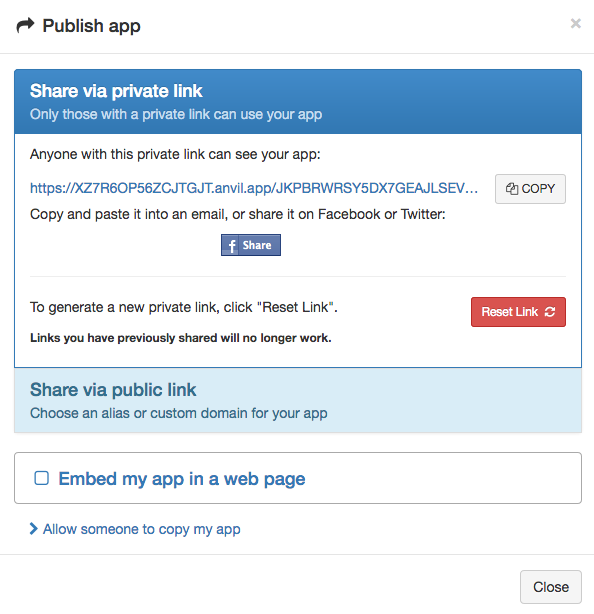
Step 10 - Publishing our app
Now we have our absence form app ready to go, all we have to do is publish our app for us to start logging our team’s absences.
From the IDE, open the Gear menu ![]() in the top left of the IDE, then select
in the top left of the IDE, then select Publish app. At the top of the dialog you’ll find a private URL.
Click on it to start using our app.
Our app is now ready to log absences on your very own URL!
That’s it!
We’ve just created a web app with nothing but Python; integrated it with Asana, and had it update every one of our users task deadlines with one click of a submit button. Pretty cool, huh?
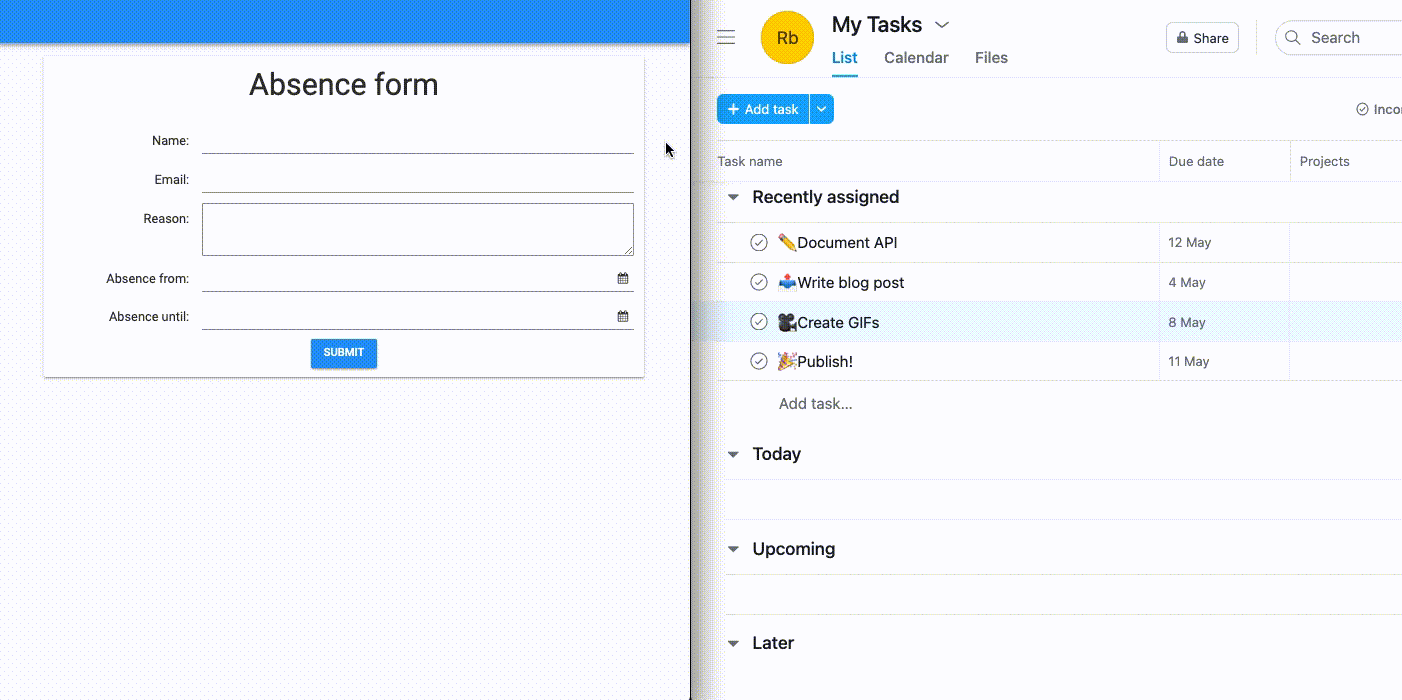
Absence being submitted
Clone the App
For those of you who want to see the finished source code for this app:
Challenge yourself
The best way to learn any new technology is to challenge your understanding. Why not challenge yourself to reinforce what you’ve learnt and learn more?
1. Add an ‘Are you sure?’ dialog
You may want to make sure you’re ready to update your team member’s tasks, why not add a confirmation to your absence form?
Try storing your response to the confirmation dialog in a variable and if you’ve said yes, then call the submit_absence.
2. Use authentication to check you’re the manager
Currently, the only thing stopping anyone online from submitting an absence using your app is the fact it is deployed to a private URL.
Adding authentication means you can check the person using your absence form is definitely you. Try adding the Anvil Users Service to your app and requiring a login to access the absence form.
Once you can log in to your absence form app, why not take it an extra step and require that the logged in user has the correct permissions to submit an absence.
Now, with an app that requires a logged in user, you can now safely publish your app to a public URL.
3. Make this form self service
Entering absences on behalf of your team is one thing but how about letting them do it for themselves?
To do this, you could implement Asana’s OAuth protocol using HTTP endpoints.
New to Anvil?
If you’re new here, welcome! Anvil is a platform for building full-stack web apps with nothing but Python. No need to wrestle with JS, HTML, CSS, Python, SQL and all their frameworks – just build it all in Python.
Yes – Python that runs in the browser. Python that runs on the server. Python that builds your UI. A drag-and-drop UI editor. We even have a built-in Python database, in case you don’t have your own.
Why not have a play with the app builder? It’s free! Click here to get started:
Want to try another tutorial? Learn about databases in Anvil with our Feedback Form tutorial:
Build Database-Backed Apps
Build a Simple Feedback Form
Build a Simple Feedback Form
Build a data-entry app, and learn the techniques fundamental to building any Anvil app. In this tutorial, you will:
- Build your User Interface
- Write client-side Python
- Write server-side Python
- Store data in a database
- Deploy your app