 By
By Chapter 3:
Add new transactions from your Anvil App
Now we’ll build a Form to add transactions. New transactions will appear in both the Anvil app and the Google Sheet.
Step 1: Create 'AddTransaction' Form
In the Anvil Editor, create a new Blank Panel Form and name it AddTransaction.
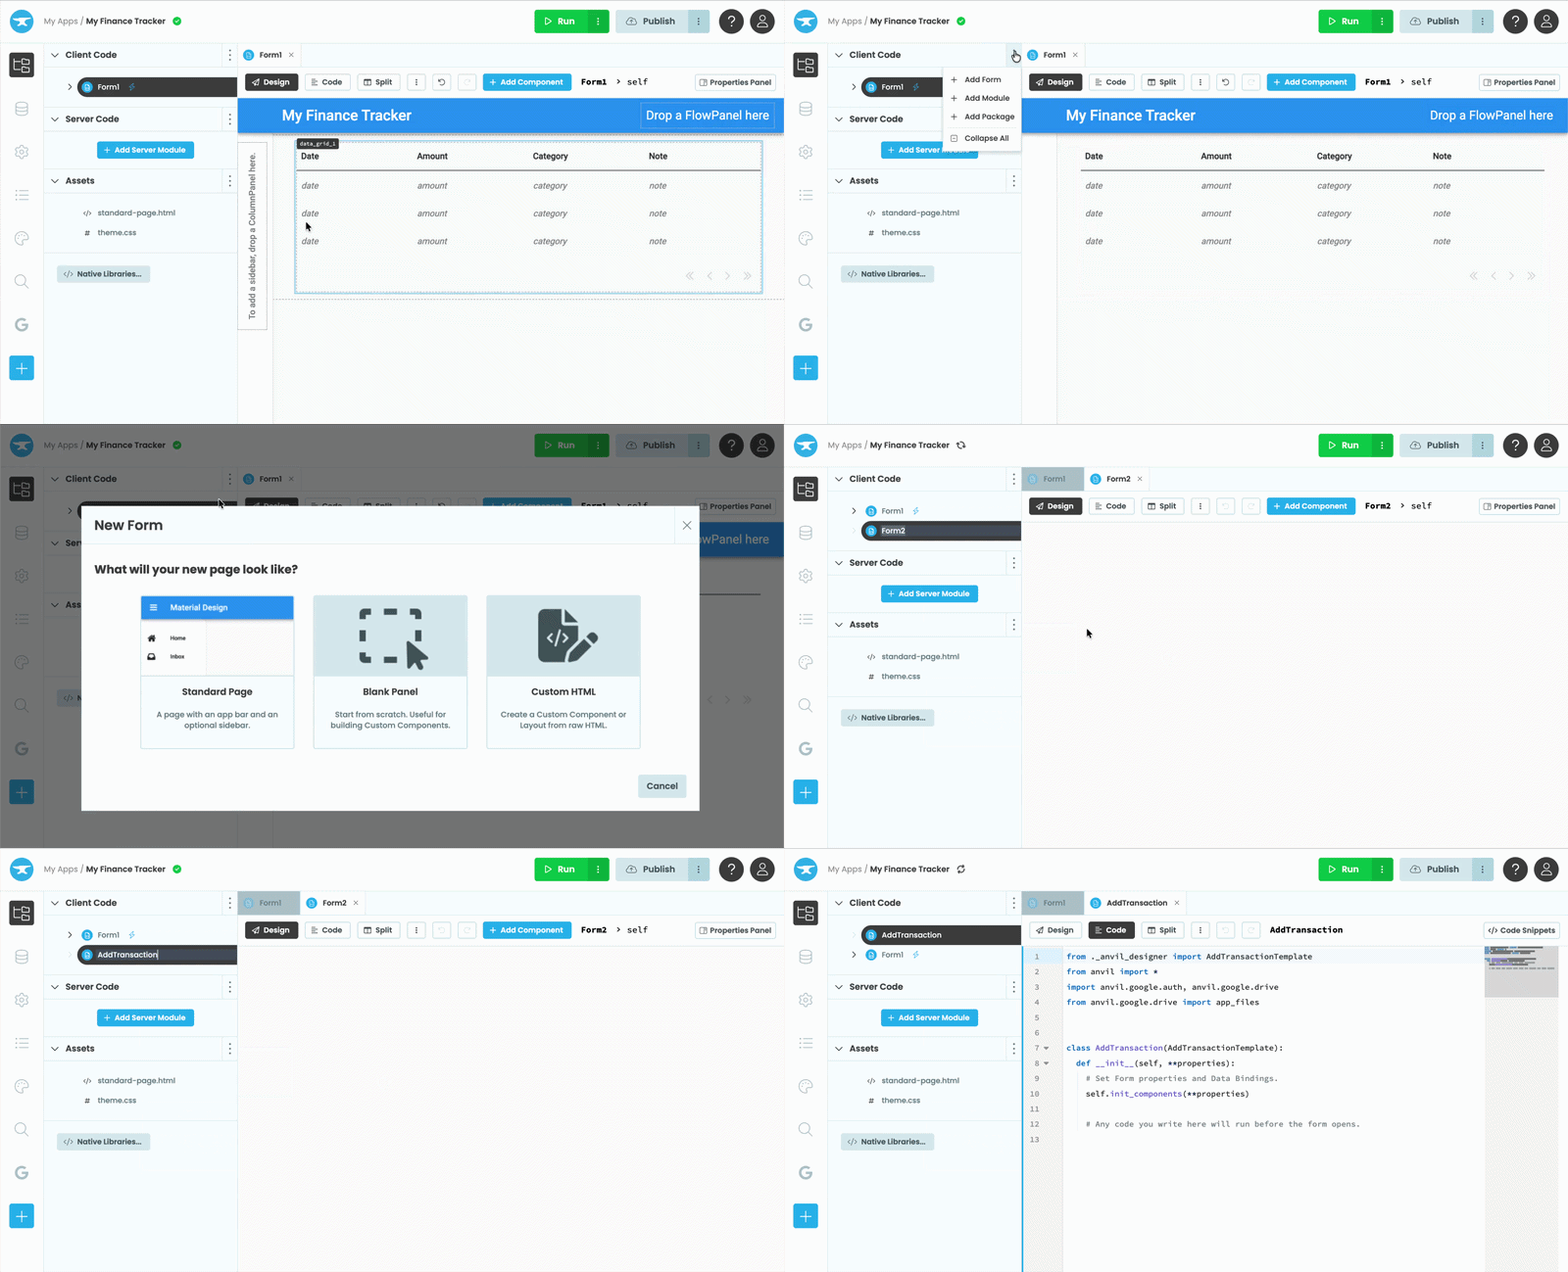
Step 2: Add Form Components
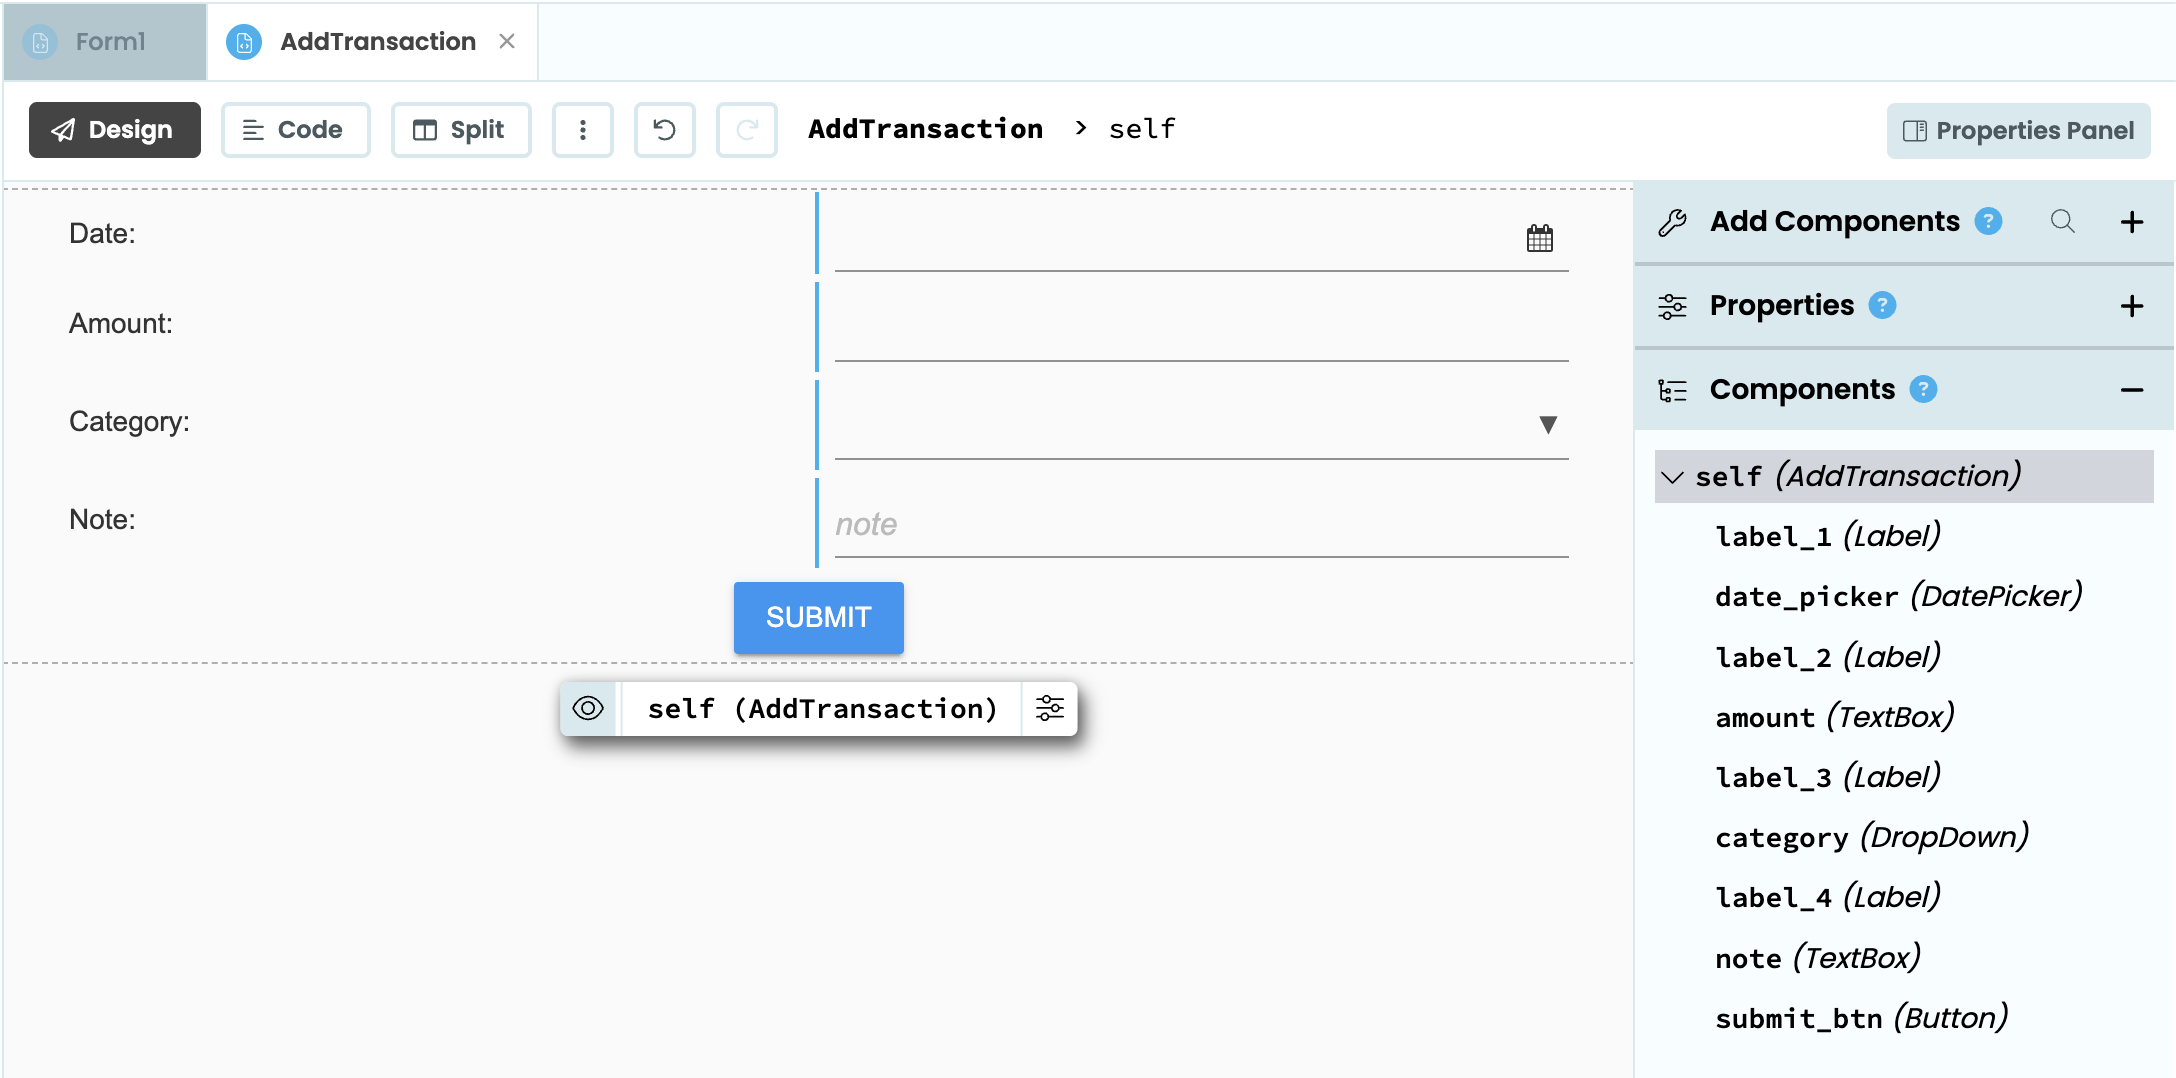
In the Design view of the AddTransaction Form, drag the following components. Each component (except the button) should have a Label next to it with the matching field name:
- A DatePicker named
date_pickerlabelledDate: - A TextBox named
amountlabelledAmount:, with the field type set tonumberin the Properties Panel - A DropDown named
categorylabelledCategory: - A TextBox named
notelabelledNote: - A Button named
submit_btnwith the textSubmit. Use theprimary-colorrole.
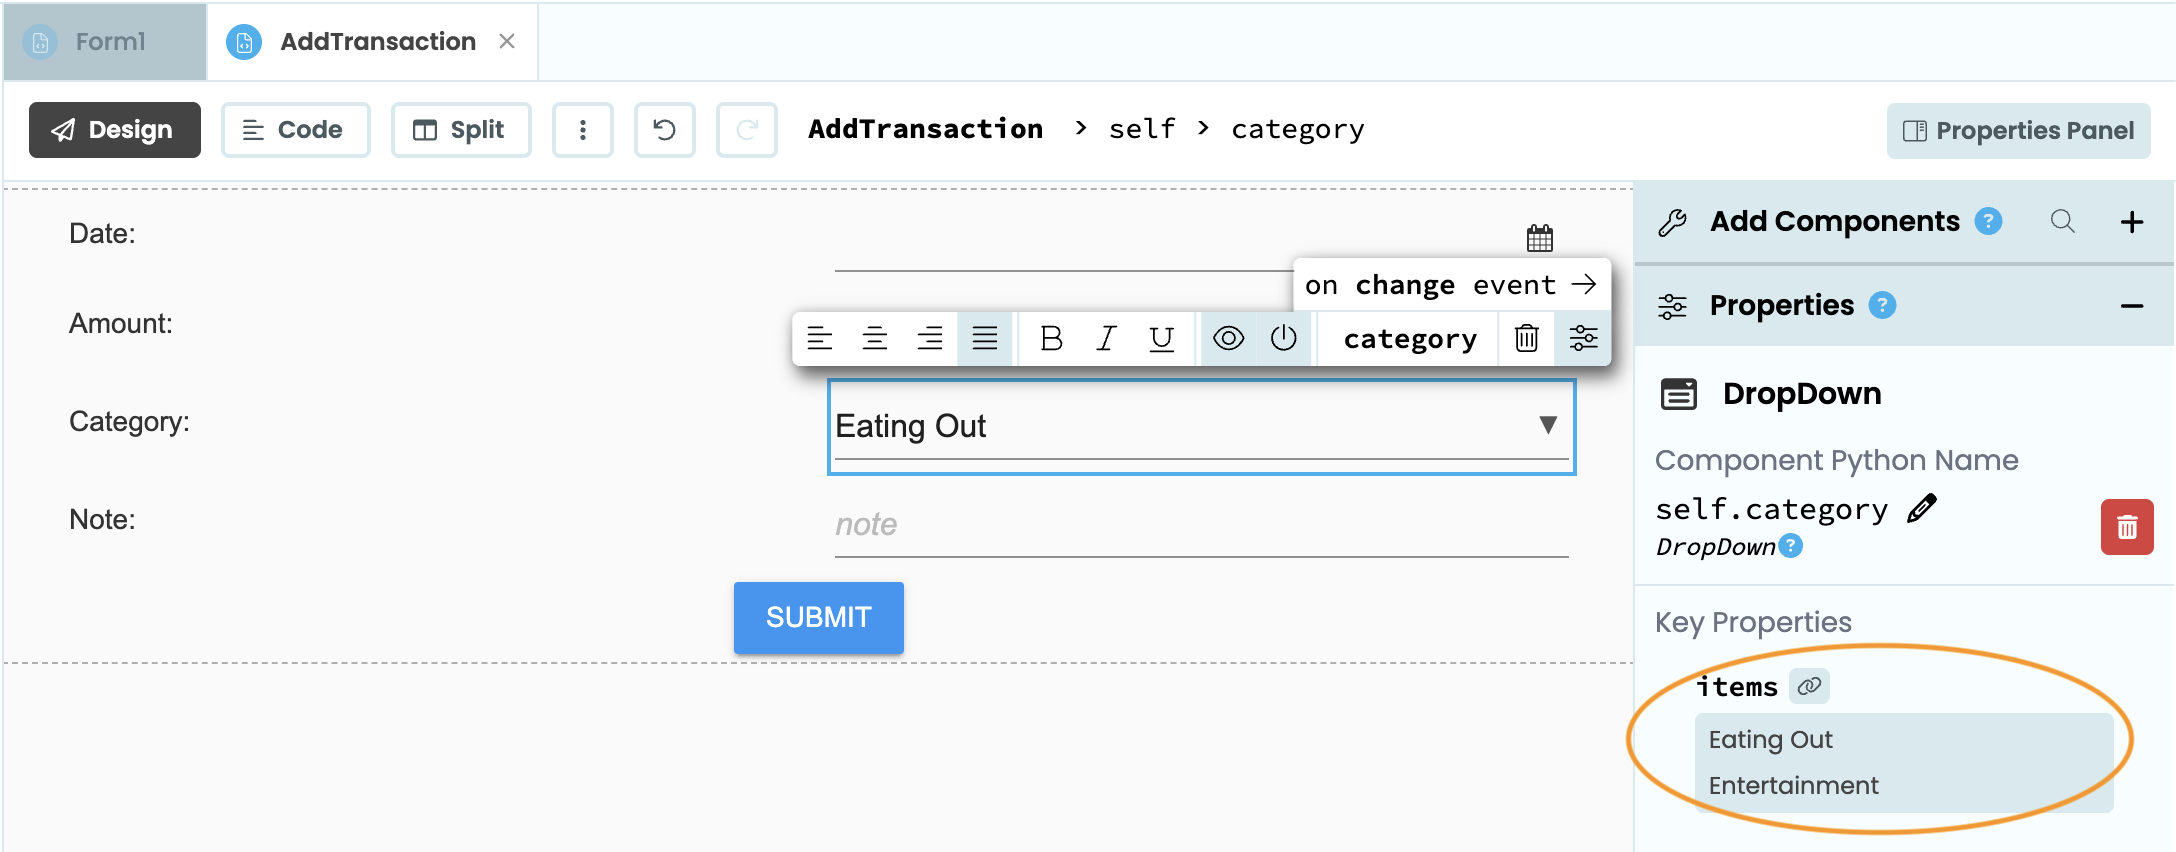
For the Category dropdown, add the following items in the Properties Panel:
Eating Out
Entertainment
Groceries
Subscriptions
Utilities
Step 3: Handle the submit button
Next, we want to handle the click event for the submit button. Click on the on click event button which opens the Code view of the AddTransaction Form.
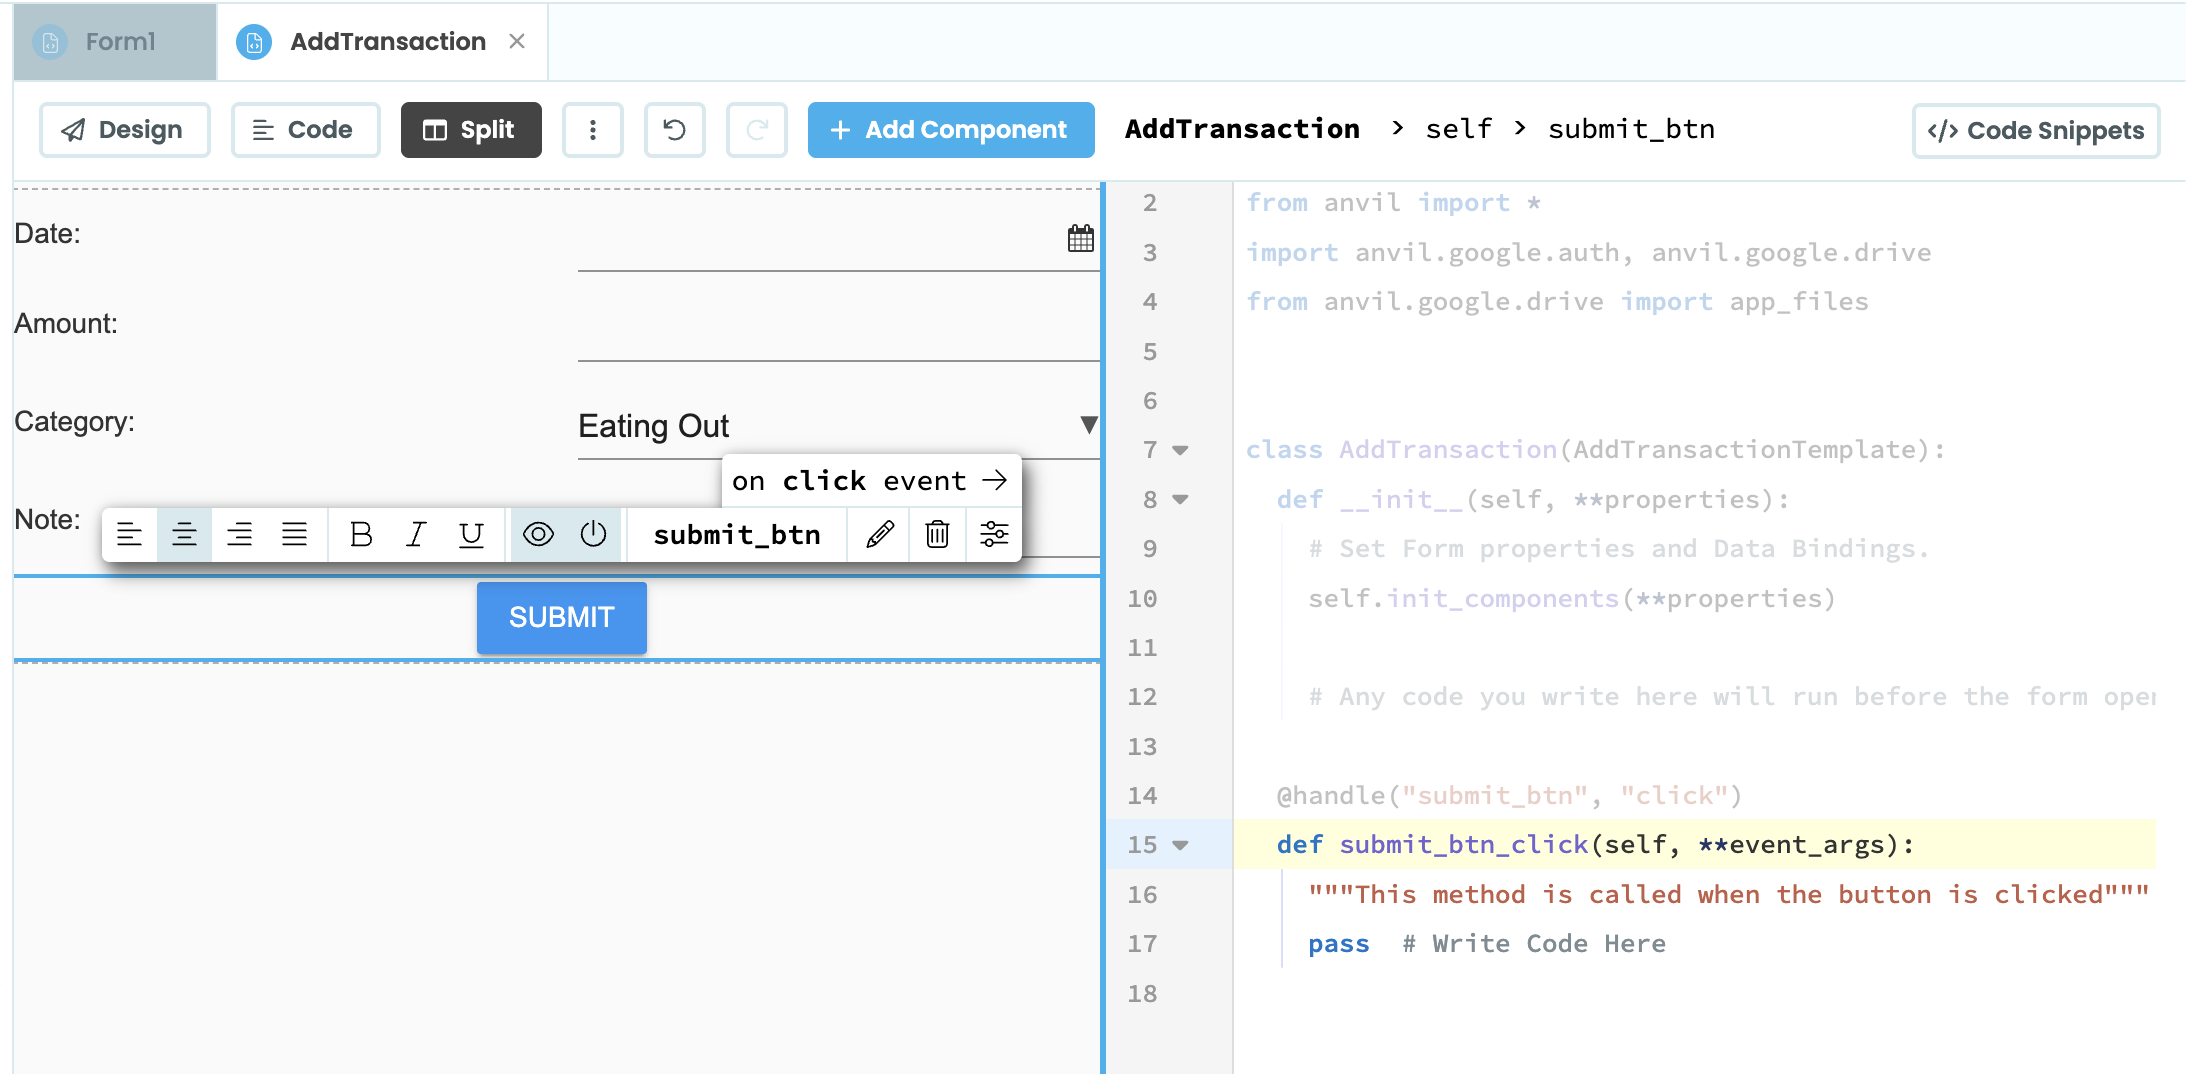
When the user clicks submit, we first want to validate that the date and amount fields are not empty. If they are, we show an alert and stop. If validation passes, we use raise_event('x-close-alert') to close the modal and pass the form data back to Form1 as result.
In the Code view, add this code to the submit_btn_click function:
@handle("submit_btn", "click")
def submit_btn_click(self, **event_args):
    # Validate inputs before submitting
    if not self.date_picker.date:
        alert("Please select a date.")
        return
    if not self.amount.text:
        alert("Please enter an amount.")
        return

    # raise_event closes the alert and returns the value to Form1
    self.raise_event('x-close-alert', value={
        'date': self.date_picker.date,
        'amount': float(self.amount.text),
        'category': self.category.selected_value,
        'note': self.note.text
})Step 4: Add an 'Add Transaction' button
Go back to the Design view of Form1.
Drag a Highlighted Button to the form below the Data Grid. Give it the text Add Transaction, the primary-color role, and the name add_btn.
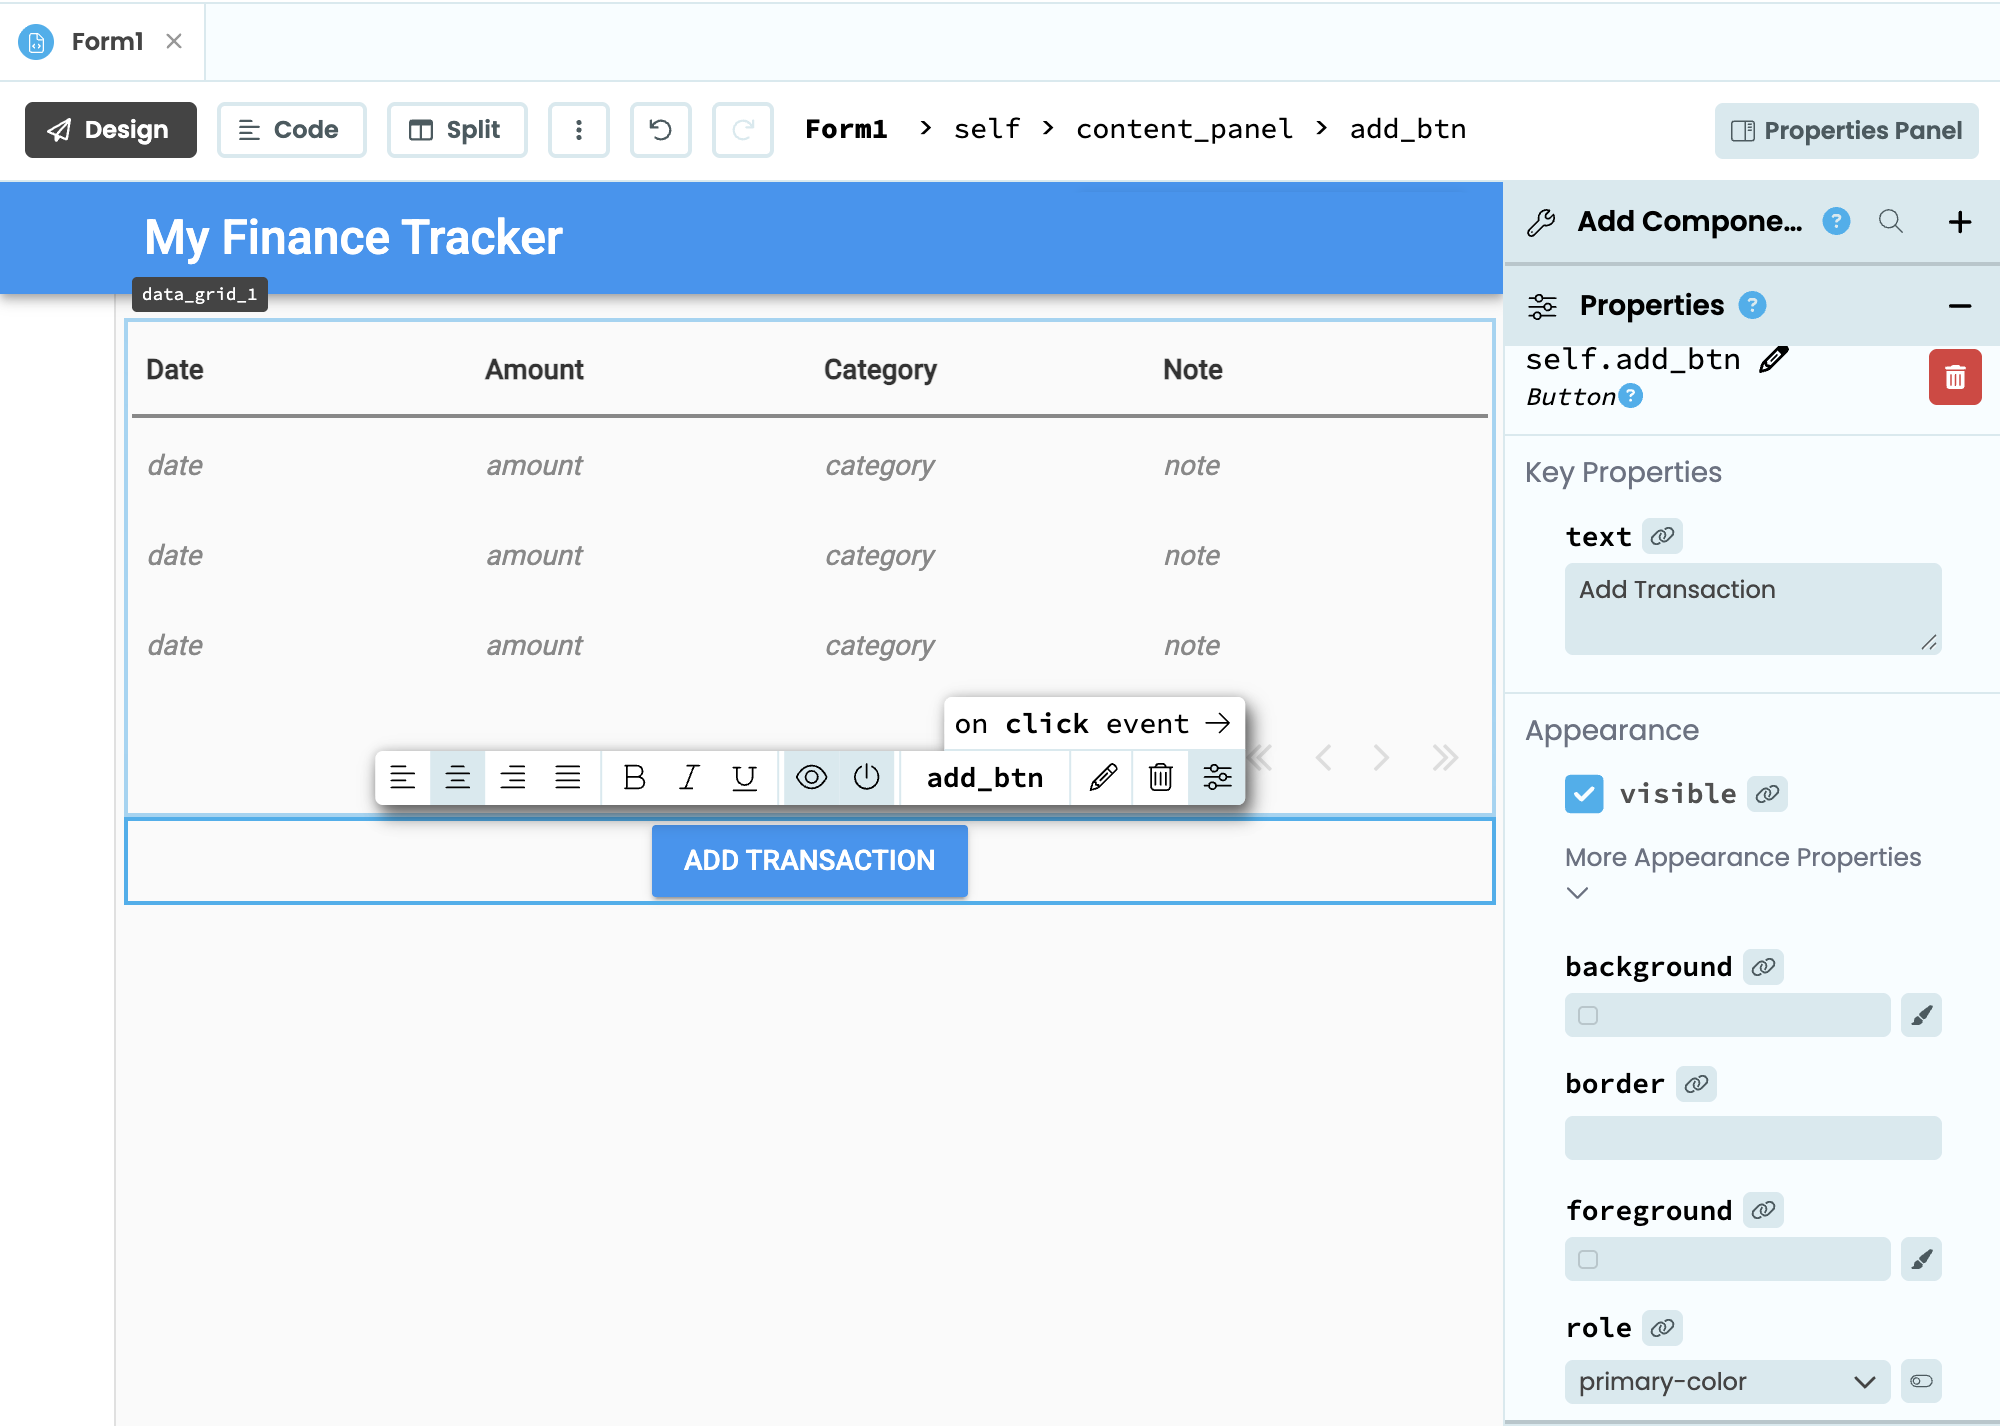
When clicked, this button will open the modal for adding a new transaction. Select the button and click on the on click event button to create the event handler.
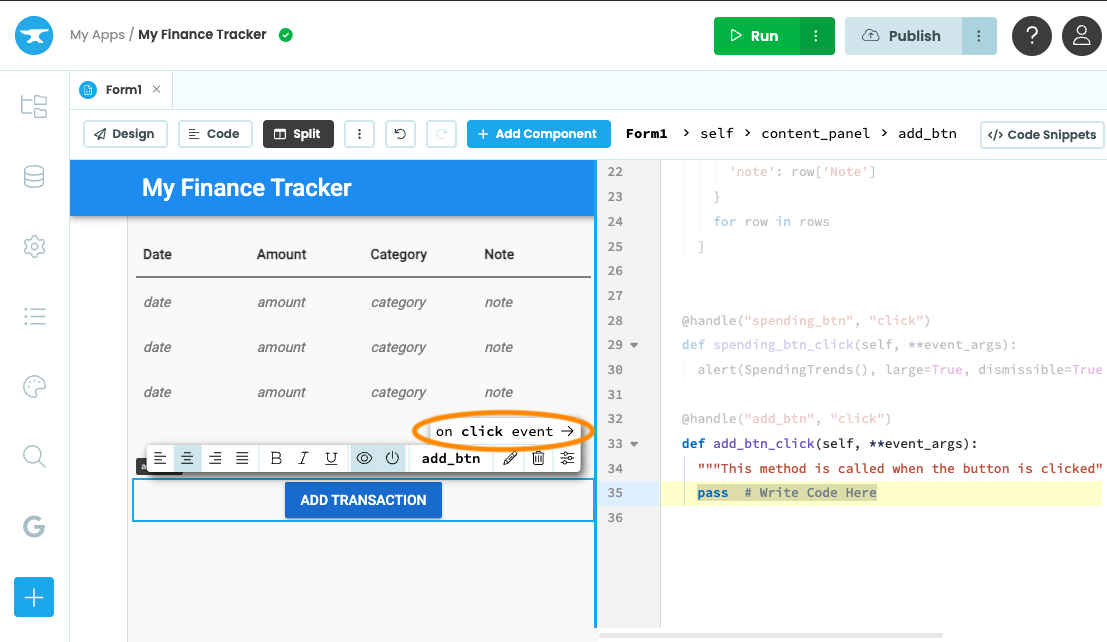
Step 5: Open the modal from the Main form
In the Code view of Form1, import the AddTransaction Form.
from ..AddTransaction import AddTransactionNext, we add the click handler for the add_btn button.
We pass an instance of AddTransaction into alert(), which renders it as a modal. When the Form is submitted, result contains the transaction data and we write it to the Sheet using add_row. After successfully adding a new row, we call load_transactions() to refresh the Data Grid.
@handle("add_btn", "click")
def add_btn_click(self, **event_args):
  result = alert(
    AddTransaction(),
    title="Add Transaction",
    large=True,
    dismissible=True,
    buttons=[]
  )

  if result:  # modal is closed
    self.worksheet.add_row( # add a new row to the Google Sheet
      Date=result['date'],
      Amount=result['amount'],
      Category=result['category'],
      Note=result['note']
    )
self.load_transactions() # Refresh the Data GridStep 6: Try it out
Click Run, click the Add Transaction button, fill in the transaction details and submit. Check that the new row appears in the Data Grid and also in your Google Sheet. You can also add a row directly in the Google Sheet and refresh the app.
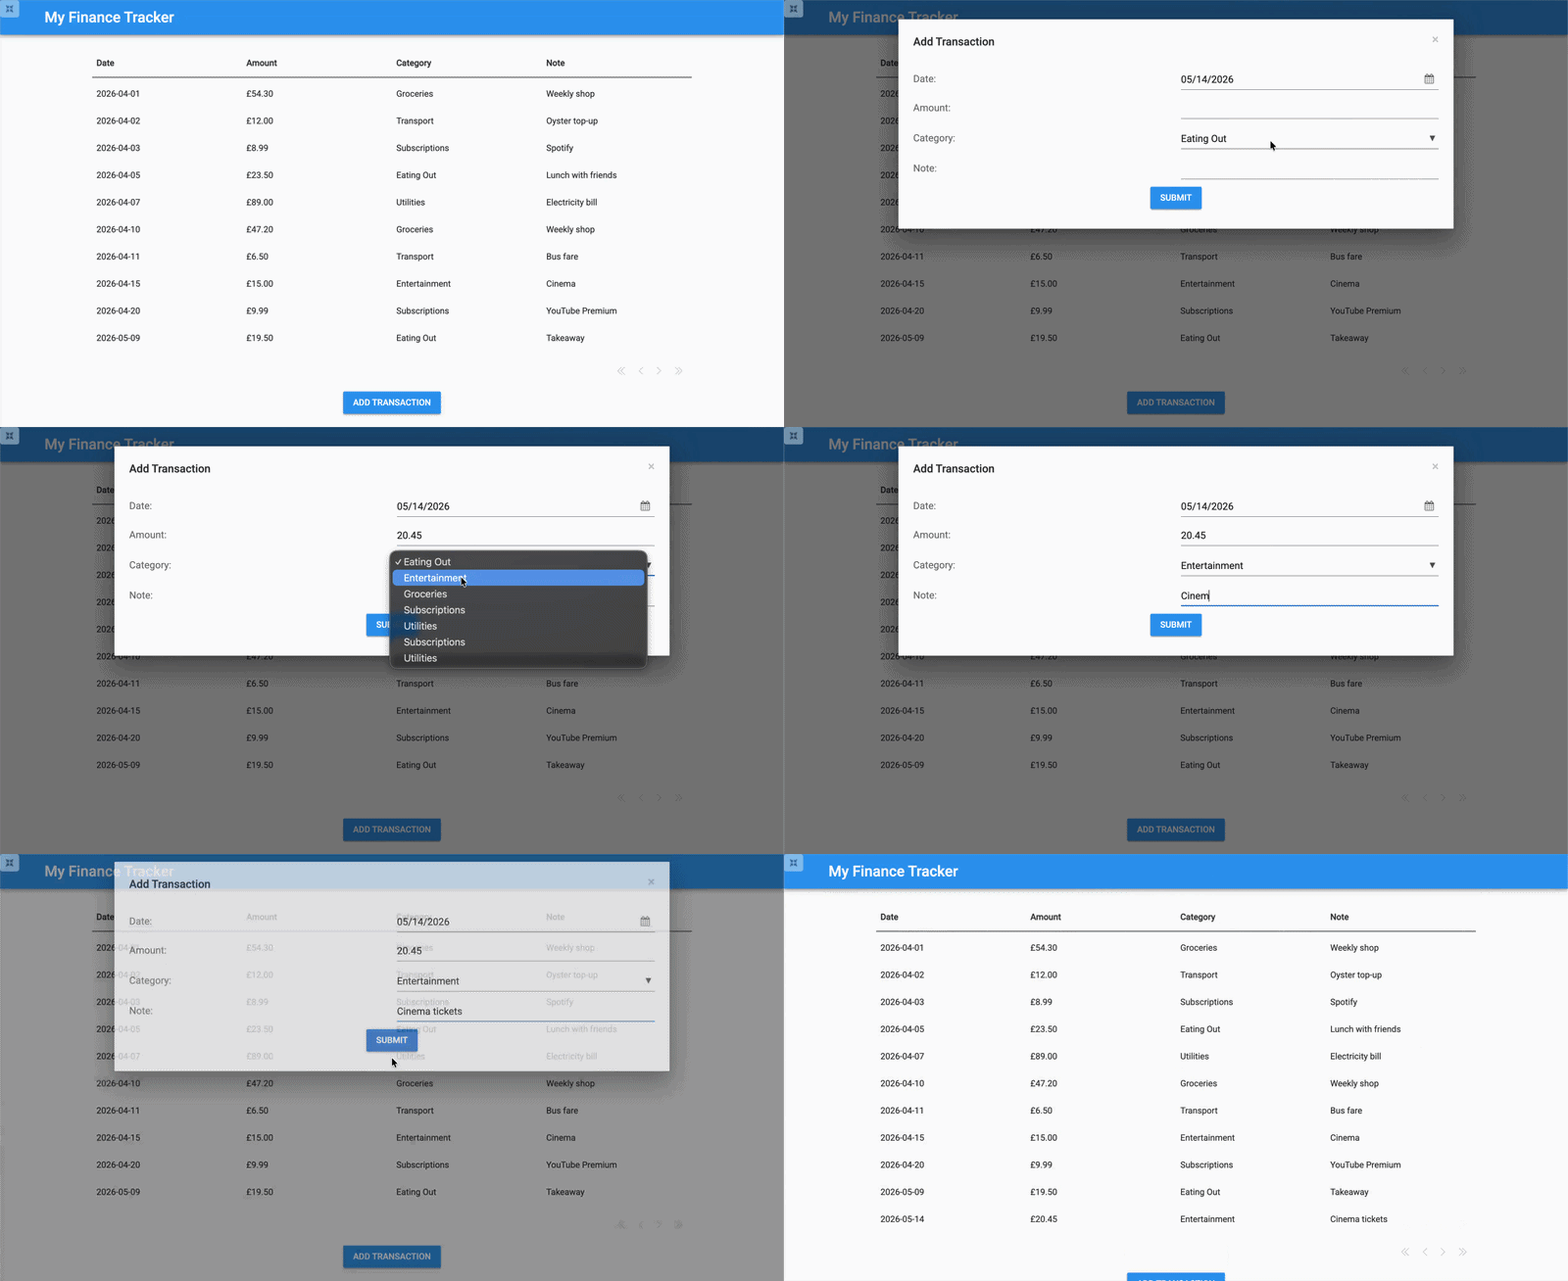
We can now read from and write to our Google Sheet from the Anvil app. In Chapter 4, we’ll create the UI to visualize our spending by category.