 By
By Chapter 3:
Let users add movies to the Data Grid
Now we will allow the user to add movies to the table.
Step 1: Write a server function to add a movie
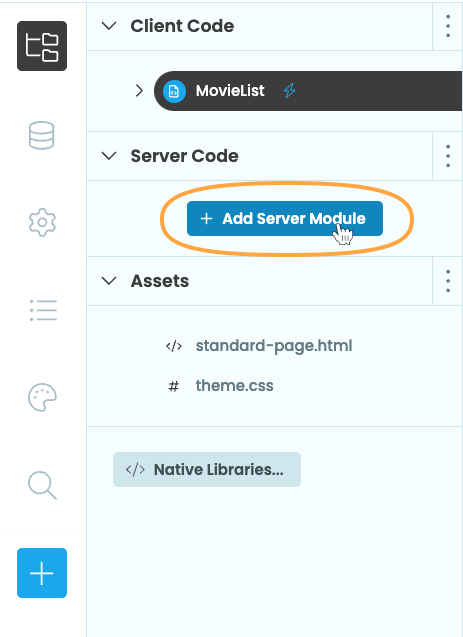
Add a Server Module by clicking on “Add Server Module” in the App Browser.
Server modules run code on a secure server rather than in the user’s browser, which is where client code runs. Any code in a Server Module can be trusted.
Inside that Server Module, we’ll write the server function that adds a movie to the movies Data Table. We’ll pass the function a dictionary of movie information. We’ll validate the values and then call app_tables.movies.add_row to add the movie.
@anvil.server.callable
def add_movie(movie_data):
  if movie_data.get('director') and movie_data.get('movie_name') and movie_data.get('summary') and movie_data.get('year'):
      app_tables.movies.add_row(**movie_data)
Note that if you haven’t encountered the **movie_data syntax before, that’s used to unpack a dictionary into a series of keyword arguments for a function. So the above is the same as if we had written:
app_tables.movies.add_row(director=movie_data['director'], movie_name=movie_data['movie_name'], year=movie_data['year'], summary=movie_data['summary'])Step 2: Create the UI for adding movies
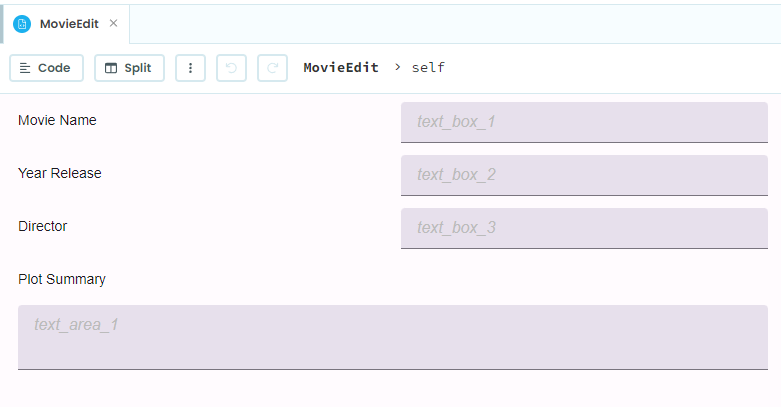
Create a second Form in your app by clicking the three dots to the right of “Client Code”. Click “Add Form”, and choose Blank Panel. We’ll use the same Form for adding and editing movies, so name the Form MovieEdit.
We’ll now build a UI so that users can add movies that will be stored in the Data Table and displayed in the Data Grid.
Drag Labels and TextBoxes onto the Form so that users can enter the name, year of release, director and plot summary of the movie. Make sure to change the type propery to number for the year of release TextBox. Use a TextArea for the plot summary since that will usually be longer than a single line.
Your finished UI should look something like this:
Step 3: Set up Data Bindings
We’ll now set up Data Bindings for the text properties of our TextBoxes and TextArea. All Anvil Forms have an item property, which is meant for storing data that we can bind to our components’ properties.
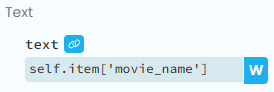
Select the TextBox that corresponds to the movie name. In the Properties Panel, click the icon next to the text property to turn that property into a Data Binding. Change the text property to self.item['movie_name']. Click on the icon to activate data binding writeback.
The writeback toggle will show on any property that’s generally user editable. When writeback is active and the user edits the text in the TextBox, the original data binding source will be updated with those changes. It’s the equivalent of executing self.item['movie_name'] = self.text_box_1.text when the text box value changes.
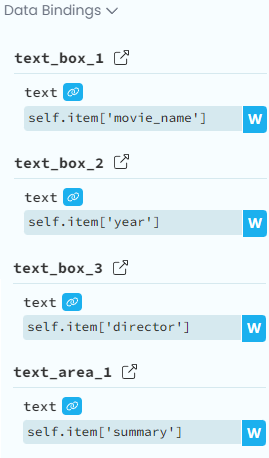
Set up the the data bindings for the rest of the TextBoxes and the TextArea so that they correspond to the remaining columns in the movies Data Table. Remember to toggle writeback for each of them.
If you click on the Form (not on a component) and scroll to the “Data Bindings” section of the Properties Panel, you should have the following data bindings:
Step 4: Add movies to the Data Grid
Switch back to the MovieList Form and add a Button. Name the button add_movie and change its text property to “Add Movie”.
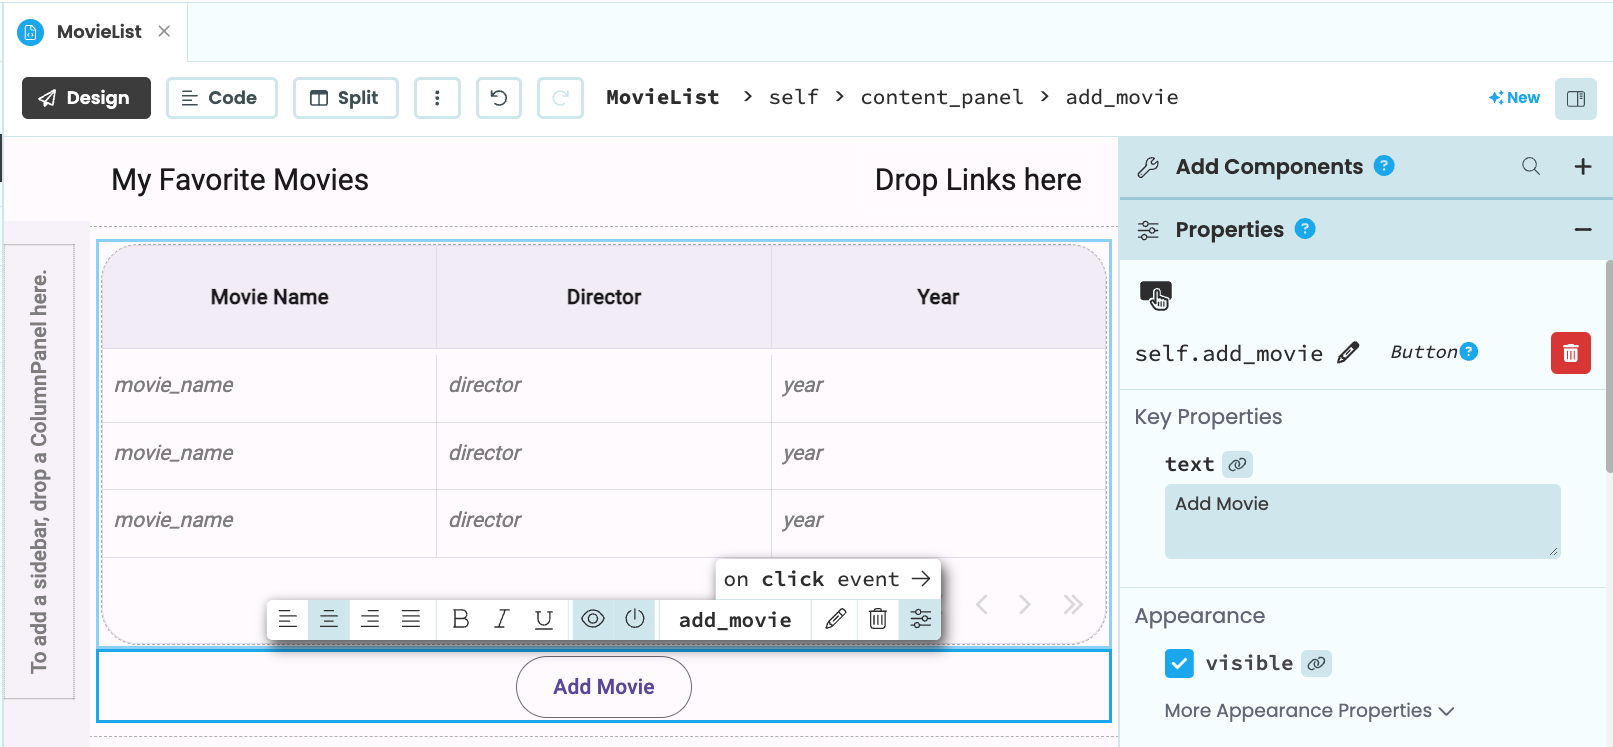
Now we need to create a function that will run when the button is clicked. Use the button’s Object Palette and click on click event to add a click event handler function. That will add an add_movie_click function to MovieList.
In that function, we’ll display an alert that uses an instance of the MovieEdit Form as its content. We also need to pass in an empty dictionary as the MovieEdit’s item property.
def add_movie_click(self, **event_args):
  item = {}
  editing_form = MovieEdit(item=item)
  alert(content=editing_form, large=True)
In order for that function to work, we need to import the MovieEdit Form at the top of the MovieList Form:
from ..MovieEdit import MovieEditIf the user clicks “OK” on the alert, the item dictionary will be filled with the information the user entered in the MovieEdit Form. Then we can call the add_movie server function we wrote earlier and pass in the now populated item dictionary. We’ll next want to refresh the Data Grid so that it displays the new movie that was added. The add_movie_click function should look like this:
def add_movie_click(self, **event_args):
  #pass in an empty dictionary to MovieEdit
  item = {}
  editing_form = MovieEdit(item=item)

  #if the user clicks OK on the alert
  if alert(content=editing_form, large=True):
    #add the movie to the Data Table with the filled in information
    anvil.server.call('add_movie', item)
    #refresh the Data Grid
    self.repeating_panel_1.items = app_tables.movies.search()
Run the app now and add a few movies to see how it works.
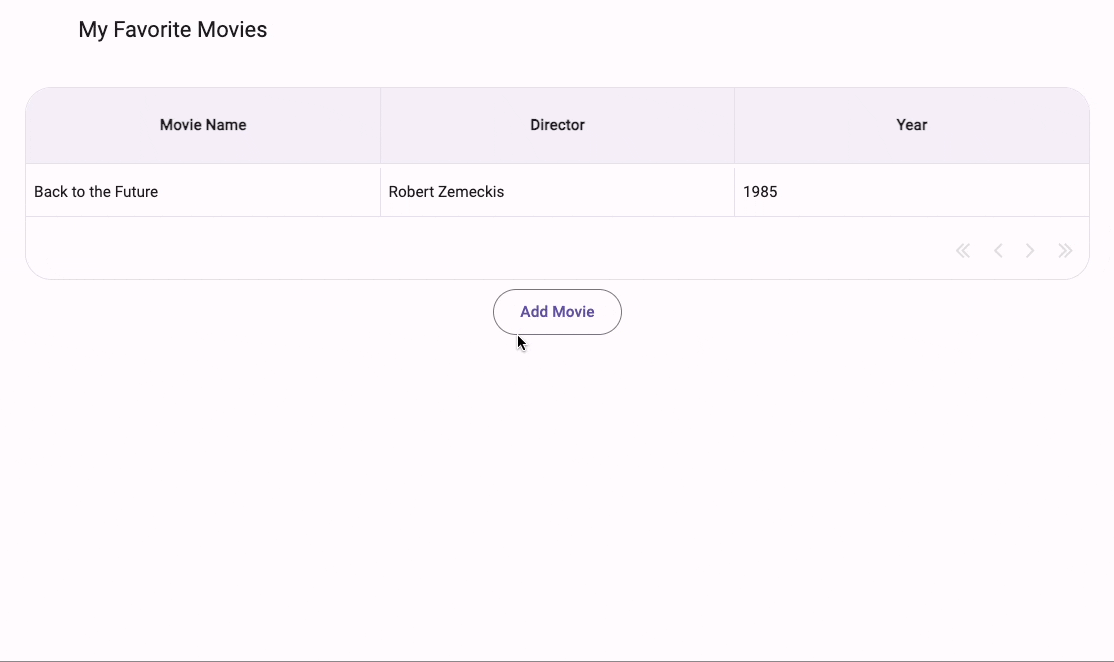
Users can now add more movies to our database, and these movies will be displayed in the Data Grid.
Next up, we’ll give users the ability to edit the movies in the database.