 By
By Chapter 2:
Get the data
We’re getting our data from the OpenWeatherMap “5 Day / 3 Hour Forecast” API. This gives forecast data for the next 5 days, with a data point every three hours.
Step 1: Add an app secret
To be able to call the OpenWeather API, we will need an API key. To access it, we’ll first create an OpenWeather account and then navigate to https://home.openweathermap.org/api_keys.
Once we have our key, we’ll use Anvil’s App Secrets service to store it securely. Let’s add the service by clicking the + button in the Sidebar Menu and then choosing App Secrets.
Now let’s click on + Create new secret. We’ll call it api_key and set its value to our API key.
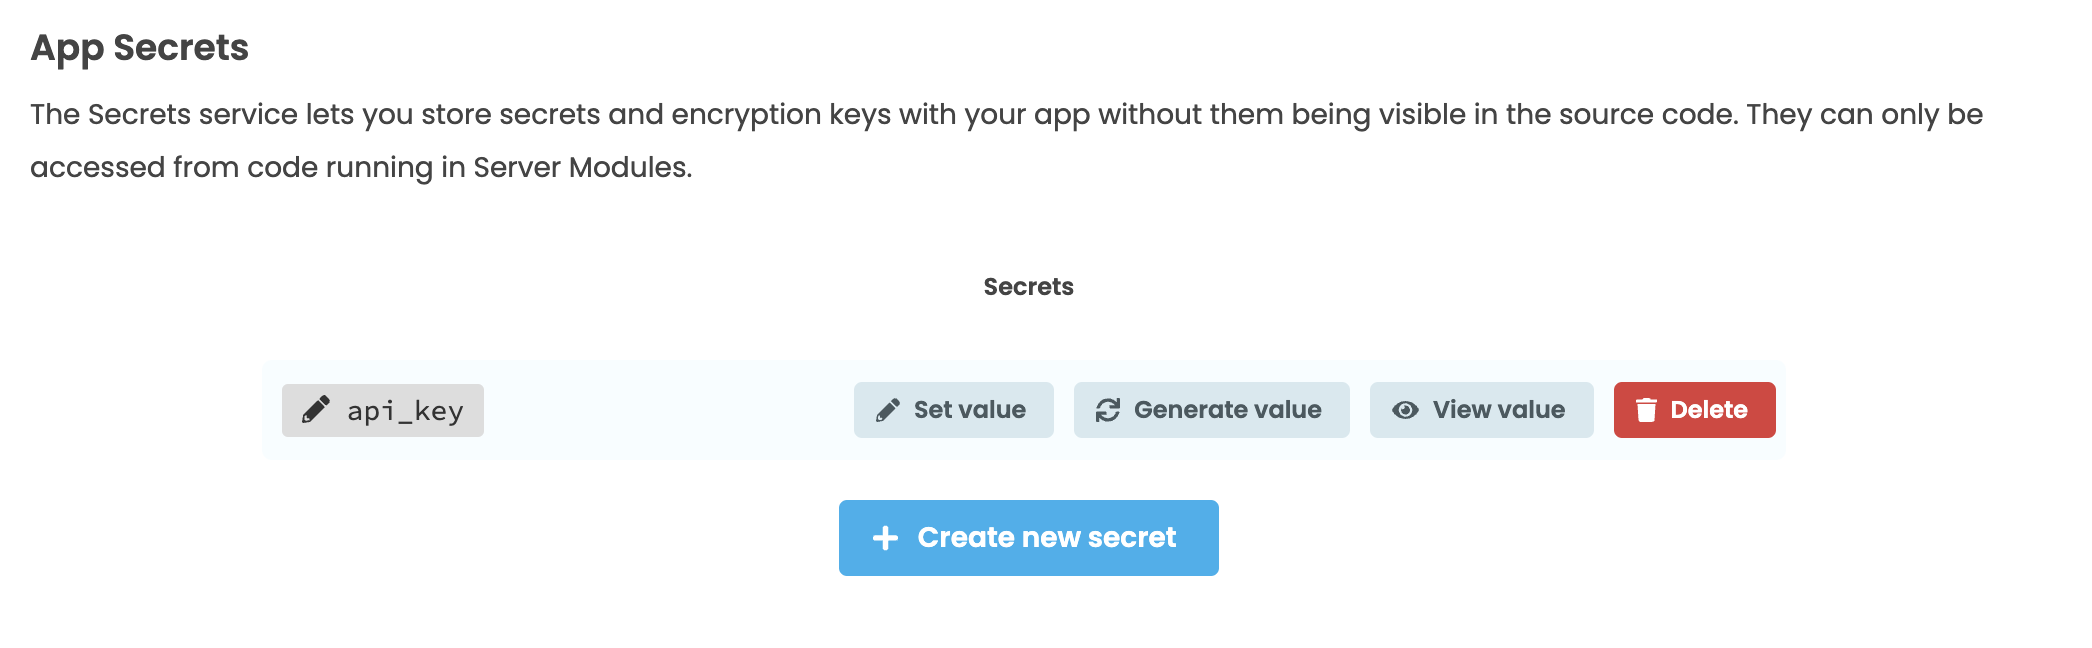
We now have our API credentials stored securely within our Anvil app.
Step 2: Fetch the API data
We’ll be accessing the OpenWeather API with our (secret) API key – this needs to happen from trusted code rather than in the browser. So we’ll access our data from a Server Module.
Navigate to the ‘App’ section in the Sidebar Menu and click on + Add Server Module. At the top, import the anvil.http module.
import anvil.httpWe’re going to write a function, get_forecast_data, that gets the weather data from the location we specify as its argument. We will decorate it as @anvil.server.callable, so that it is available from the client.
@anvil.server.callable
def get_forecast_data(location):
  pass
Inside it, we’ll format the API URL to include our key and set up the location. Once that’s done, we’ll make the request using anvil.http.request and, for the time being, we’ll have the function return the response.
@anvil.server.callable
def get_forecast_data(location):
  API_URL = f"http://api.openweathermap.org/data/2.5/forecast?lat={location['lat']}&lon={location['lon']}&appid={anvil.secrets.get_secret('api_key')}&units=metric"
  response = anvil.http.request(API_URL,json=True)
  return response
This should get us the data from the API. Let’s now choose a location and call this function from our client Form.
Step 3: Set the location
Go back to your Form1, and enter the Code view.
In order to test our function, we need to choose a location for which to get weather data. We’ll write a function called set_location that will also update the text of the location_label to display our chosen location. Add the following function to your Form1 code:
class Form1(Form1Template):
  def __init__(self, **properties):
    # Set Form properties and Data Bindings.
    self.init_components(**properties)

  def set_location(self, lat, lon):
    self.location = {"lat": lat, "lon": lon}
    self.location_label.text = f"Showing weather forecast for {lat}, {lon}."
In order to initalize the location when the app loads, let’s call the function we just wrote from the __init__ of our Form. I’ve set mine to the coordinates for Cambridge, UK, since that’s where we are here at Anvil.
class Form1(Form1Template):
  def __init__(self, **properties):
    # Set Form properties and Data Bindings.
    self.init_components(**properties)

    # Initialize location to Cambridge, UK
    self.set_location(52.205, 0.1218)
Now that we’ve set the location for our get_forecast_data server function, let’s run that function to test it out.
Step 4: Test it out
Now, we can use anvil.server.call to call our get_forecast_data server function. The return value of that function is the response from the OpenWeatherMap API, so let’s print that out and make sure everything is working.
class Form1(Form1Template):
  def __init__(self, **properties):
    # Set Form properties and Data Bindings.
    self.init_components(**properties)

    # Initialize location to Cambridge, UK
    self.set_location(52.205, 0.1218)
    #print the output from the OpenWeatherMap API
    print(anvil.server.call('get_forecast_data', self.location))
Run your app by clicking the green ‘Run’ button at the top of the Editor.

In the App Console, you should see a JSON object as output that looks like this:
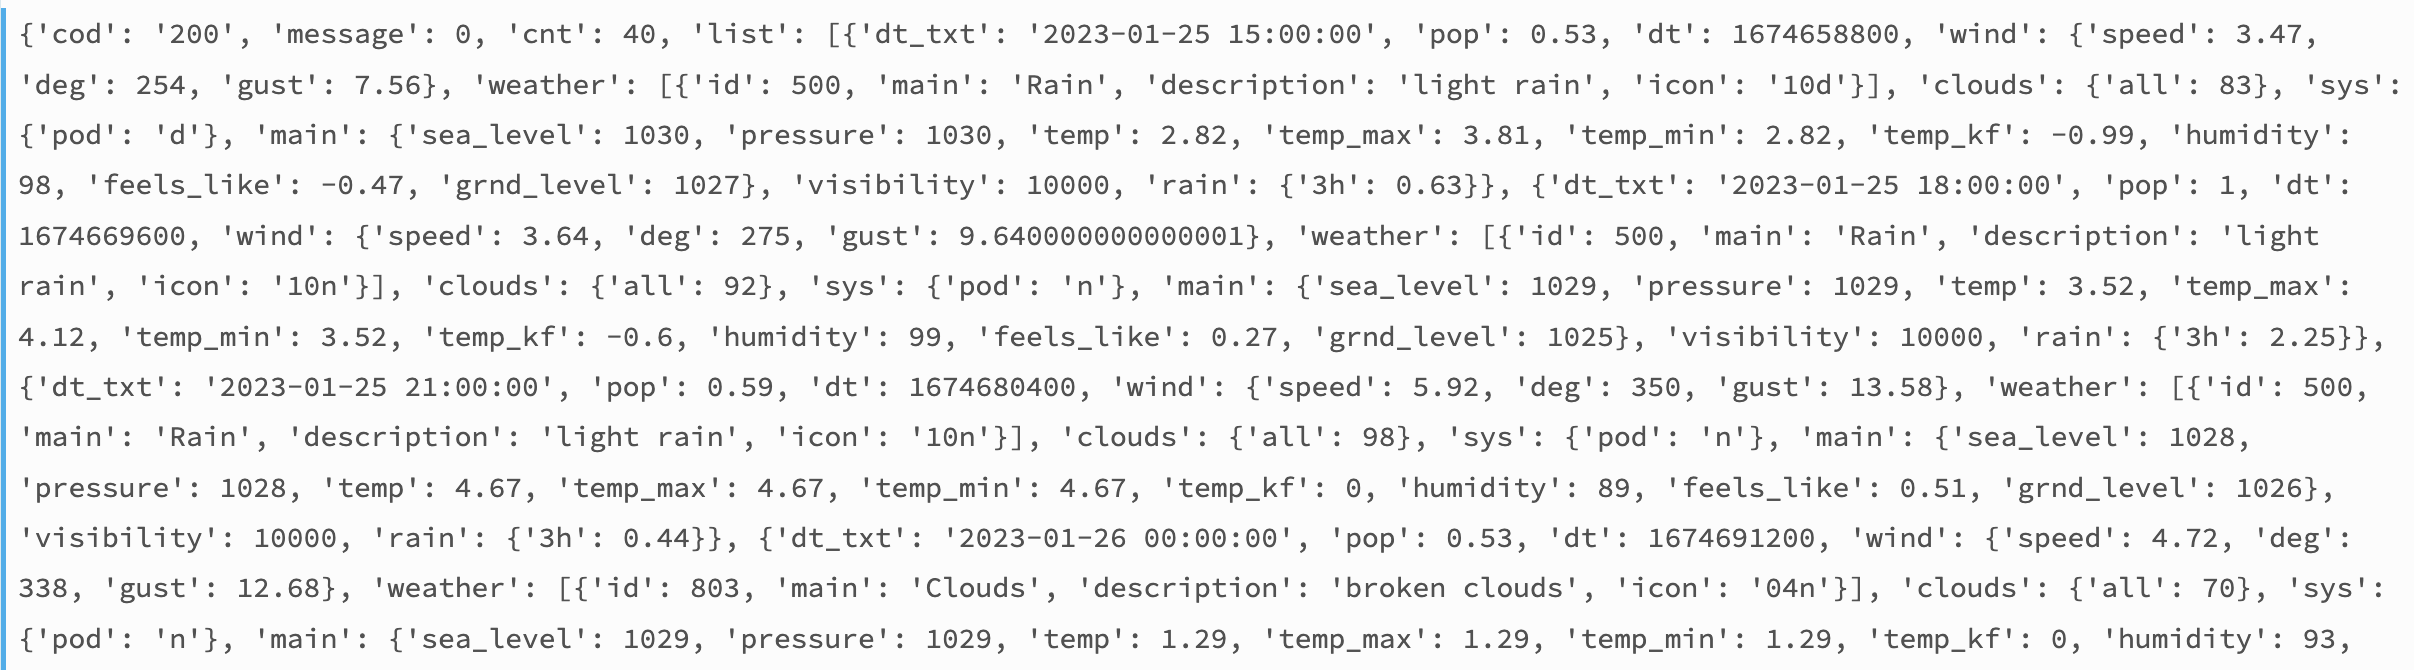
Now that everything is working as it should, let’s move onto creating our visualisations.