 By
By Chapter 6:
Drag and drop objects
Allowing the user to drag and drop objects is a common part of working with a Canvas component. The Canvas component exposes mouse events we can use to create a drag and drop effect. In our example, we’ll add the ability for the user to drag blocks to swap their places.
Step 1 - Adding the mouse event handlers and tool selection
We already have a mouse_down event handler, but for drag and drop we also need the mouse_up and mouse_move handlers. Add those handler functions to the Canvas:
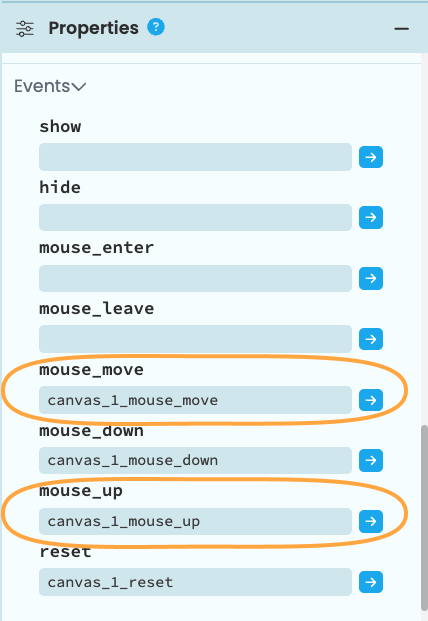
Add mouse_move and mouse_up event handlers to the Canvas
We also want users to be able to select which tool they’ll use. So far we have two tools available, a delete tool and a drag tool. While we could use different mouse buttons for each tool, that becomes awkward if we get more than two tools.
Instead we’ll use RadioButtons above the Canvas to allow the user to select between them. Add a FlowPanel and two RadioButtons above the Canvas. Set the FlowPanel’s align property to center. Be sure to set the group value property for the RadioButtons to delete_tool and drag_tool respectively. We’ll start with the delete RadioButton selected:
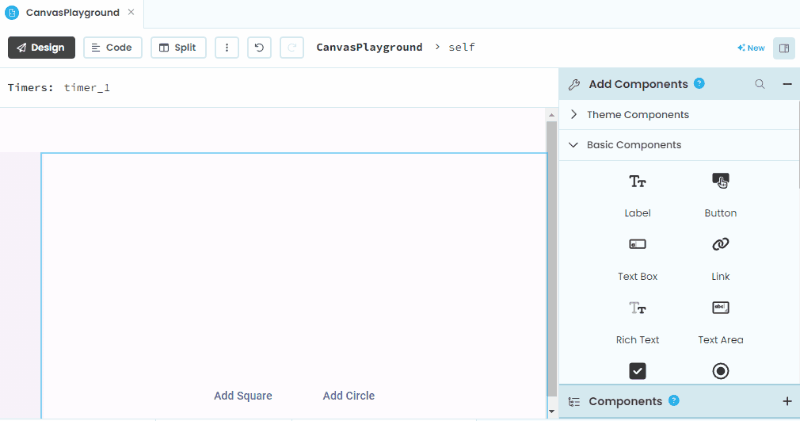
Adding RadioButtons to switch tools
Step 2 - Coding the mouse_down handler
The mouse_down, mouse_up, and mouse_move functions must work together to create the drag and drop effect. In the mouse_down handler we want to set variables that tell us which object was clicked on, and in the mouse_up handler we want to finalize the swap.
We first must set the variable we’ll use to an initial value that means nothing is being dragged. We’ll do this in the __init__ function:
    def __init__(self, **properties):
        ...
        self.drag_obj = None
        self.IMAGE_SIZE = 32
        self.model = []
Currently, our mouse_down handler will delete the clicked object. Before we add more functionality to the function, let’s first move the code that handles the deletion into a separate function.
    def do_delete_action(self, obj_x, obj_y):
        for shape in self.model:
            if shape['type'] not in self.images:
                continue

            if obj_x == shape['x'] and obj_y == shape['y']:
                self.deleted_obj = shape
                self.model.remove(shape)
                self.canvas_1.reset_context()
                self.timer_1.interval = 0.01
                break
Let’s also create a function for the dragging action when the drag tool is selected. We’ll keep track of the original x and y coordinates of the object we’re dragging so that we can later put the object we’re swapping it with at those coordinates:
    def do_drag_action(self, row, col, x, y):
        self.drag_obj = self.find_object(row, col)

        if self.drag_obj:
            self.drag_obj['original_x'] = self.drag_obj['x']
            self.drag_obj['original_y'] = self.drag_obj['y']
Now in the mouse_down function, we can determine the selected tool using get_group_value on one of the RadioButtons. We’ll then run the appropriate function based on the selected tool:
    def canvas_1_mouse_down(self, x, y, button, keys, **event_args):
        if button == 1:
            if self.deleted_obj:
                return

            row = y // self.IMAGE_SIZE
            col = (x - self.canvas_offset)// self.IMAGE_SIZE
            obj_y = row * self.IMAGE_SIZE
            obj_x = col * self.IMAGE_SIZE

            #determine selected tool
            tool = self.delete_tool.get_group_value()

            if tool == 'delete_tool':
                self.do_delete_action(obj_x, obj_y)

            elif tool == 'drag_tool':
                self.do_drag_action(row, col, x, y)
Step 3 - Coding the mouse_up handler
When the mouse button is released, we want to swap the object that was originally clicked with the current object.
In the mouse_up handler, we’ll first decide if we need to swap the two objects. self.drag_obj is the original object being dragged. If the current x and y coordinates give us a different object, then we want to swap the locations of the two objects:
    def canvas_1_mouse_up(self, x, y, button, **event_args):
        if self.drag_obj:
            row = y // self.IMAGE_SIZE
            col = (x - self.canvas_offset) // self.IMAGE_SIZE
            other = self.find_object(row, col)

            if other and other != self.drag_obj:
                self.drag_obj['x'] = other['x']
                self.drag_obj['y'] = other['y']
                other['x'] = self.drag_obj['original_x']
                other['y'] = self.drag_obj['original_y']

                self.canvas_1.reset_context()

            self.drag_obj = None
We can’t forget to clear self.drag_obj when the mouse button is released, otherwise the Form will think we’re still dragging something.
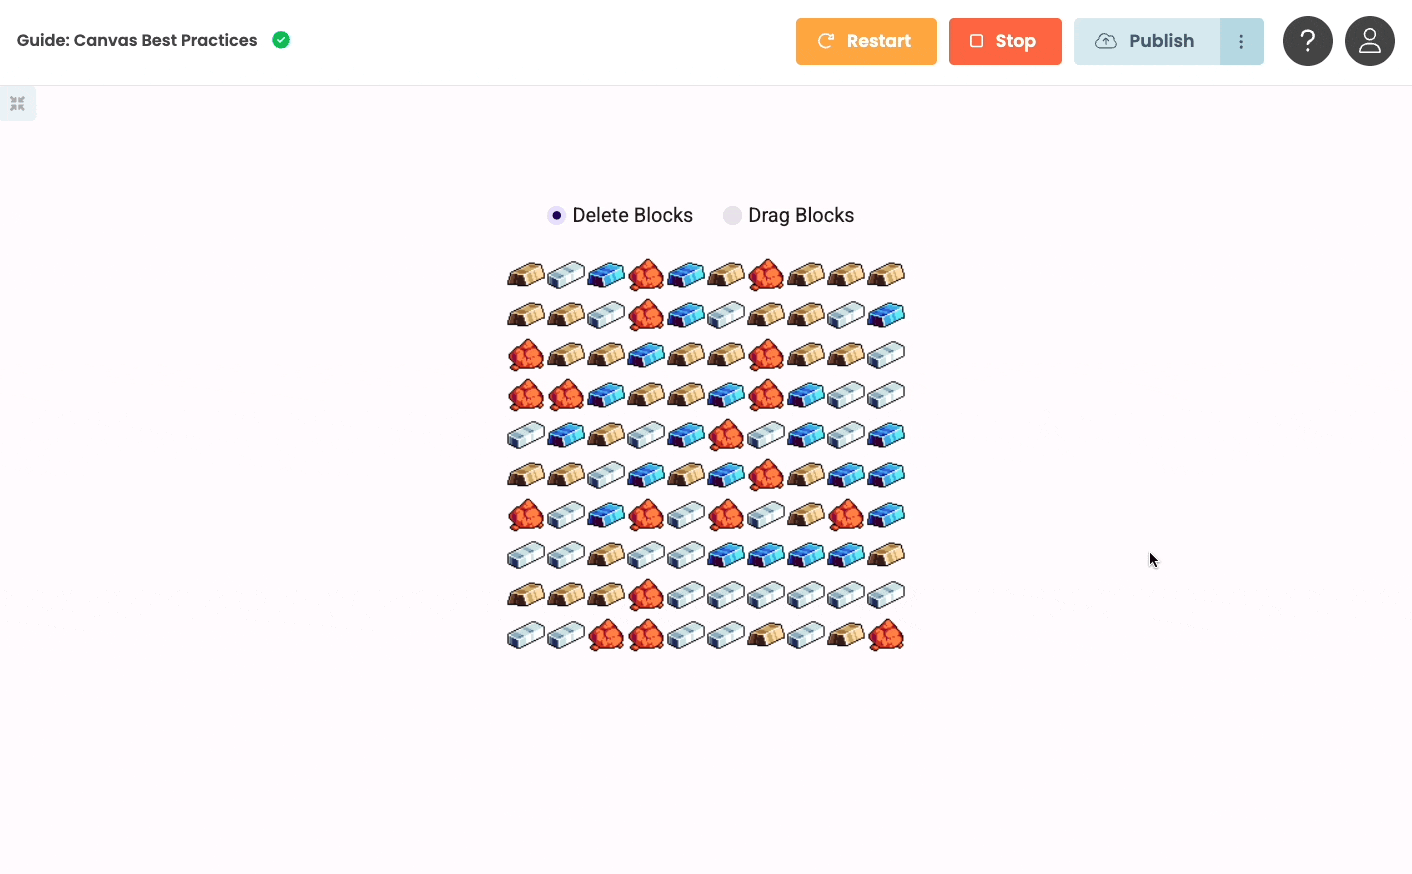
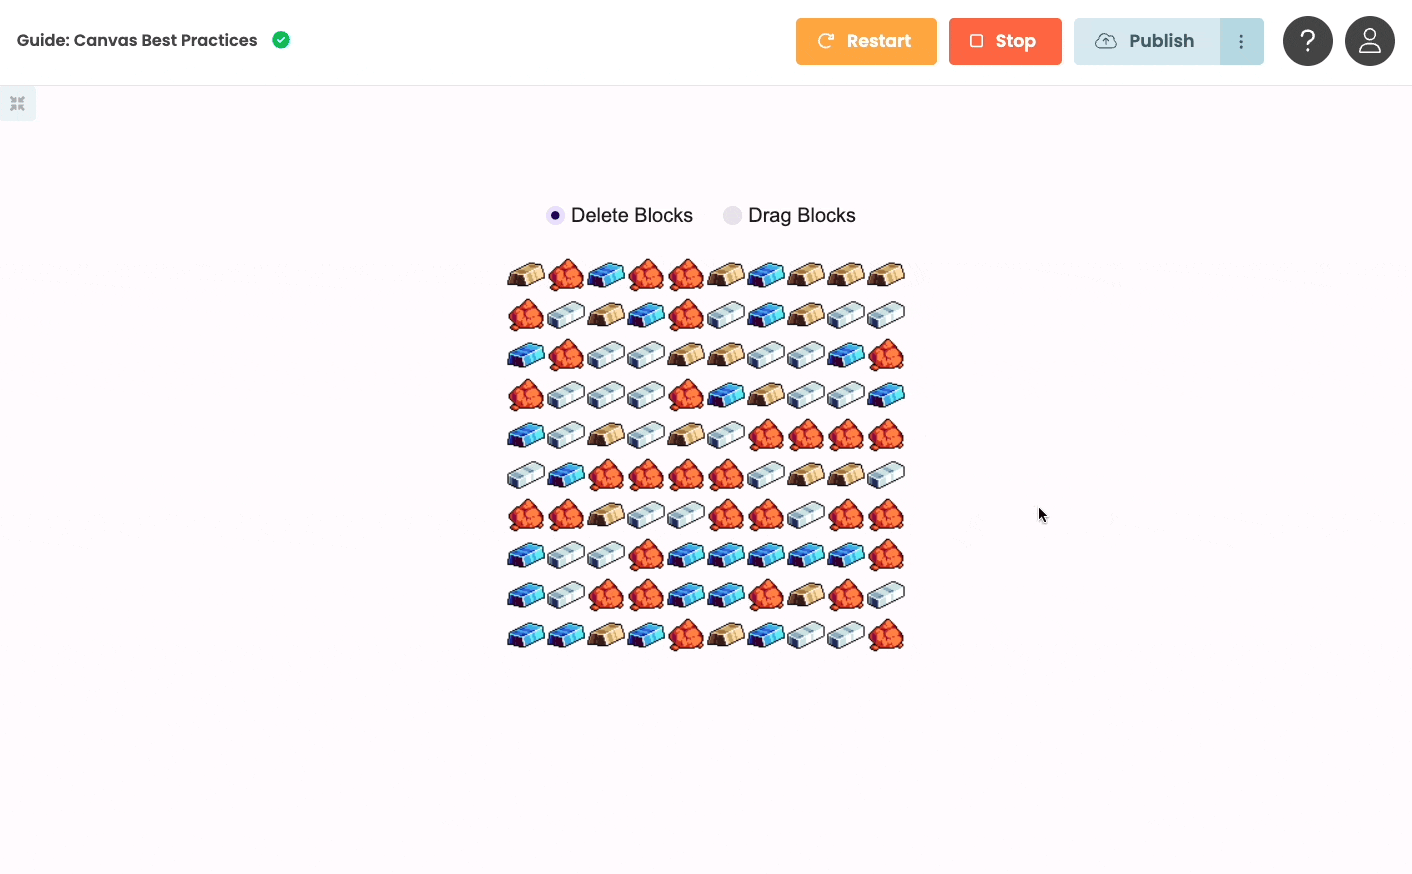
You can run this as is and see the two objects swap places when you release the mouse button. You won’t see the actual dragging process until we code the mouse_move handler.
Step 4 - Coding the mouse_move handler
Now we can put code into the mouse_move handler that will show us the object as it is being dragged.
    def canvas_1_mouse_move(self, x, y, **event_args):
        if self.drag_obj:
            self.drag_obj['x'] = x - self.canvas_offset
            self.drag_obj['y'] = y

            self.canvas_1.reset_context()
Run the app now and you’ll find that sometimes the swap doesn’t happen and the dragged object just gets dropped where you release the mouse button. This is because at that point we now have two objects in the same grid space. The find_object function might find either of the two objects. If it finds the object you’re dragging, then the mouse_up handler thinks there’s nothing to swap.
To solve this, add a parameter to find_object that will allow it to ignore an object:
    def find_object(self, row, col, ignore=None):
        for obj in self.model:
            if ignore and ignore == obj:
                continue

            if obj['x'] // self.IMAGE_SIZE == col and obj['y'] // self.IMAGE_SIZE == row:
                return obj

        return None
And then modify the mouse_up handler to tell find_object to ignore the dragged object:
    def canvas_1_mouse_up(self, x, y, button, **event_args):
        if self.drag_obj:
            row = y // self.IMAGE_SIZE
            col = (x - self.canvas_offset) // self.IMAGE_SIZE
            other = self.find_object(row, col, self.drag_obj)

            if other and other != self.drag_obj:
                self.drag_obj['x'] = other['x']
                self.drag_obj['y'] = other['y']
                other['x'] = self.drag_obj['original_x']
                other['y'] = self.drag_obj['original_y']

                self.canvas_1.reset_context()

            self.drag_obj = None
Now run the app and you can see the progress of the drag operation:

Step 5 - Fixing the image offset
If you look closely you’ll see that the position of the object with respect to the mouse cursor looks odd during the dragging. That’s because we’re setting the x and y coordinates of the upper left corner of the image to the mouse cursor coordinates. Ideally you’d want to calculate the offset of the mouse cursor coordinates from the object coordinates in the mouse_down handler, and use those offsets for setting the object coordinates in the mouse_move handler.
In the mouse_down event handler add in the code to calculate the offsets:
            elif tool == 'drag_tool':
                self.drag_obj = self.find_object(row, col)

                if self.drag_obj:
                    self.drag_obj['original_x'] = self.drag_obj['x']
                    self.drag_obj['original_y'] = self.drag_obj['y']
                    self.x_offset = self.drag_obj['x'] - x
                    self.y_offset = self.drag_obj['y'] - y
And in the mouse_move event handler, use those offsets to set the image position:
    def canvas_1_mouse_move(self, x, y, **event_args):
        if self.drag_obj:
            self.drag_obj['x'] = x + self.x_offset
            self.drag_obj['y'] = y + self.y_offset

            self.canvas_1.reset_context()
Note that we’re no longer using self.canvas_offset because that offset is now built into the self.x_offset value.
Now run the app and you can see a more natural dragging effect:
We’ve now learned how to support drag and drop on the Canvas. Next, we’ll look at how to use the Canvas as a viewport on a larger world.