Chapter 4:
Build a user interface
In this chapter, we’ll build a user interface for our app so that anyone who sends us their flight emails will be able to see them in one place.
Step 1: Add components to your app frontend
Let’s add some components to our app. Go to the Form1 and add components from the Toolbox in the Design View.
We’ll use a Data Grid to display the flight data in a table in our user interface.
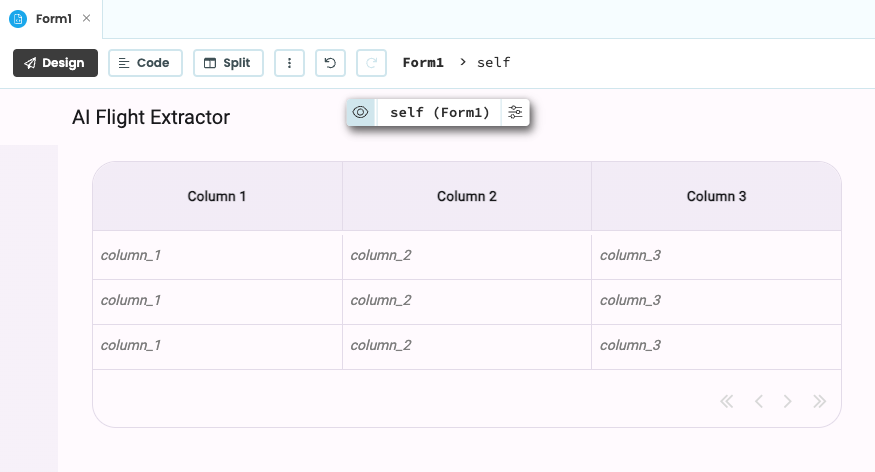
We’ll also add a title to our app using a Label.
Step 2: Set up the Data Grid
Now, we need to set up the Data Grid. We are going to need five columns, where we’ll display the flight number, its origin, its destination, the departure time and the arrival time.
Our Data Grid currently has three columns, so click on the + icon to add two more. Select the first column by clicking on its header. We’re going to change its title and data_key properties from the Properties Panel. The title is what will be displayed as the Data Grid column header – change this to “Flight Number”. The data_key is the name of the Data Table column whose data we want to display here. Set it to flight_number.
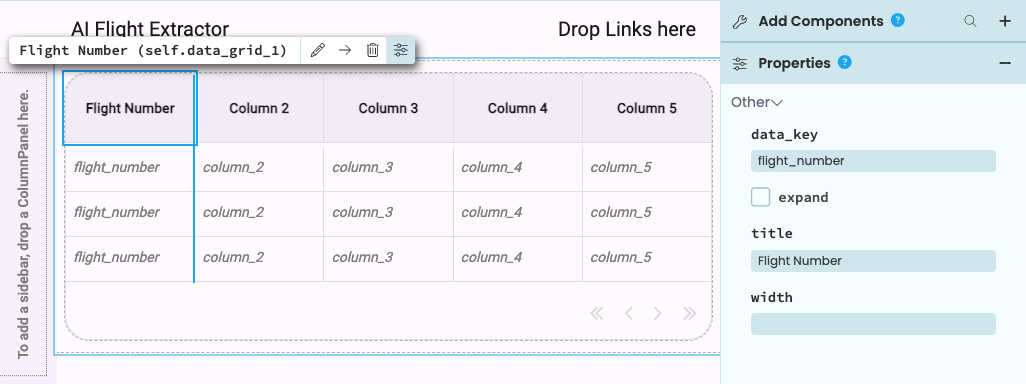
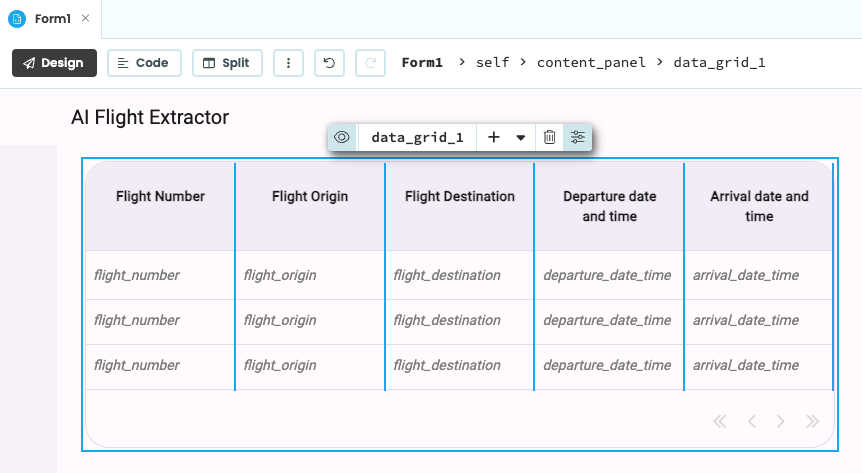
Repeat the process with columns 2 to 5, setting their titles and data_keys to:
- “Flight Origin”,
flight_origin - “Flight Destination”,
flight_destination - “Departure date and time”,
departure_date_time - “Arrival date and time”,
arrival_date_time
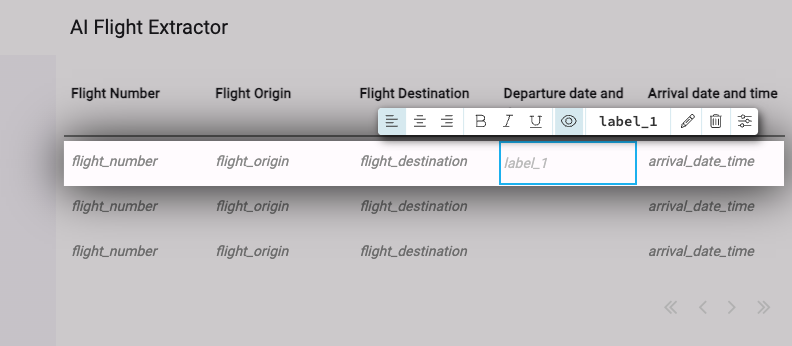
Finally, we’ll update the columns containing datetimes so that they’re formatted nicely in the UI. Drop a Label into the departure and arrival time columns, then use data bindings to format the output. For the ‘Departure Time’ column, bind the text property of the label to self.item['departure_date_time'].strftime("%c"). Do the same for the ‘Arrival Time’ column, binding the text to self.item['arrival_date_time'].strftime("%c") instead.
Step 3: Retrieve the data
Next, we’ll retrieve the data we’ve stored in the Data Table from our Server Module, and send it to the client to display it in our Data Grid.
In the Server Module, write the get_flight_details() function. In it, we use the search() method to get the rows from the data table. Decorating it with @anvil.server.callable means that the client can access this function.
@anvil.server.callable
def get_flight_details():
  return app_tables.flight_details.search()
Then, go back to our Form1’s Code View. Data Grids contain a Repeating Panel inside, which is what we need to populate to display our data. Add a line to the __init__ method to use the get_flight_details function to set the repeating_panel_1’s items.
class Form1(Form1Template):
  def __init__(self, **properties):
    # Set Form properties and Data Bindings.
    self.init_components(**properties)

    self.repeating_panel_1.items = anvil.server.call('get_flight_details')
With this, you should see the data from our Data Table displayed in our Data Grid.
Step 4: Add user authentication
If many people are using our app, we want them to only be able to see their own flights. To do this, we will be using Anvil’s built-in Users Service to add signup and logins to our app.
Let’s add it to our app. Click on the + icon on the sidebar and select ‘Users’. On the menu that opens, under “Supported sign-in methods”, enable the “Sign in with Google” option.
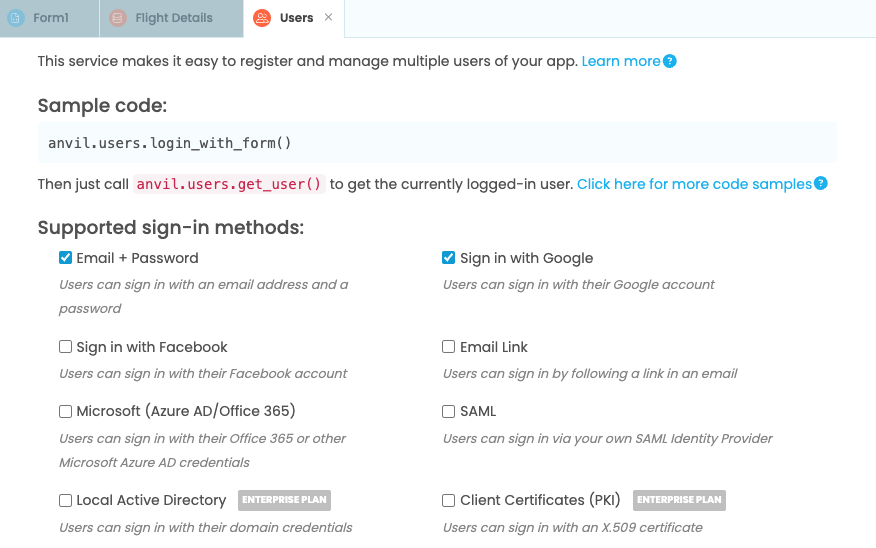
Then, go back to your Form1’s client code. In a new line inside the __init__ method, add anvil.users.login_with_form() to require users to login. This will display a popup which lets users sign up or sign in.
class Form1(Form1Template):
  def __init__(self, **properties):
    # Set Form properties and Data Bindings.
    self.init_components(**properties)

    anvil.users.login_with_form()

    self.repeating_panel_1.items = anvil.server.call('get_flight_details')
Now, go to the server code. We’ll update the get_flight_details function to run only when a user is logged in and retrieve only flights for that user.
Adding require_user=True to @anvil.server.callable verifies whether a user is logged in. anvil.users.get_user()['email'] retrieves the email address of the user who is currently logged in.
@anvil.server.callable(require_user=True)
def get_flight_details():
  return app_tables.flight_details.search(email=anvil.users.get_user()['email'])
With this, users of your app will be able to sign in and they’ll only see the flight details associated with their email address.
Step 5: Try it out
We’ve completed our app! Try forwarding some emails and run it to see it in action.
You’ll be prompted to sign in and, after that, you’ll be able to see your flight details in the Data Grid. It should look something like this:
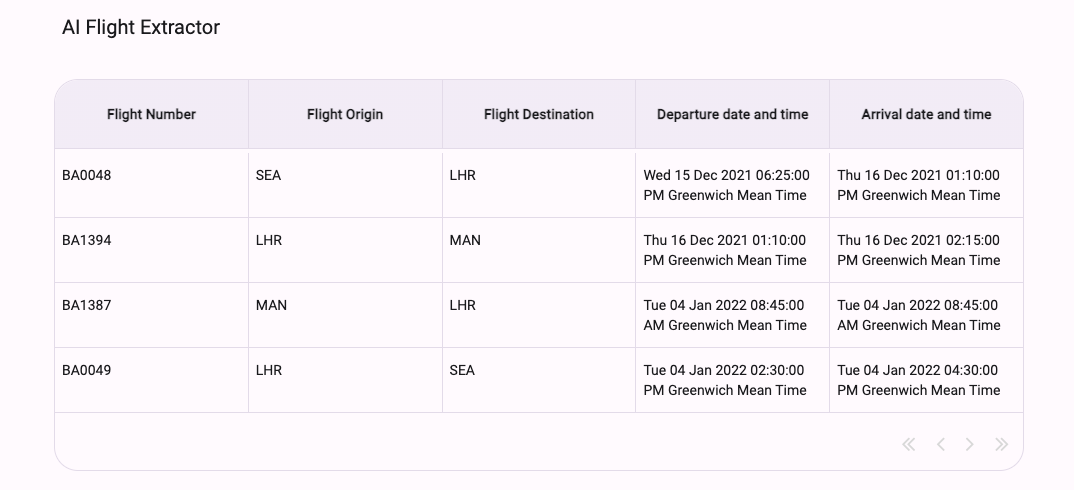
And that’s it! You’ve just built an AI-powered app in Anvil.
You can use the following link to clone the finished app and explore it yourself:
What next?
Head to the Anvil Learning Centre for more tutorials, or head to our examples page to see how to build some complex apps in Anvil.
Build Database-Backed Apps
In this tutorial, you’ll learn how to do all of those things and more in Anvil.
Display data on a dashboard

Deploy data science to the web with Deepnote

Generate PDF Invoices with Python

See a large-scale ticketing system, built with Anvil

 By
By