Chapter 2:
Set up the Anvil server module and email service
Let’s move our code from py.space into Anvil so that we can build an app. In this chapter, we’ll build a service that accepts an email containing flight details and sends out an email containing the data that the LLM has extracted.
Step 1: Setup the Anvil app
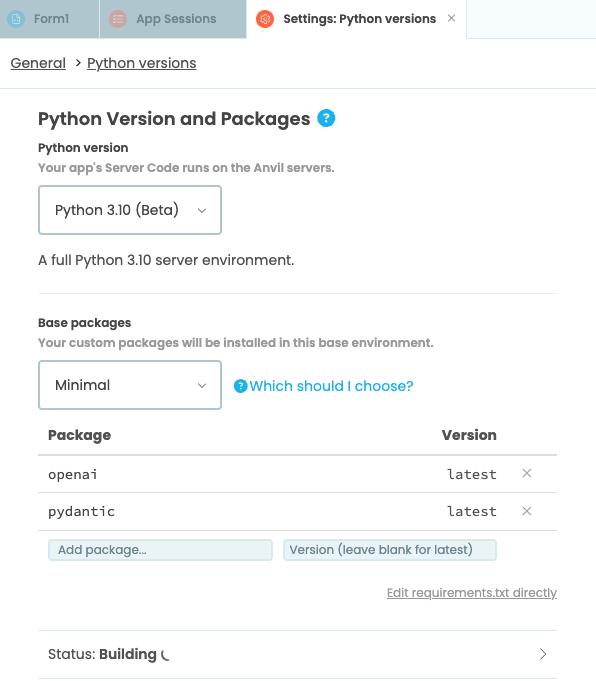
Navigate to Anvil and create a new app. Like we did with py.space, we first need to install the required packages. Go to the “Python versions” tab in the Settings sidebar menu and add openai and pydantic to your environment.

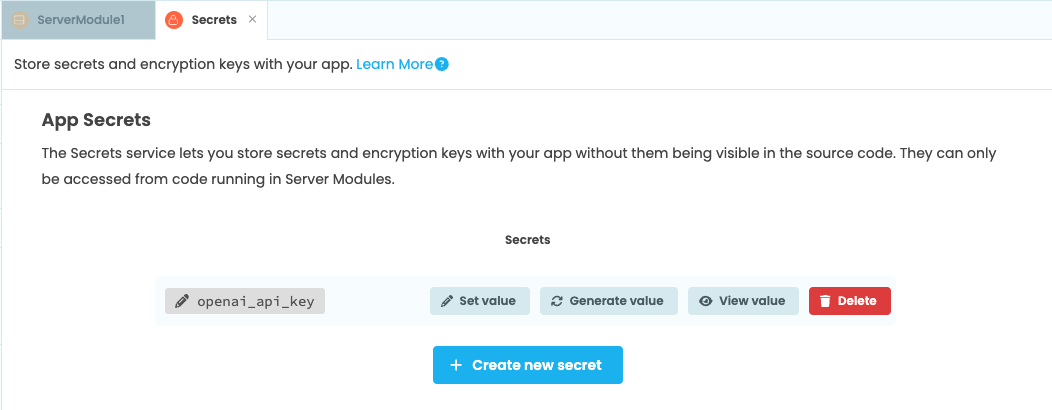
We also need to securely store our API key. Add the App Secrets service to your app using the + button in the sidebar menu. Create a new secret and set its value to your key.

Step 2: Add the LLM code to the server module
Next, we’ll add the LLM code that we developed in py.space to our app. Go to the App Browser and create a new Server Module.
Copy and paste the code from your py.space script into the Server Module. We’ll leave it as is for the most part, but we’ll modify the call to the LLM by wrapping it in a function and returning the response, like so:
def call_open_ai(email_text):
  response = openai_client.beta.chat.completions.parse(
    model="gpt-4o-mini",
    messages=[
        {"role": "system", "content": FLIGHT_EXTRACTION_PROMPT},
        {"role": "user", "content": email_text},
    ],
    response_format=Flights,
  )
  return response.choices[0].message.parsed
We will also remove the sample email we used to test the prompt earlier. In the next step, we’ll make it possible for our app to receive emails that we can pass through to call_open_ai.
Step 3: Handle emails
Next, we’ll make it possible for our app to receive flight itinerary emails that we can feed to our LLM. Then, we’ll have our app send us an email with the data that the model returns.
Start by adding the Email service from the Sidebar Menu. Then, add a function that runs whenever the service receives an email. We can do this with the @anvil.email.handle_message decorator. We start by parsing the text from the email we’ve received and calling our call_open_ai function with the parsed text as input.
import re

@anvil.email.handle_message
def handle_incoming_emails(msg):
  # clean email text
  email_text = re.sub(r"<.*?>", "", msg.text)

  openai_response = call_open_ai(email_text)
Now, add some code for sending an email reply with the flight data that our model returns. We do this using the reply method. We’ll also add some error handling:
import re
from datetime import datetime

@anvil.email.handle_message
def handle_incoming_emails(msg):
  # clean email text
  email_text = re.sub(r"<.*?>", "", msg.text)

  reply_email = "Thank you for your message. Here are your flight details:\n"

  try:
    openai_response = call_open_ai(email_text)

    for flight in openai_response.flights:
      flight_text = f"""
      Flight number: {flight.flight_number} \n
      Flight origin: {flight.origin} \n
      Flight destination: {flight.destination} \n
      Departure date and time: {datetime.strptime(flight.departure_time, '%Y/%m/%d %H:%M')} \n
      Arrival date and time: {datetime.strptime(flight.arrival_time, '%Y/%m/%d %H:%M')} \n
      \n
      """
      reply_email += flight_text

    msg.reply(text=reply_email)

  except (ValueError, KeyError):
    msg.reply(text="Your message could not be processed. Sorry!")
Next, let’s test this out.
Step 4: Test it out
First, we need to publish our app to be able to receive email.
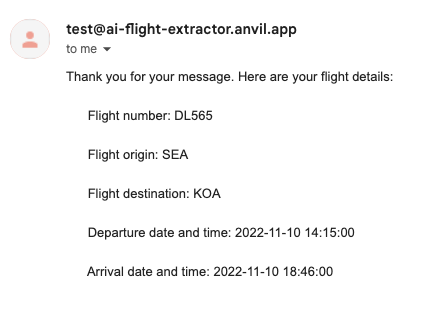
Now, let’s forward an email containing flight details to our app. Your app will be able to receive emails sent to <anything>@YOUR_APP_ID.anvil.app. Once you’ve sent the email, you’ll get a reply containing the details extracted by the LLM.

We’ve successfully connected our Anvil app to a LLM! In chapter 3, we’ll save the flights data to a data table.
 By
By