
 By
By Chapter 3:
Add, Edit and Delete your items from your app
You’ve successfully connected to your external database from a web app! That’s the core mission of this tutorial accomplished.
We’ll go a little further by building a UI to edit the contents of the inventory table. We’ll also create some input components to add and delete rows.
Step 1: Create a 'refresh' method
We want to be able to refresh the table at any time, so we can show the user what happens when they create or update rows.
Here’s the line we’ve been using to fetch the inventory items from the database:
self.repeating_panel_1.items = anvil.server.call('get_items')Remove this line from __init__ and put it in a method of its own:
  def refresh(self, **event_args):
    self.repeating_panel_1.items = anvil.server.call('get_items')
Now call your new method from __init__:
  def __init__(self, **properties):
    # Set Form properties and Data Bindings.
    super().__init__(**properties)

    # Any code you write here will run before the form opens.
    self.refresh()
Re-run your app: you should still see your database rows displayed in the table.
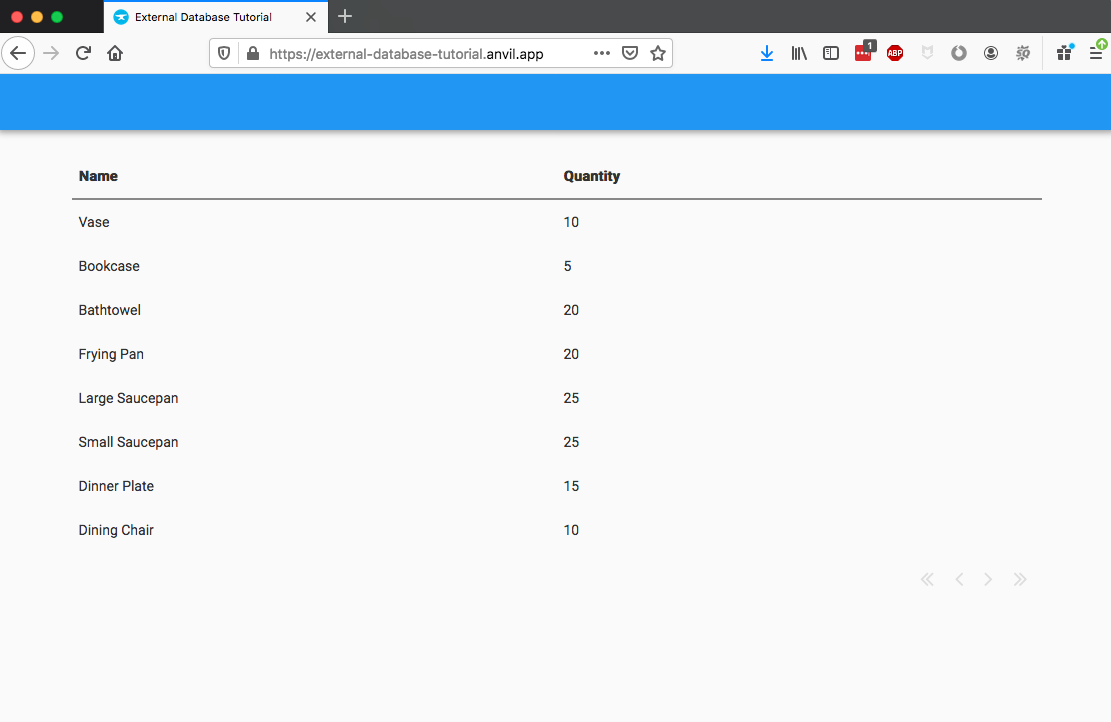
The app still displays the database rows after moving the load logic into a refresh method
Step 2: Write a function to add items
Let’s make our app add items to the database.
In your Server Module, add this simple function to run an INSERT statement against the external database:
@anvil.server.callable
def insert_item(name, quantity):
  query = "INSERT INTO inventory (name, quantity) VALUES (%s, %s);"
  with db_connection() as conn:
    cur = conn.cursor()
    cur.execute(query, [name, quantity])
    conn.commit()
Why don’t we just use Python format strings to insert the values?
Psycopg2’s cursor.execute method allows you to construct queries from Python objects in a way
that protects against SQL injection. That prevents users from taking over our database by using SQL statements as variables.
Step 3: Build the UI to add items
Now we need to run that insert_item function when an item is added to our inventory from the UI. Let’s build an add widget into the Data Grid.
Remember the third column? Clear its Title and Key. Set its width to 80. This will hold our add button later.
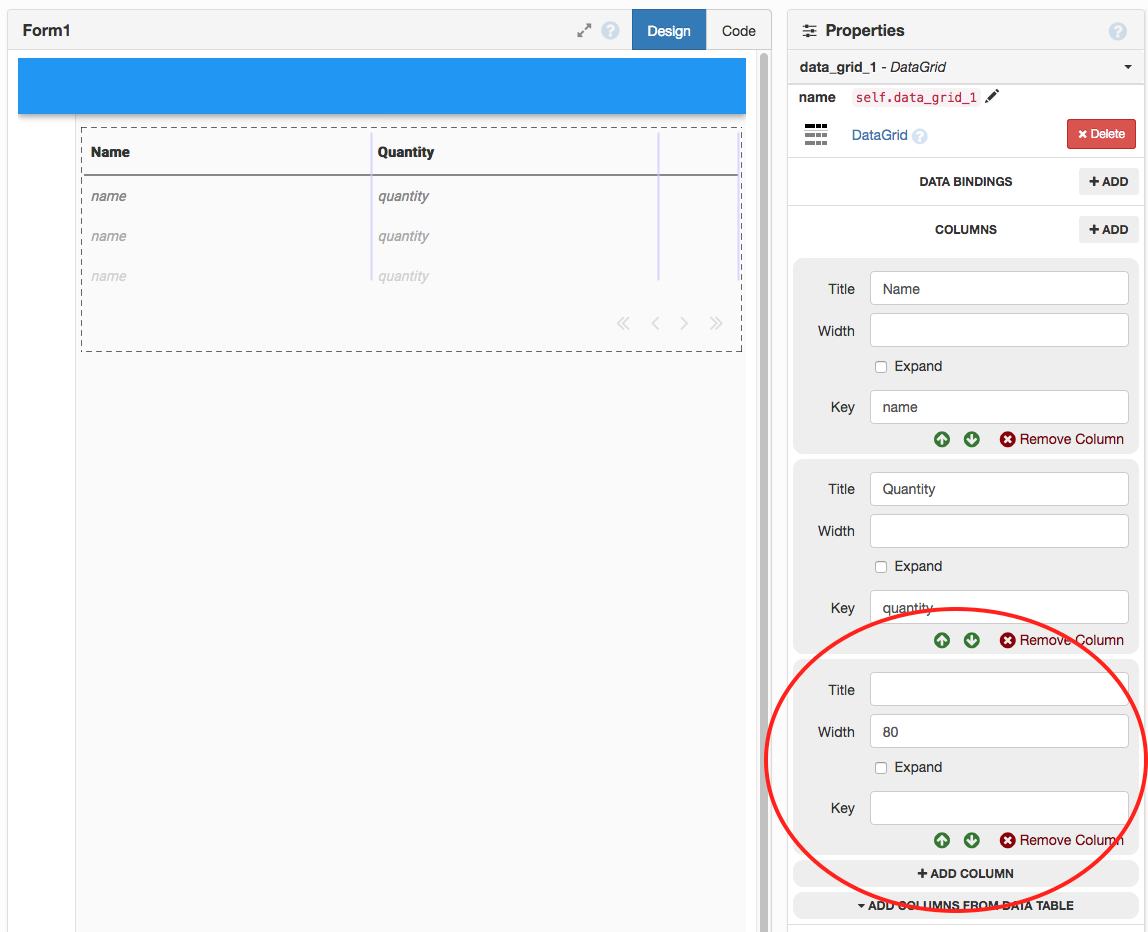
Clear the third column so it can hold the add button
Add a Data Row Panel  to the bottom of your Data Grid.
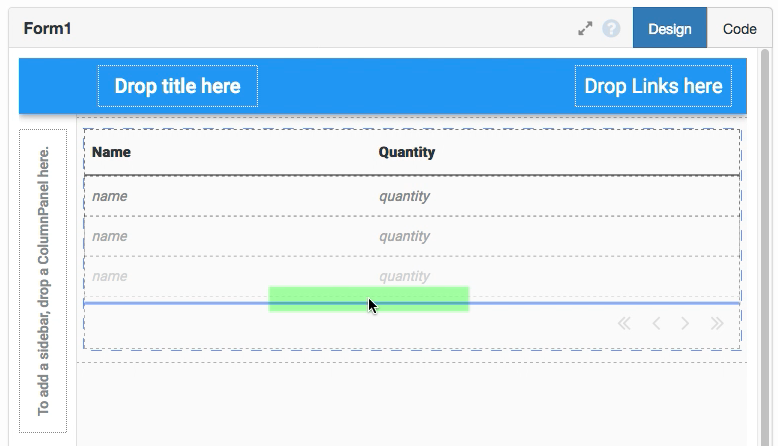
Add a Data Row Panel to the bottom of the Data Grid
Drop a TextBox into each of the Name and Quantity columns. Rename them text_box_name and text_box_quantity. Set the Quantity TextBox’s type to number.

Add TextBoxes for the new item’s name and quantity
Drop a Button into the last column. Rename it button_add. Set the Button’s text to ADD and its role to primary-color.
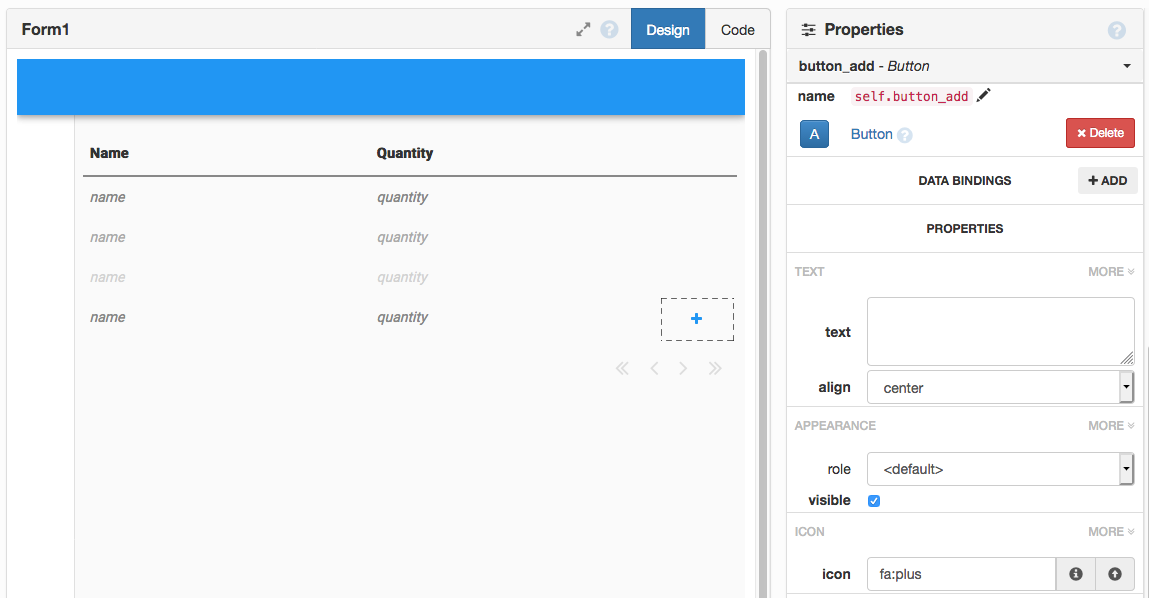
Add an ADD button to submit new items
Create a click handler by clicking the on click event button :
Create a click event handler for the add button
  @handle("button_add", "click")
  def add_btn_click(self, **event_args):
    anvil.server.call('insert_item', self.text_box_name.text, self.text_box_quantity.text)
    self.text_box_name.text = ""
    self.text_box_quantity.text = ""
    self.refresh()
Now you can add items to your database from your web app!

Adding a new inventory item from the web app
Step 4: Write a function to update items
Next, we’ll update rows in the external database from the web app.
We need to write another function in our Server Module - this time we’ll do an UPDATE:
@anvil.server.callable
def update_item(item_id, name, quantity):
  query = "UPDATE inventory SET name = %s, quantity = %s WHERE id = %s;"
  with db_connection() as conn:
    cur = conn.cursor()
    cur.execute(query, [name, quantity, item_id])
conn.commit()Step 5: Add TextBoxes to the Data Grid
Now back to the Anvil Editor. We’ll modify each line of the table to contain input components so the user can change the items that already exist.
Double-click on the Repeating Panel in your Data Grid and drop TextBoxes into the Quantity and Name columns.
Call them text_box_name and text_box_quantity respectively.
Set the Quantity TextBox to be type number.
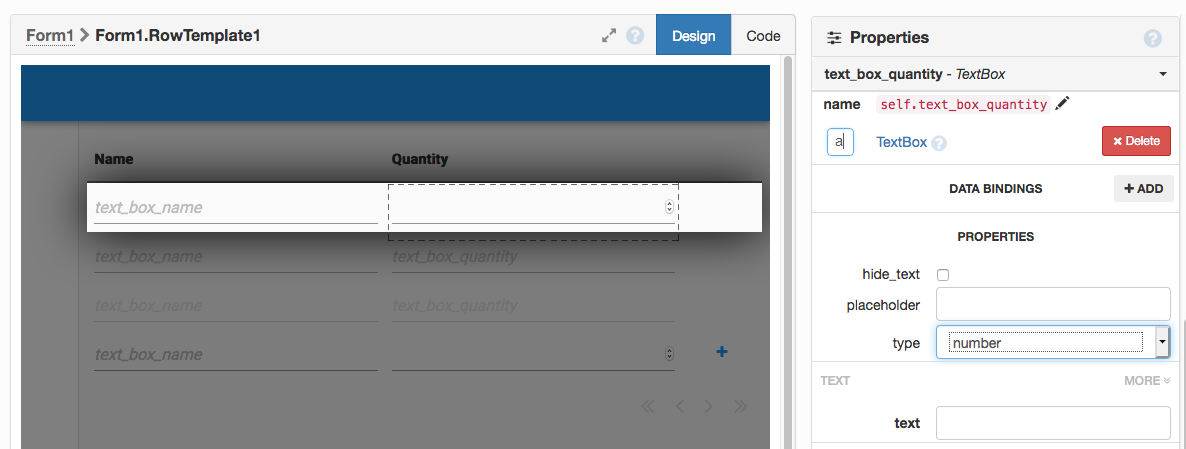
Add editable TextBoxes to each row for updating existing items
These TextBoxes are going to display the values we read from the database when we refresh. We can access the values for each row from the self.item property.
For each TextBox, set up a Data Binding on its text property by clicking the link icon next to text in the Properties Panel. Set text_box_name’s text to self.item['name'] and text_box_quantity’s text to self.item['quantity']. This will populate each TextBox with the name and quantity values from the database when the table is fetched.
Make sure to click on the icon to activate data binding writeback. This ensures that when the user edits a TextBox, self.item is automatically updated to reflect the new value.

Data Binding for name TextBox
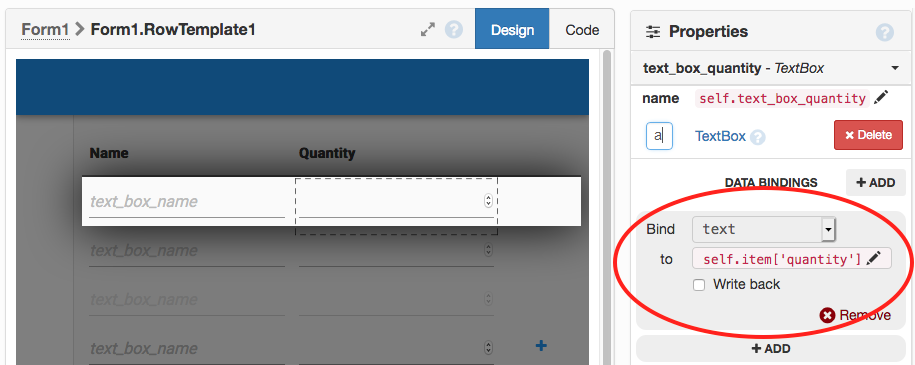
Data Binding for quantity TextBox
Step 6: Set up update event handler
Now go to the Code view for RowTemplate1.
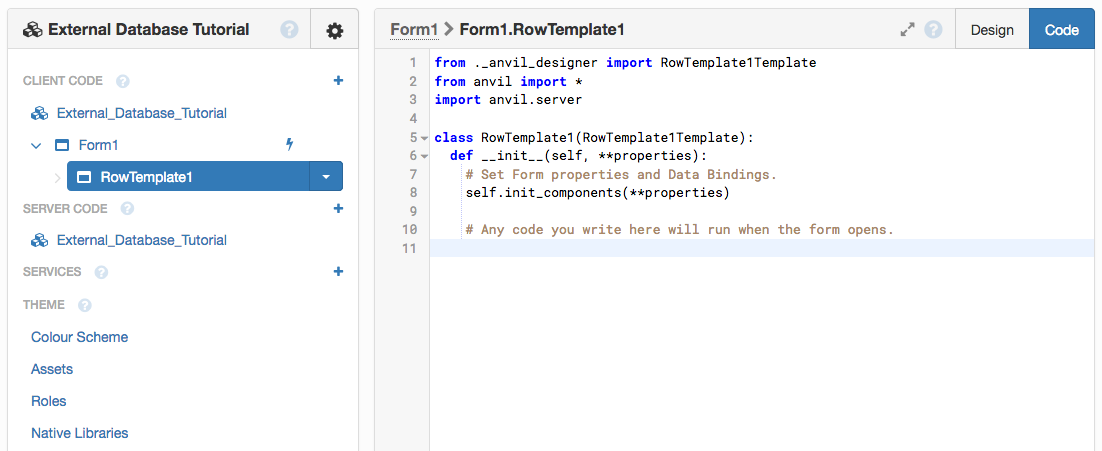
Go to the Code View for RowTemplate1
We need this row to tell Form1 when an item has been edited. Instead of calling the server directly from RowTemplate1, we’ll raise a custom event x-update-item that Form1 can listen for. This keeps all the server calls in one place, which is a good practice when building CRUD apps and easier to maintain as your app grows.
Write a method that raises this event, passing self.item along with it so Form1 knows which item was edited:
@handle('text_box_name', 'pressed_enter')
@handle('text_box_quantity', 'pressed_enter')
def update_item(self, **event_args):
# Pass the item as an argument to the event handler
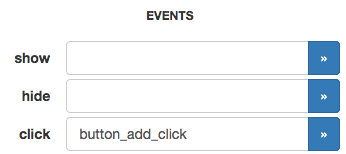
self.parent.raise_event("x-update-item", item=self.item)Bind this method to the pressed_enter of each TextBox so that every time the Enter key on a TextBox is pressed, the update_item method is called:
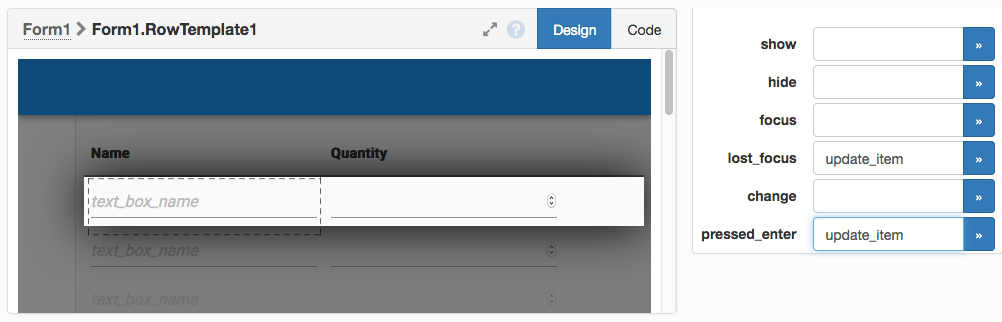
Bind the update_item method to the pressed_enter events by entering the method name in the boxes
Then, in our Form code, add another event handler for the x-update-item event:
  def __init__(self, **properties):
    # ...Existing code...
    self.repeating_panel_1.add_event_handler('x-update-item', self.update_item)
We’ll also create a method to call the update_item server function from Form1.
  def update_item(self, item, **event_args):
    anvil.server.call('update_item', item['id'], item['name'], item['quantity'])
    self.refresh()
Now run your app. You’ll find your table is full of TextBoxes that update the database every time they are modified.

Updating the database from the web app.
Step 7: Write a function to delete items
To delete items, we’ll add one more function to our Server Module:
@anvil.server.callable
def delete_item(item_id):
  query = "DELETE from inventory WHERE id = %s;"
  with db_connection() as conn:
    cur = conn.cursor()
    cur.execute(query, [item_id])
conn.commit()Step 8: Build the UI to delete items
Return to the Design View of Form1 and double-click on the RepeatingPanel inside the Data Grid.
Drag-and-drop a FlowPanel into the last column.
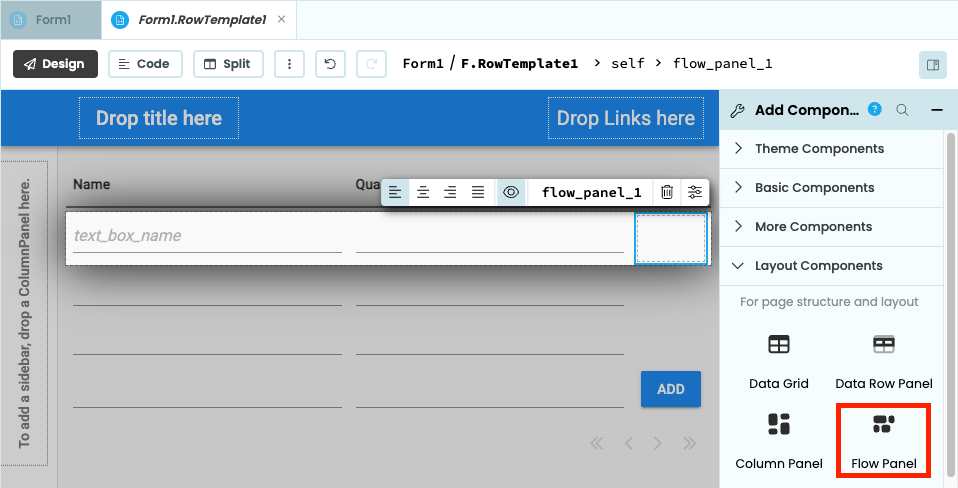
Adding a flow panel to the last column of our Data Grid.
Then, drag a Button into the FlowPanel. This will be the delete button for each item. Rename it button_delete. Clear the Button’s text, set its icon to fa:trash and the foreground colour to red.
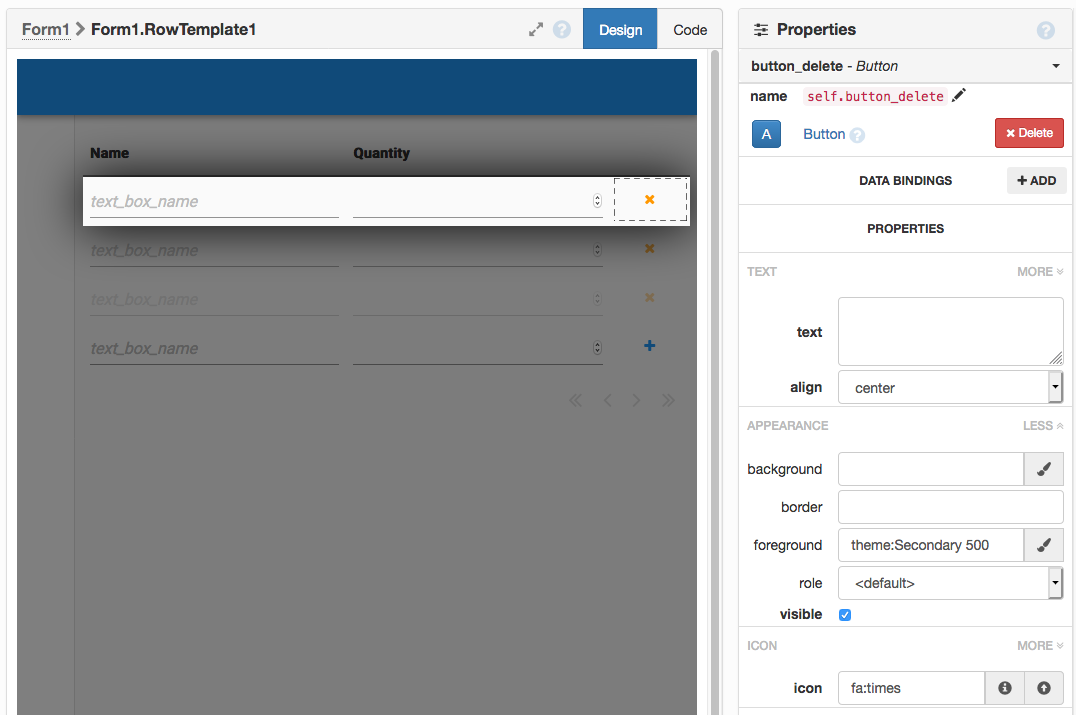
Adding a delete button to the last column of our Data Grid.
Now create a click event handler for your new delete button by clicking the on click event button:
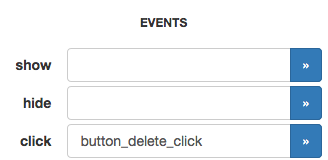
Create a click event handler for the delete button
In your RowTemplate1 code, add the following method:
  @handle("button_delete", "click")
  def button_delete_click(self, **event_args):
    self.parent.raise_event("x-delete-item", item=self.item)
Then, in your Form1 code:
  def __init__(self, **properties):
    # ...Existing code...
    self.repeating_panel_1.add_event_handler('x-delete-item', self.delete_item)

  def delete_item(self, item, **event_args):
    # Add a delete confirmation modal to prevent accidental deletions
    if confirm("Are you sure you want to delete this item?"):
      anvil.server.call('delete_item', item['id'])
      self.refresh()
Run your app - you can now delete items from your external database using your web app.

Deleting and re-adding an item in the database.
Nice work! You’ve connected your Anvil app to an external Postgres database and built a full CRUD interface to add, edit and delete items in that database.
View the finished app here:
New to Anvil?
If you’re new here, welcome! Anvil is a platform for building full-stack web apps with nothing but Python. No need to wrestle with JS, HTML, CSS, Python, SQL and all their frameworks – just build it all in Python.
Yes – Python that runs in the browser. Python that runs on the server. Python that builds your UI. A drag-and-drop UI editor. We even have a built-in Python database, in case you don’t have your own.
Build Database-Backed Apps
Build a Simple Feedback Form
Build a Simple Feedback Form
Build a data-entry app, and learn the techniques fundamental to building any Anvil app. In this tutorial, you will:
- Build your User Interface
- Write client-side Python
- Write server-side Python
- Store data in a database
- Deploy your app