 By
By Build an expense approval system with Anvil
Anvil is a powerful and versatile tool for building full-stack web applications. With Anvil, you can quickly and easily create your UI and write Python code to control the front-end and back-end of your app. Creating apps with Anvil is fast and flexible, making it well-suited for building internal tools. This expense approval system app showcases some of the features that Anvil has on offer.
I built the app’s UI using Anvil’s drag-and-drop editor and writing front-end Python code. I also wrote the backend in Python, on a secure Server Module. This app also uses Anvil’s built-in database, user authentication and email sending. Take a look below at how I built this expense approval system, with only Python and Anvil.
The Expense Approval app
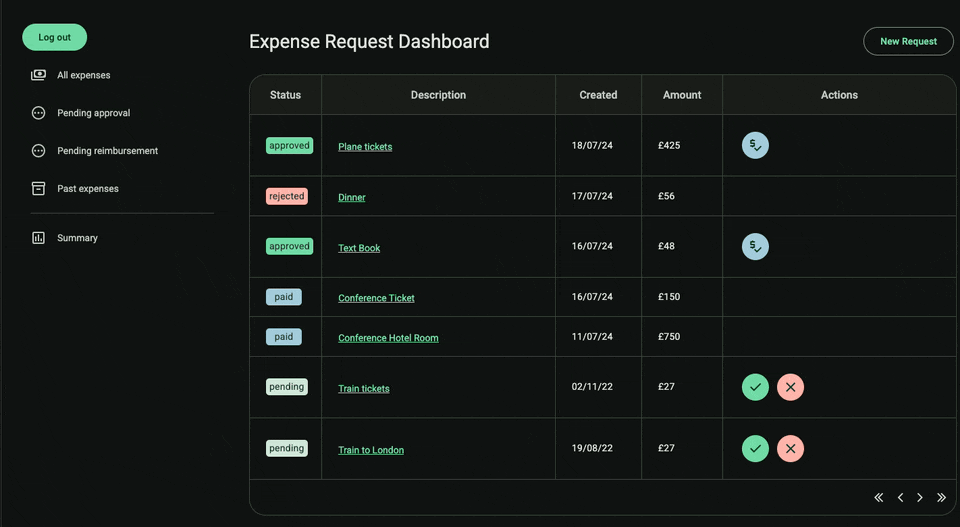
This app is a simple expense approval system, where users can submit expenses for an admin user to approve or reject. The main page is a view of the expenses, and users can add expenses by clicking on the + New Expense button, and filling out the pop-up form that it triggers. Clicking on the expense description brings out a detailed view of the expense.

Adding a new expense and viewing it.
An admin will be able to see all expenses and reject, approve and reimburse them, whereas a regular user will only have access to their own submissions
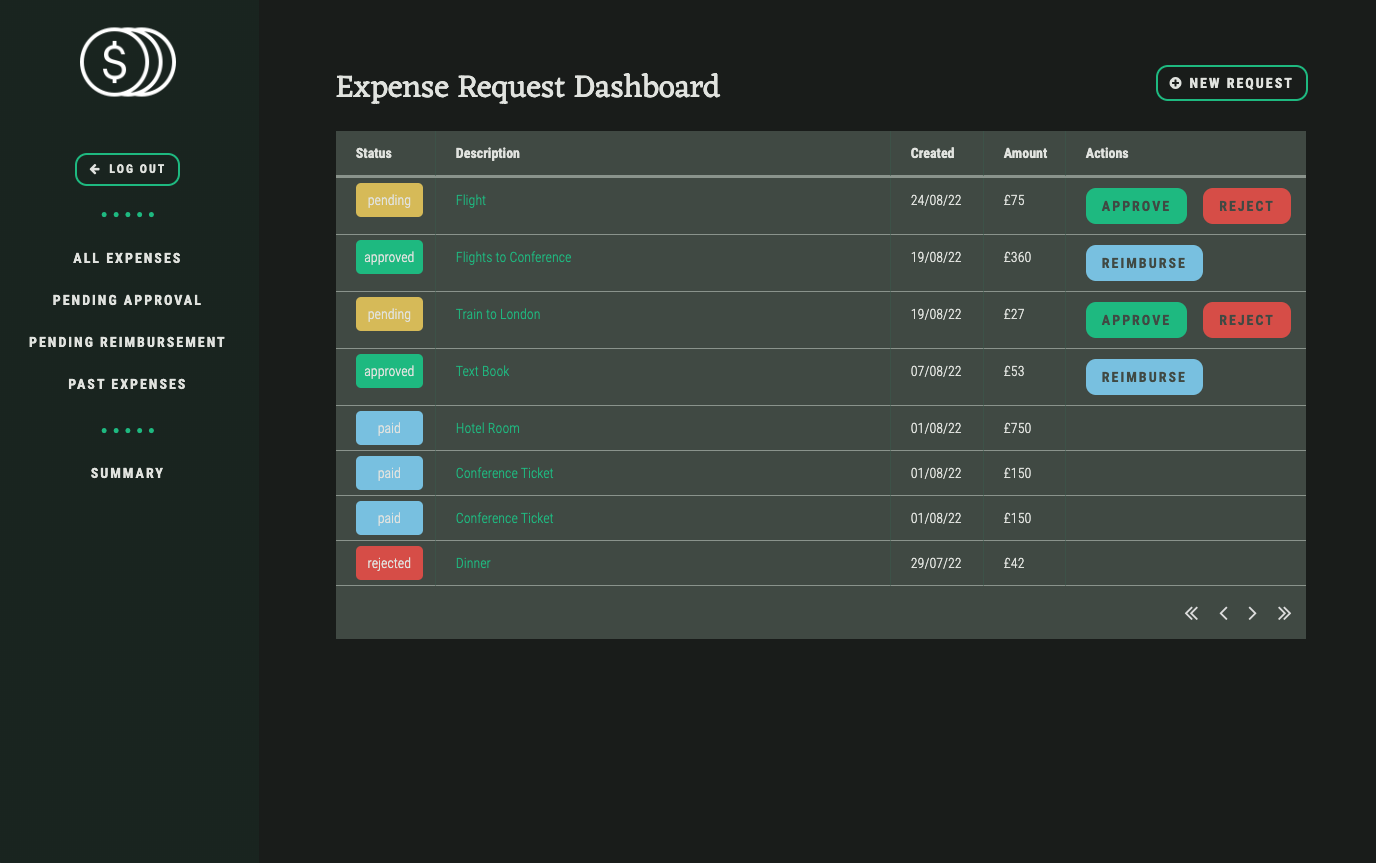
The admin view.
Whenever an admin takes action on an expense, the user that submitted it receives an email notifying them of the change. Finally, admins also have access to a dashboard summary of the expenses, with visualisations, which they can download as a PDF.
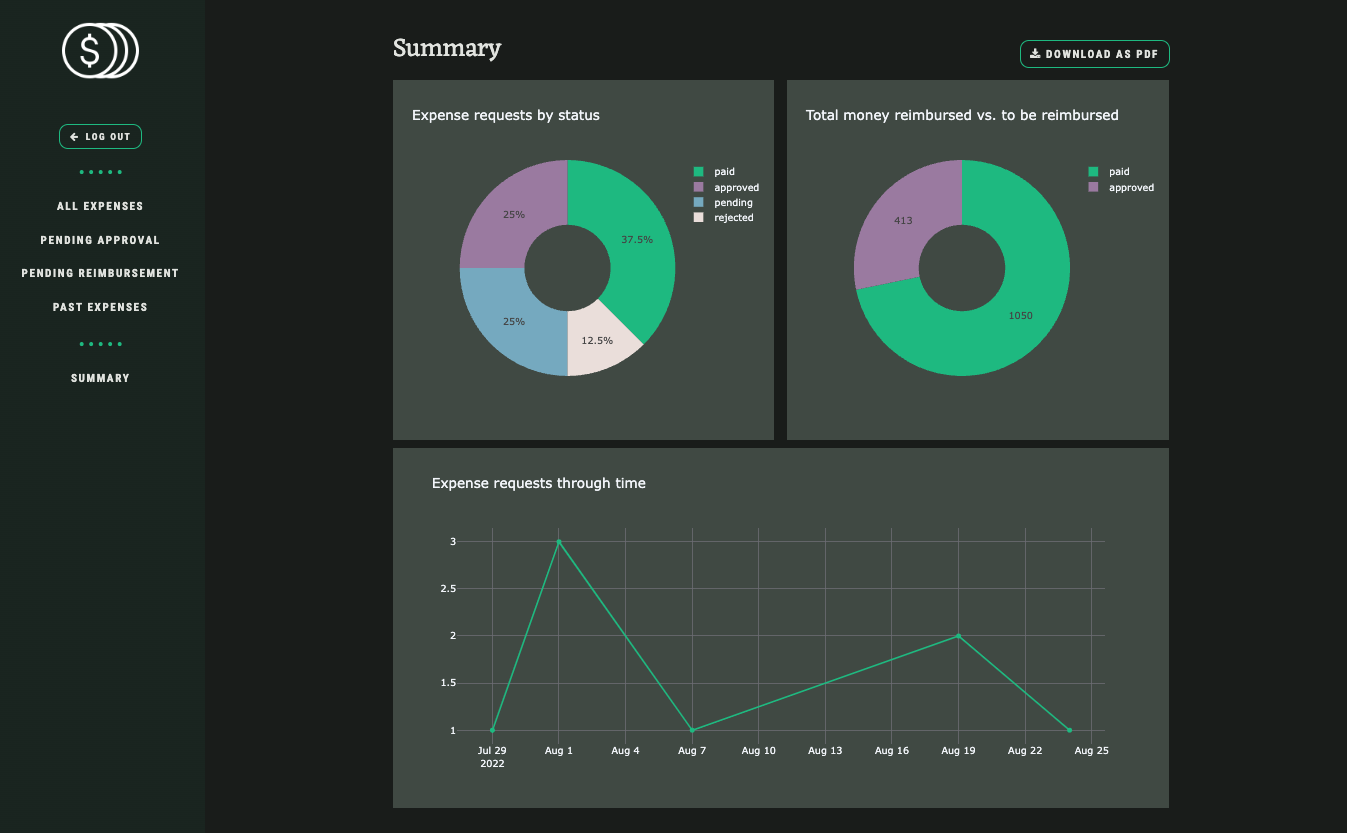
A summary page with data visualisations.
How it’s built
Creating the UI
Anvil makes it simple to create a UI. You can use drag-and-drop components and then write Python to make them interact with each other. For example, I used a Data Grid to display the expenses in my app.
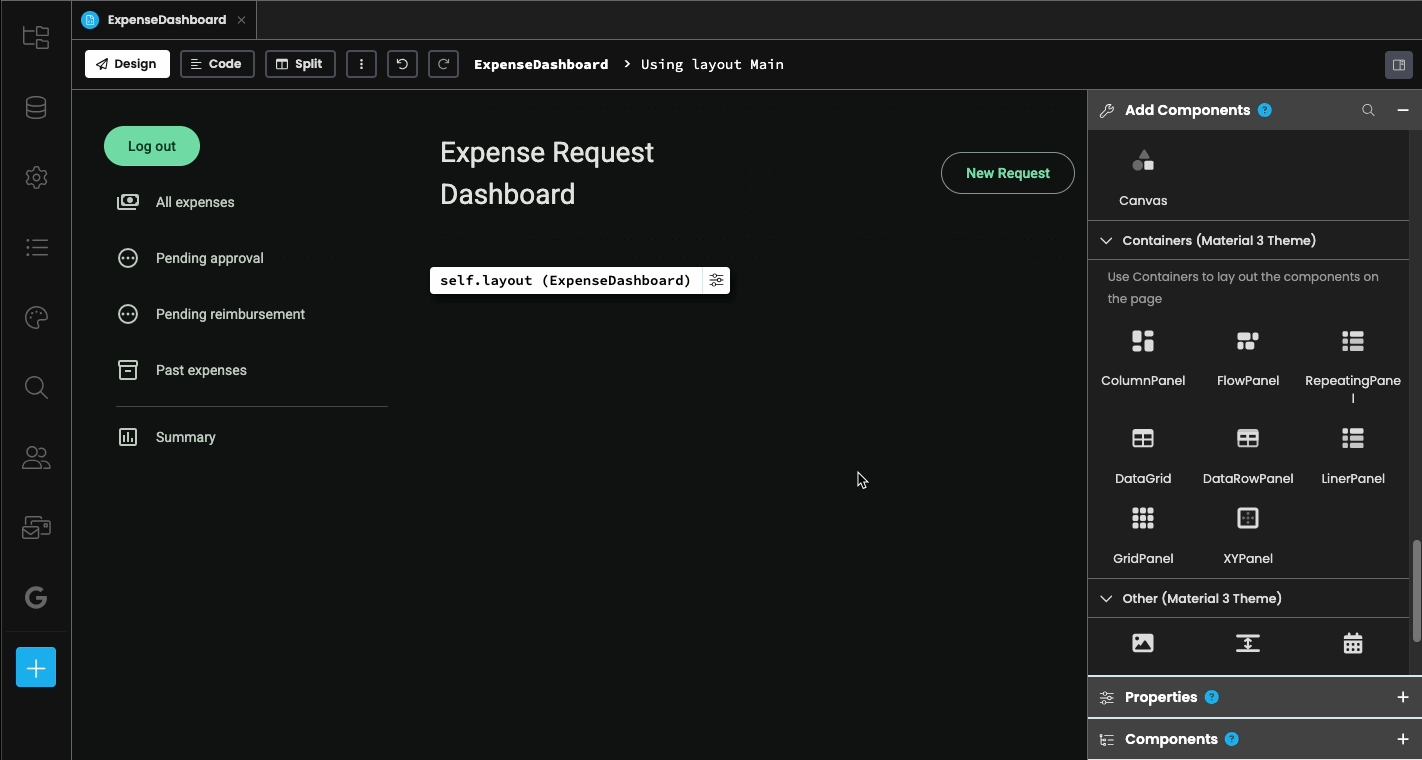
Dragging-and-dropping a Data Grid component from the Toolbox onto the ExpenseDashboard Form
Once the layout is set, you can make your components interact with each other by writing your browser code, all in Python. The function below, which runs whenever we change to the Pending Approval view, is running entirely in the browser without making any round trips to the server.
def pendingappr_btn_click(self, **event_args):
# When pendingappr_btn is clicked, the page contents are changed
    self.content_panel.clear()
    self.content_panel.add_component(ExpenseDashboard(status='pending'))
User Management
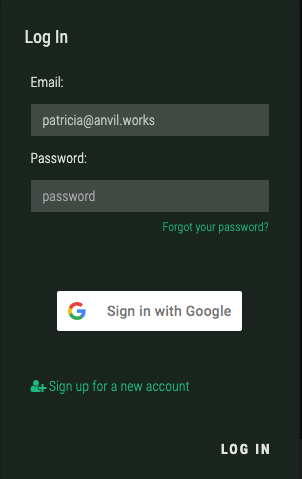
Anvil has a built-in Users Service, which handles signup, login and user permissions, as well as supporting corporate single-sign-on, two-factor authentication, and more. I simply added the Users Service to my app and chose the authentication methods I wanted to use - Email + Password and Google sign-in. I then added anvil.users.login_with_form() to my client side to display a login form on startup.
With Anvil, it’s also very simple to restrict functionalities based on user roles. For example, I wanted certain components to be visible and enabled only if the logged in user is an admin, and I was able to implement this with only a couple lines of code:
if State.user['role'] == 'admin':
    self.summary_btn.visible = True
    self.summary_btn.enabled = True
Interacting with Data Tables
Anvil has a built-in database system built on top of PostgreSQL, with a GUI for creating, editing and deleting tables. This makes it simple to define your schema. By default, Data Tables are only accessible from the server side.
I defined a model class to enhance interactions with our User Data Table. Model Classes let you extend Data Table Row objects, adding custom behaviors to them, like validation.
Data Table Row objects extended by a model class are given a _do_create method. This method handles the act of creating a new row in the Data Table. Therefore, by overriding this method, we can add various permission checks before the row is created.
When a new expense row is to be created, we make sure:
- The user is logged in
- The logged-in user is an administrator
Should either of these checks fail, we do not proceed with creating a new User row, thereby protect the integrity of the table.
@classmethod
  def _do_create(cls, buffer, from_client):
    u = anvil.users.get_user()
    if not u:
      raise Exception("Must be logged in to create an expense")

    submitted_by = buffer.get("submitted_by", u)
    if submitted_by != u and not u.is_admin():
      raise Exception("Non-admins cannot create expenses for other people")

    return super()._do_create(buffer, from_client)
Email service and background tasks
Anvil makes it easy to send and receive emails from your app with a few lines of Python using the built-in email service. I wanted to notify users via email of a status change in their expense request, so first I wrote a server function to do just that:
@anvil.server.background_task
def send_email(user, message):
  anvil.email.send(to=user, from_name="Expenses App", subject="Your expense has been updated", html=message)
The @anvil.server.background_task decorator indicates that this task can be run in the background. Background Tasks allow you to fire off a function to run in the background, leaving your main program to continue executing while the function is running.
With this, I could launch my background task every time an expense’s status is changed, without blocking the control flow of my app, by adding anvil.server.launch_background_task to the update_status method of my model class, which is called whenever an expense is approved or rejected.
@server_method(require_user=User.is_admin)
  def update_status(self, status):
    old_status = self.status
    user = self.submitted_by.email
    message = f"<p>Hi, {user},</p><p>The status of your expense ('{self.description}') changed from <b>{old_status}</b> to <b>{status}</b>.</p><p>Visit the <a href={anvil.server.get_app_origin()}>app</a> to learn more details.</p>"
    self.status = status
    anvil.server.launch_background_task('send_email', user=user, message=message)
Data Visualisations and PDF rendering
Anvil comes with a built in Plotly integration, so you can import, process and visualize data, all within Anvil, using Python. Because they’re Plotly plots under the hood, Anvil’s plots are interactive — you can move the mouse over a plot to see the available tools.
I decided to plot some data from the app’s database, so I first created some functions on the server to get the data into shape, like in the example below:
@anvil.server.callable(require_user=User.is_admin)
def get_status_data():
  status_data = [x['status'] for x in app_tables.expenses.search()]
  labels = list(set(status_data))
  values = []
  for l in labels:
    values.append(status_data.count(l))
  return labels, values
Then, I just fed it into one of my plots from my Summary Form:
labels, values = anvil.server.call('get_status_data')
self.plot_1.data = go.Pie(labels=labels, values=values, hole=.4)
self.plot_1.layout.title = "Expense requests by status"
I also decided to make the Form downloadable as a PDF. First, I rendered it into a PDF in a server function:
@anvil.server.callable(require_user=is_admin)
def create_summary_pdf():
  return anvil.pdf.render_form('Plots')
Then, I call this function from the client to download the file whenever the download button is clicked:
  def download_summ_btn_click(self, **event_args):
    """This method is called when the button is clicked"""
    media_object = anvil.server.call('create_summary_pdf')
    anvil.media.download(media_object)
Build your internal tools with Anvil
Anvil makes building powerful internal tools simple, straightforward and fast. You can use all your favourite Python libraries to build your code, and the drag-and-drop designer makes building UIs a breeze.
This expense approval system makes use of Anvil’s built-in database system, the easy-to-use user management service, the email service, and more. It’s powered by Python running in the browser, as well as on the server, meaning that it’s extremely customisable. Clone the app to check out the source code and play with it yourself!
Want to learn more? You can start by reading some of our tutorials:
Build Database-Backed Apps
Build a Simple Feedback Form
Build a data-entry app, and learn the techniques fundamental to building any Anvil app. In this tutorial, you will:
- Build your User Interface
- Write client-side Python
- Write server-side Python
- Store data in a database
- Deploy your app