 By
By Display a Message on your Rainbow HAT from the Web
The Raspberry Pi is awesome – with just a little Python code, you can make this tiny computer flash lights, sound buzzers, or control industrial processes. But it’s also really easy to control it from a website, and I’m going to show you how.
I’m going to show you how to write a program that controls Pimoroni’s excellent Rainbow HAT, from a web page – and we’ll only need Python to do it! We’re going to use Anvil to build a web app where you can enter a message, then display it on your Rainbow HAT’s 14-segment display. Here’s the app we’ll be building:
Loading video...
Ready? Here’s what we’re going to do:
- Build a Python web app to get the message, in Anvil
- Write a program to display our message, on the Pi
- Connect them up, so when you enter the message, it appears on your Rainbow HAT!
1. Build the web app
We’re going to build our web interface with Anvil. Anvil lets us design our page with a drag-and-drop designer, and run Python code when you use it.
Sign up for a free account, then create a new app. (Choose the Material Design theme.)
(Note: If you have a Raspberry Pi 4 or later, you can use the Anvil editor smoothly from the Pi. If you have an older Pi, we suggest you do this part from an ordinary computer.)
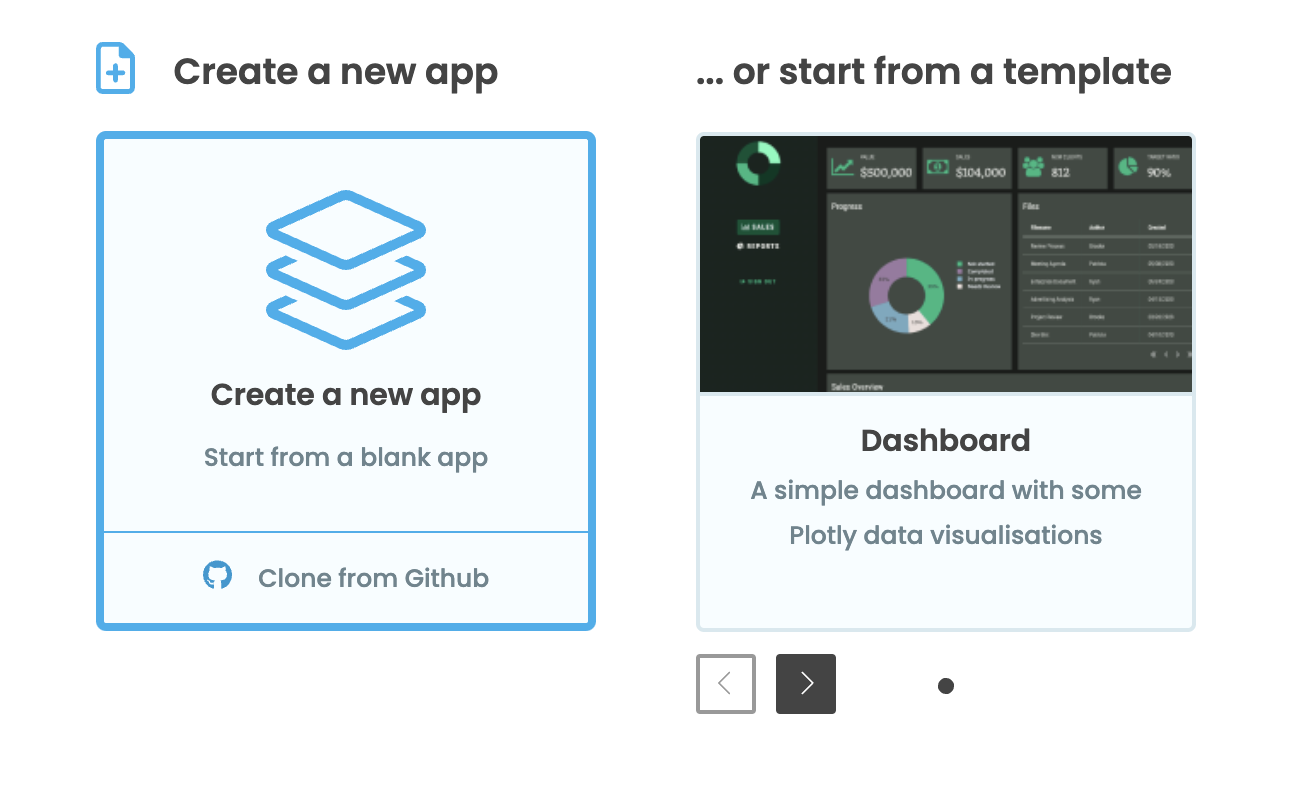
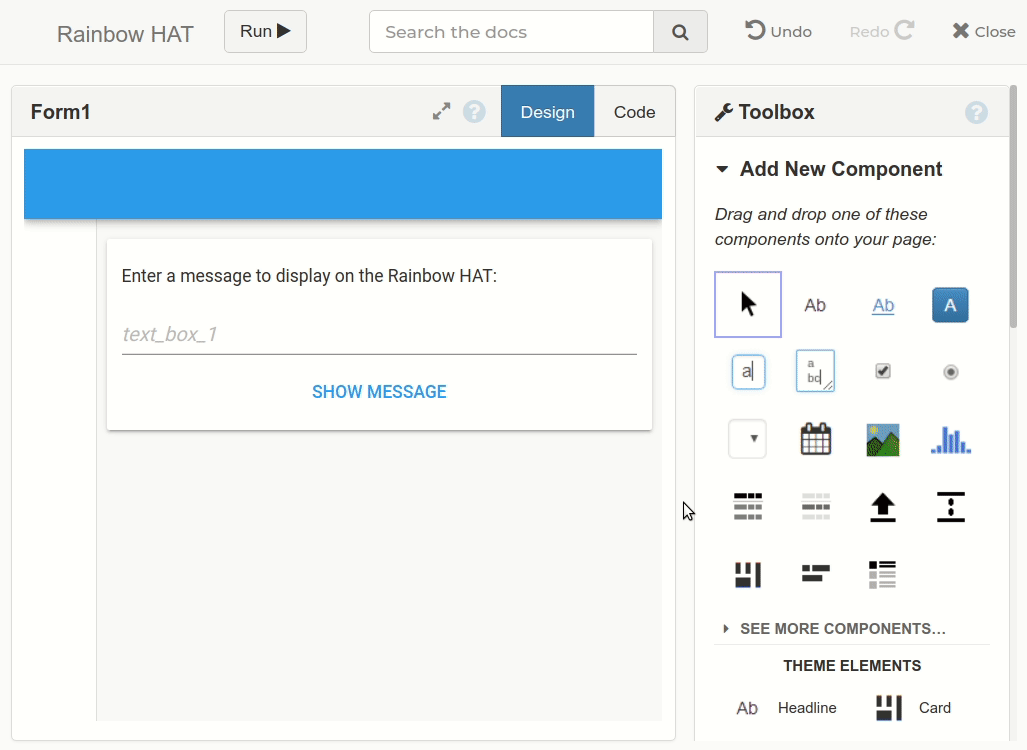
Creating a new app
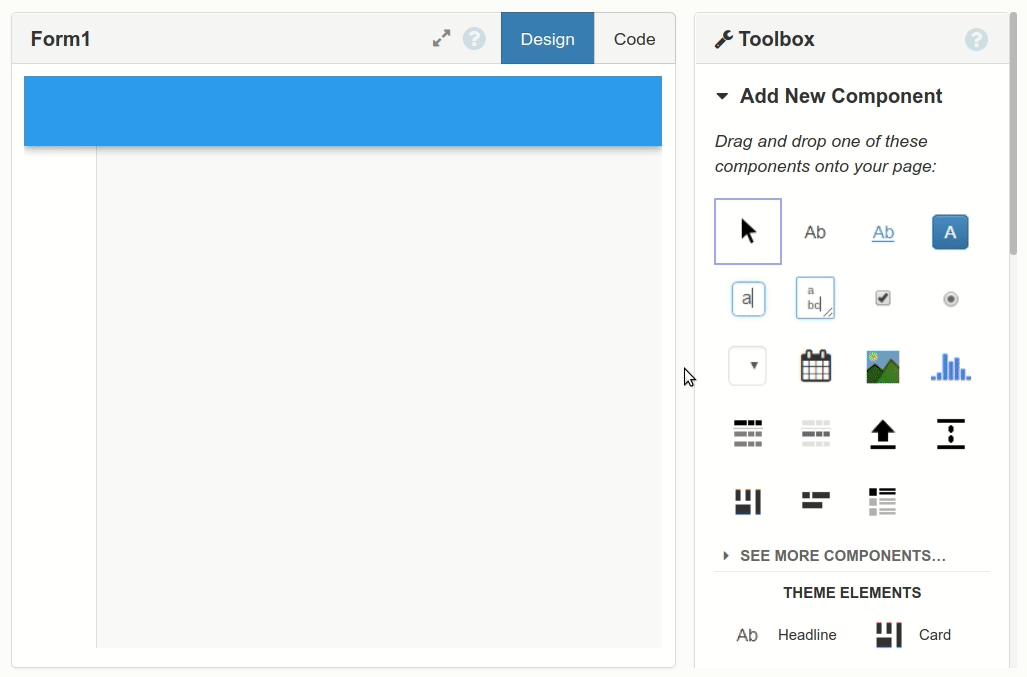
Now we can design our page! We do this by dragging components from the Toolbox onto our page.
Let’s start by dropping a Card  into our page – card components provide neat containers for other components.
Then let’s put a TextBox ![]() inside that card, so we can enter a message, and a Button
inside that card, so we can enter a message, and a Button ![]() to click when it’s ready to display. We can use the Properties window to set the text on the Button:
to click when it’s ready to display. We can use the Properties window to set the text on the Button:
Note: This guide includes screenshots of the Classic Editor. Since we created this guide, we've released the new Anvil Editor, which is more powerful and easier to use.
All the code in this guide will work, but the Anvil Editor will look a little different to the screenshots you see here!
Creating our user interface
Let’s add a Label ![]() , so we know what this app will do. We can set its
, so we know what this app will do. We can set its role to “Headline” to make it big:
Add a Label.
OK, it’s time to make this app do something! Double-click the Button, and write some Python code to pop up a message box when the button is clicked. Add this code to the button-click function:
alert("You clicked the button")Now you can run it and watch it work:
Add some code and run your app
Great - we now have a working web app! Time to fire up our Raspberry Pi, and make it respond to that web form.
2. Display a message on the Rainbow HAT
Setup
First, a bit of setup. You’ll need to install packages to link to Anvil and use the Rainbow HAT. Open a Terminal, and run these commands:
-
sudo pip3 install anvil-uplink– This installs the package we’ll need to talk to our web app -
curl https://get.pimoroni.com/rainbowhat | bash– If you haven’t set up your Rainbow HAT before, this will do everything you need. It might take a few minutes, and you’ll be prompted to enter “y” or “n” as it asks you to install things. You only need to do this once, so if you’ve already followed Pimoroni’s tutorial, you can skip this step. When you’re done with this step, reboot your Pi.
Write some code
Fire up Thonny (or your preferred Python editor), and write a function to display a string on the 14-segment displays:
import rainbowhat as rh

def show_text(text):
    rh.display.print_str(text)
    rh.display.show()

show_text("LOOK")
You should see the message appear on your Rainbow HAT:
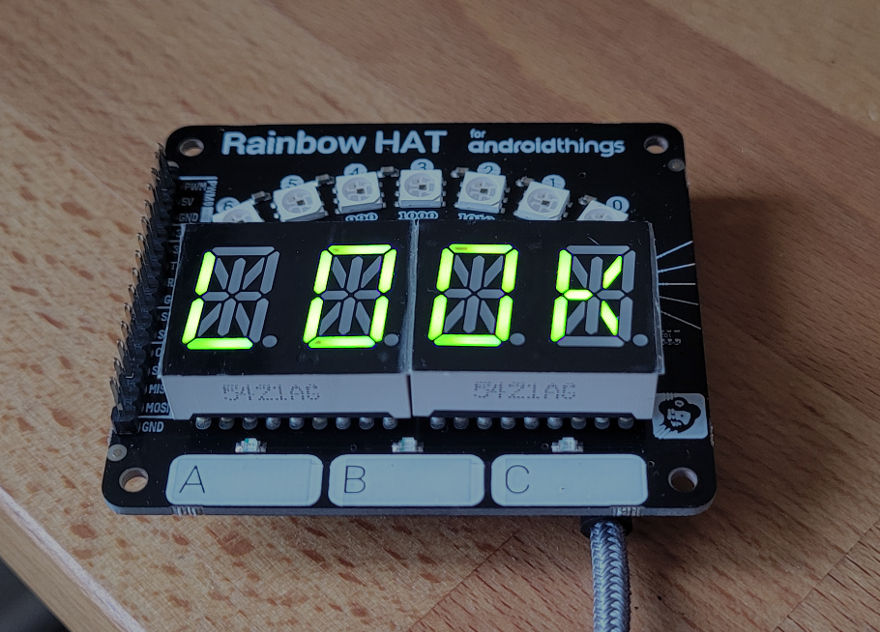
My Rainbow HAT, saying ‘LOOK’
If you’re using Thonny, you can now change the text from the Python console, by calling show_text() again! Try running:
show_text("MORE")OK, we’ve got a function to display text on our Rainbow HAT. Now let’s connect it up to our web app, so we can display messages from the web!
3. Control the Rainbow HAT from the Web
We’ve got Python code running in the web browser, and a Python function running on our Pi. Perhaps the web browser is on our Pi, perhaps it’s thousands of miles away, but we want it to call show_text() on our Pi. We’re going to use the Anvil Uplink, which lets us do exactly that.
Enable the Uplink
First, let’s go back to the Anvil Editor, and open up our app. Do this part on the Pi, even if you were using a normal computer before – we’ll need to copy-and-paste from here to your Python code. It will load a bit slower on older Pi models, but it will work!
To enable the Uplink, we open the gear menu and click “Uplink”:
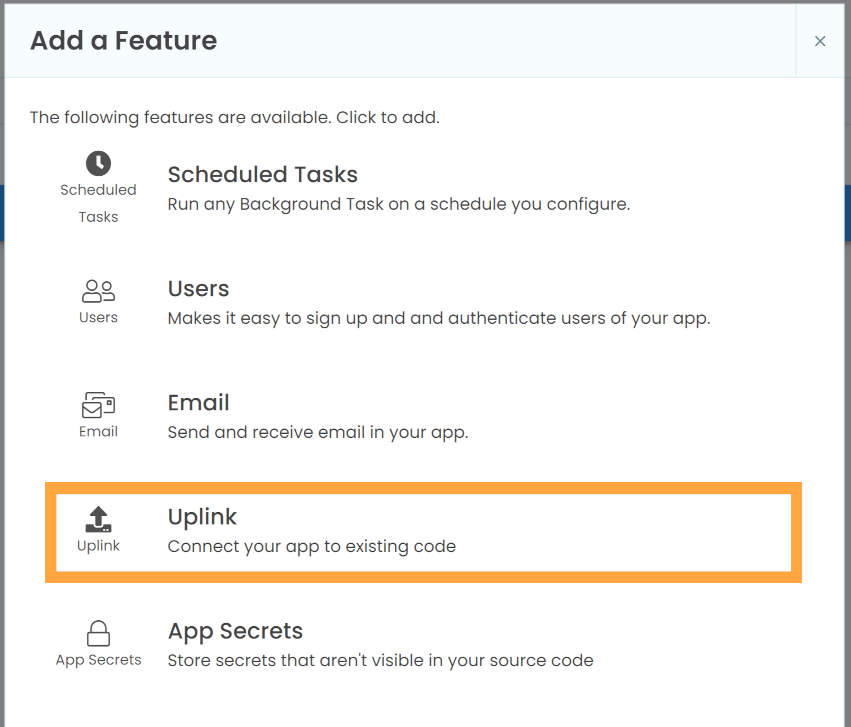
This will open the Uplink dialog. Click the green Enable button, and Anvil will generate an “Uplink key” – that’s a long string we can use to link the Python code on our Pi with this web app. Copy down this sample code from the Uplink dialog (yours will have a different key to mine).
Connect your Pi
Now paste it at the top of your Python code, before the show_text function. This will link your Python script with your Anvil app.
There’s just one more thing to do: Make it possible to call the show_text() function from the web. To do this, add @anvil.server.callable on the line before def show_text(...). Your final code will look something like this:
import rainbowhat as rh
# Pasted code:
import anvil.server

anvil.server.connect("YOUR-UPLINK-KEY-GOES-HERE")

# Added line:
@anvil.server.callable
def show_text(text):
    rh.display.print_str(text)
    rh.display.show()

show_text("LOOK")
Run this code in Thonny, and you’ll see output like:
Connecting to wss://anvil.works/uplink
Anvil websocket open
Connected to "Default environment (dev)" as SERVER
Call it from the web
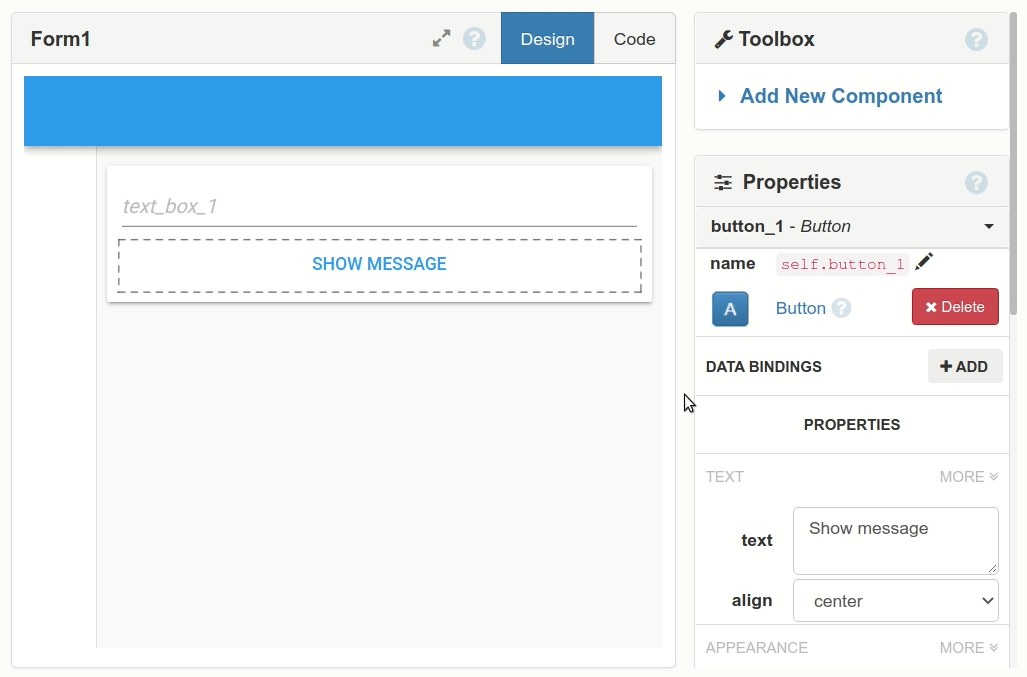
Final stage: We want to call that function from our web app! Open your app back up in the Anvil editor, and find the code that runs when you click the button. It should look something like:
  def button_1_click(self, **event_args):
    """This method is called when the button is clicked"""
    alert("You clicked the button")
Instead of popping up an alert box, we want it to call the show_text() function
Change it to say:
  def button_1_click(self, **event_args):
    anvil.server.call('show_text', self.text_box_1.text)
Here’s me, making that change in the Anvil editor:
Time to try it out
Now run your app again, enter something into the text box, and click the button! You’ll see it appear on your Rainbow HAT:
Loading video...
You’ve got a web page controlling your Raspberry Pi. How cool is that?
Share it with the world!
If you click Publish app from the top right for the Editor, you can get the URL for your app.

Now you can tell the world your URL – and anyone can enter a message to appear on your Rainbow HAT! Cool, huh?
Challenge yourself
The best way to learn is to try something new. Why not challenge yourself to reinforce what you’ve learnt and learn more?
1. Control the rainbow lights
The Rainbow HAT has a lot more than just the 14-segment displays! The Rainbow HAT tutorial can show you how to light up the bright multicoloured LEDs on the board too. Can you control them from the web?
HINT: You could create new functions to change the lights’ colour, make them @anvil.server.callable, then add new buttons to your web app that call those functions.
2. Record button presses
You can run code when you touch any of the touch pads (labelled A, B and C at the bottom of the HAT). Can you record the times when they were touched into a Data Table?
HINT: Search “touch pads” in the the Rainbow HAT tutorial to see how to trigger function calls when they’re pressed. You can use Data Table functions like app_tables.my_table.add_row() from Uplink code, so you can write directly into your Anvil database from your Pi!
Learn More
If you’re new here, welcome! Anvil is a platform for building full-stack web apps with nothing but Python. No need to wrestle with JS, HTML, CSS, Python, SQL and all their frameworks – just build it all in Python.
You can learn more about the Uplink from the Anvil docs
Come and show us what you’ve made on the Anvil forum!
Get Started with Anvil
Nothing but Python required!
Build a news aggregator
Seven ways to plot data in Python
Python is the language of Data Science, and there are many plotting libraries out there.
Which should you choose?
In this guide, we introduce and explain the best-known Python plotting libraries, with a detailed article on each one.
I Built Calendly in 3 Hours
Generate PDFs with Python