 By
By Integrating Javascript libraries into your Anvil app
Let’s say you’ve found a cool JavaScript library that you want to use in your project. In Anvil, you can access any JavaScript library directly from Python, so you can easily integrate it into your app.
In this tutorial we’ll see how to add a Javascript library to an Anvil app. We’ll use the Croppie library to allow the user to crop an uploaded image and anvil.js to access Javascript from Python.
These are the steps we’ll cover:
- Build the user interface
- Add the Croppie library
- Initialize the Croppie library
- Extract the cropped image
Let’s get started!
Step 1 - Build the user interface
Start with a new Anvil app with a Material 3 theme.
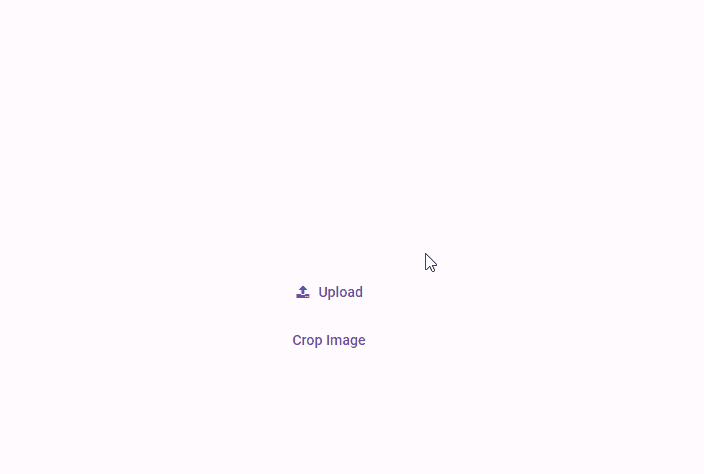
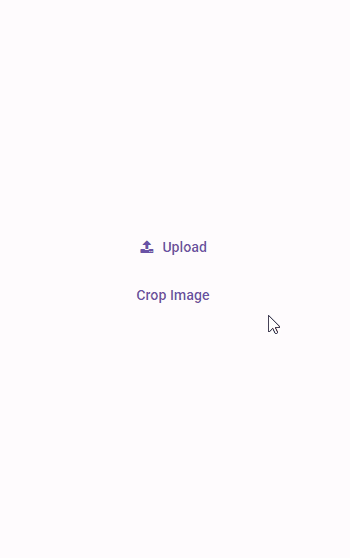
On your main Form, add an Image, a FileLoader, a Button, and another Image. Name the Button crop_image and set its text property to Crop Image. Name the second Image cropped_image.
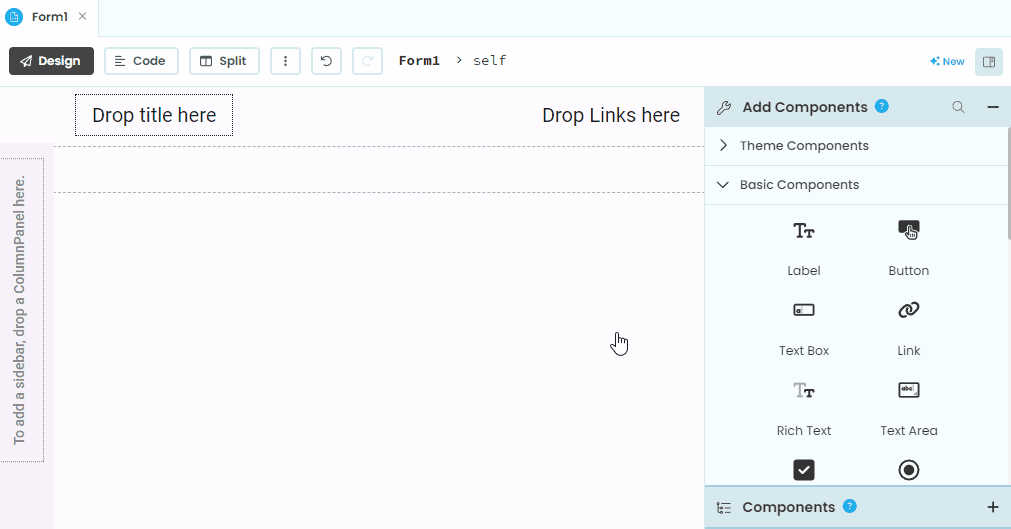
Now, use the Object Palette for the FileLoader to add a change event handler. This function will be run whenever the user selects a file. In that function, add the following code to display an image uploaded to the FileLoader into the first Image component.
    def file_loader_1_change(self, file, **event_args):
        self.image_1.source = self.file_loader_1.file
You can now run the app and choose which file gets displayed in the Image component (Photo by Alexander London on Unsplash):
Step 2 - Add the Croppie library
Now, let’s add the Croppie library to our Anvil app. We’re going to link to files hosted in JSDELIVR, a popular Content Delivery Network for Javascript libraries.
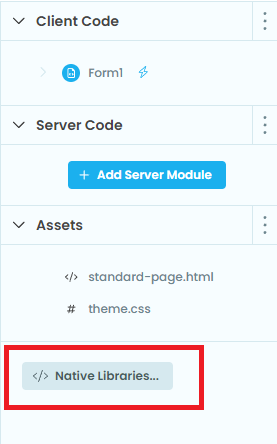
Go to the Native Libraries section in your app. Native Libraries is where you put the script tags for loading Javascript libraries.
According to the Croppie documentation, we need to include both the Croppie Javascript and CSS file. Go to JSDELIVR and search for Croppie. The first result will take you to the JSDELIVR page for Croppie. On that page you’ll see this box:
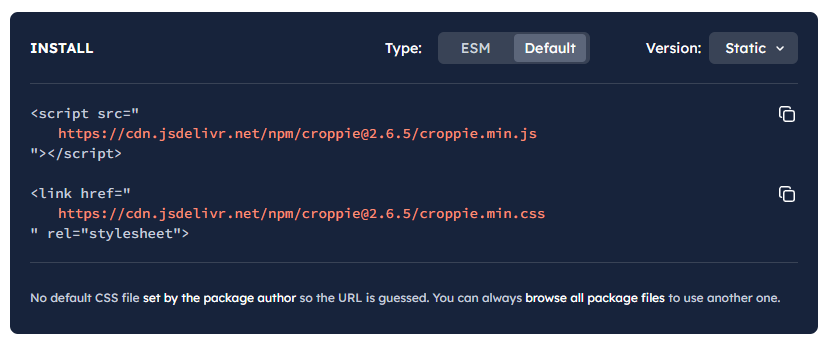
The default options of Default and Static are fine for us. Note that the .min in the name means we’re getting minified versions of the files. Minified files are not really human readable but take up less space than the readable versions, so they are typically what you want to use if you’re not going to edit or debug into the library code.
Click the copy icon to the right of the JavaScript file and paste it into your app’s Native Libraries section, then repeat the process for the CSS file. You’ll end up with something like this:
<link rel="stylesheet" href="https://cdn.jsdelivr.net/npm/croppie@2.6.5/croppie.min.css">
<script src="https://cdn.jsdelivr.net/npm/croppie@2.6.5/croppie.min.js"></script>
The library is now available to use in your Anvil app.
Step 3 - Initialize the Croppie library
We still need to actually use the library. Many Javascript libraries are initialized with an HTML element to use. Croppie, in particular, needs an image or canvas element. The Croppie quickstart shows this code to initialize the library:
var c = new Croppie(document.getElementById('item'), opts);The first argument is the DOM (Document Object Model) node to use. The DOM is how web pages are structured by the browser; each element on the page has a node in the DOM. The second argument is a dictionary of options for the library. Through the options dictionary we can enable, disable, and configure features of the library. We’ll deal with the options shortly. For now we need an image element to pass as the first argument.
We now have to initialize Croppie in a similar way but using Python instead of Javascript, using anvil.js. At the top of the Form, we need to import both anvil.js and the Croppie object from the Native Libraries. When the Croppie library loads, it adds a Croppie object to the javascript window namespace, so we can use anvil.js.window to access Croppie:
import anvil.js
from anvil.js.window import Croppie
Now, go back to the file_loader_1_change function. In there, we want to initialize Croppie and pass in the DOM node of the image we want to crop. We can use anvil.js.get_dom_node to get the DOM node for a specific Anvil component. In our case, we’ll get the DOM node for the self.image_1 component and pass that to Croppie.
    def file_loader_1_change(self, file, **event_args):
        self.image_1.source = self.file_loader_1.file

        image = anvil.js.get_dom_node(self.image_1)
        image = image.querySelector('img')
        self.croppie = Croppie(image)
What does the image.querySelector('img') line do? While js.get_dom_node will return the right HTML element for most Anvil components, some components are wrapped in an enclosing div tag. The Image component is one of those. The DOM node we get back from anvil.js.get_dom_node is the div that surrounds the actual img element. Croppie needs the actual image element, so we drill down to get that.
anvil.js.get_dom_node will return. You can read more about using developer tools in this tutorial.We still need to pass options to configure the library. The Croppie page shows this code in their vanilla Javascript example:
var vanilla = new Croppie(el, {
    viewport: { width: 100, height: 100 },
    boundary: { width: 300, height: 300 },
    showZoomer: false,
    enableOrientation: true
});
Croppie expects the second parameter to be a Javascript object full of options. We must convert the Javascript object to a Python dictionary by making the keys strings, and using Python True and False.
Modify the initialization of the library like this:
def file_loader_1_change(self, file, **event_args):
self.image_1.source = self.file_loader_1.file
options = {
'viewport': { 'width': 100, 'height': 100 },
'boundary': { 'width': 300, 'height': 300 },
'showZoomer': False,
'enableOrientation': True
}
image = anvil.js.get_dom_node(self.image_1)
image = image.querySelector('img')
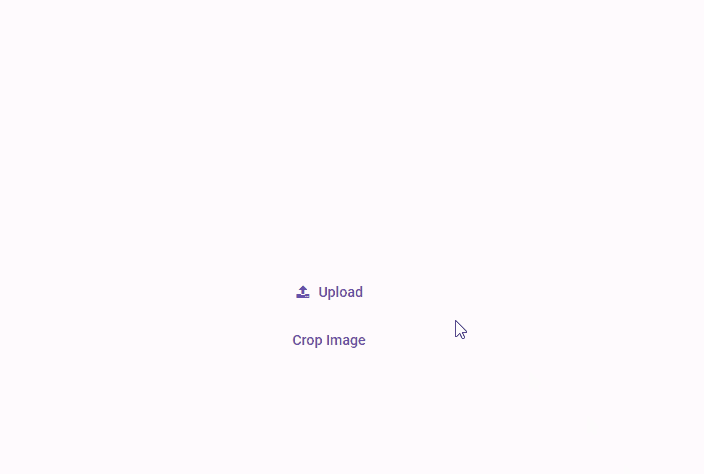
self.croppie = Croppie(image, options) Now run the app and choose an image to see the library in action:
Step 4 - Extract the cropped image
Our library is working! Now, we need to extract the cropped image that we’re going to use. Croppie provides a result function we can use to get the cropped image.
Use the Object Palette for the crop_image Button to add a click event handler. In that function use this code to extract the cropped image:
    def crop_image_click(self, **event_args):
        if self.croppie:
            result = self.croppie.result("blob")
            result = anvil.js.to_media(result)
First we ask Croppie to give us the cropped image in a blob format. That’s the binary format of the image. Then we ask Anvil to convert that into a Media object for us, using anvil.js.to_media().
Now, we can take that Media object and display it in another image component. Modify the Button click handler to display the cropped image in the cropped_image Image:
    def crop_image_click(self, **event_args):
        if self.croppie:
            result = self.croppie.result("blob")
            result = anvil.js.to_media(result)
            self.cropped_image.source = result
Run the app and crop an image to see it in action:
When the Above Doesn’t Work
Unfortunately, the Javascript ecosystem has evolved to be a bit of a mess. The approach described previously works for older libraries that are designed to be used only in a browser. There are other environments where libraries are designed to work (e.g. a framework like React), along with other ways of importing libraries in the browser (e.g. ESM style libraries).
There’s no one-size-fits-all solution to importing and using every Javascript library and you may need to experiment. The Anvil docs on importing ESM style Javascript contain more information on techniques to use.
Note that not all Javascript libraries will work in the browser, no matter what approach you use. The Anvil forum is a great place to get advice about integrating problematic Javascript libraries.
You now have the tools to integrate Javascript libraries into your Anvil app to give it that extra edge, all while writing entirely in Python.
Clone the App
For those of you who want to see the source code for this app:
What next?
Head to the Anvil Learning Centre for more tutorials, or head to our examples page to see how to build some complex apps in Anvil.