Chapter 4:
Write client-side Python
We want to store information in our Data Table when users click the ‘Submit’ button. This means calling the add_feedback server function when our users click the submit_feedback Button.
We’ll use Events for this.
Step 1: Set up an event handler
Anvil components can raise events. For example, when a Button is clicked, it raises the ‘click’ event.
Click on ‘Form1’ in the App Browser to go back to your UI.
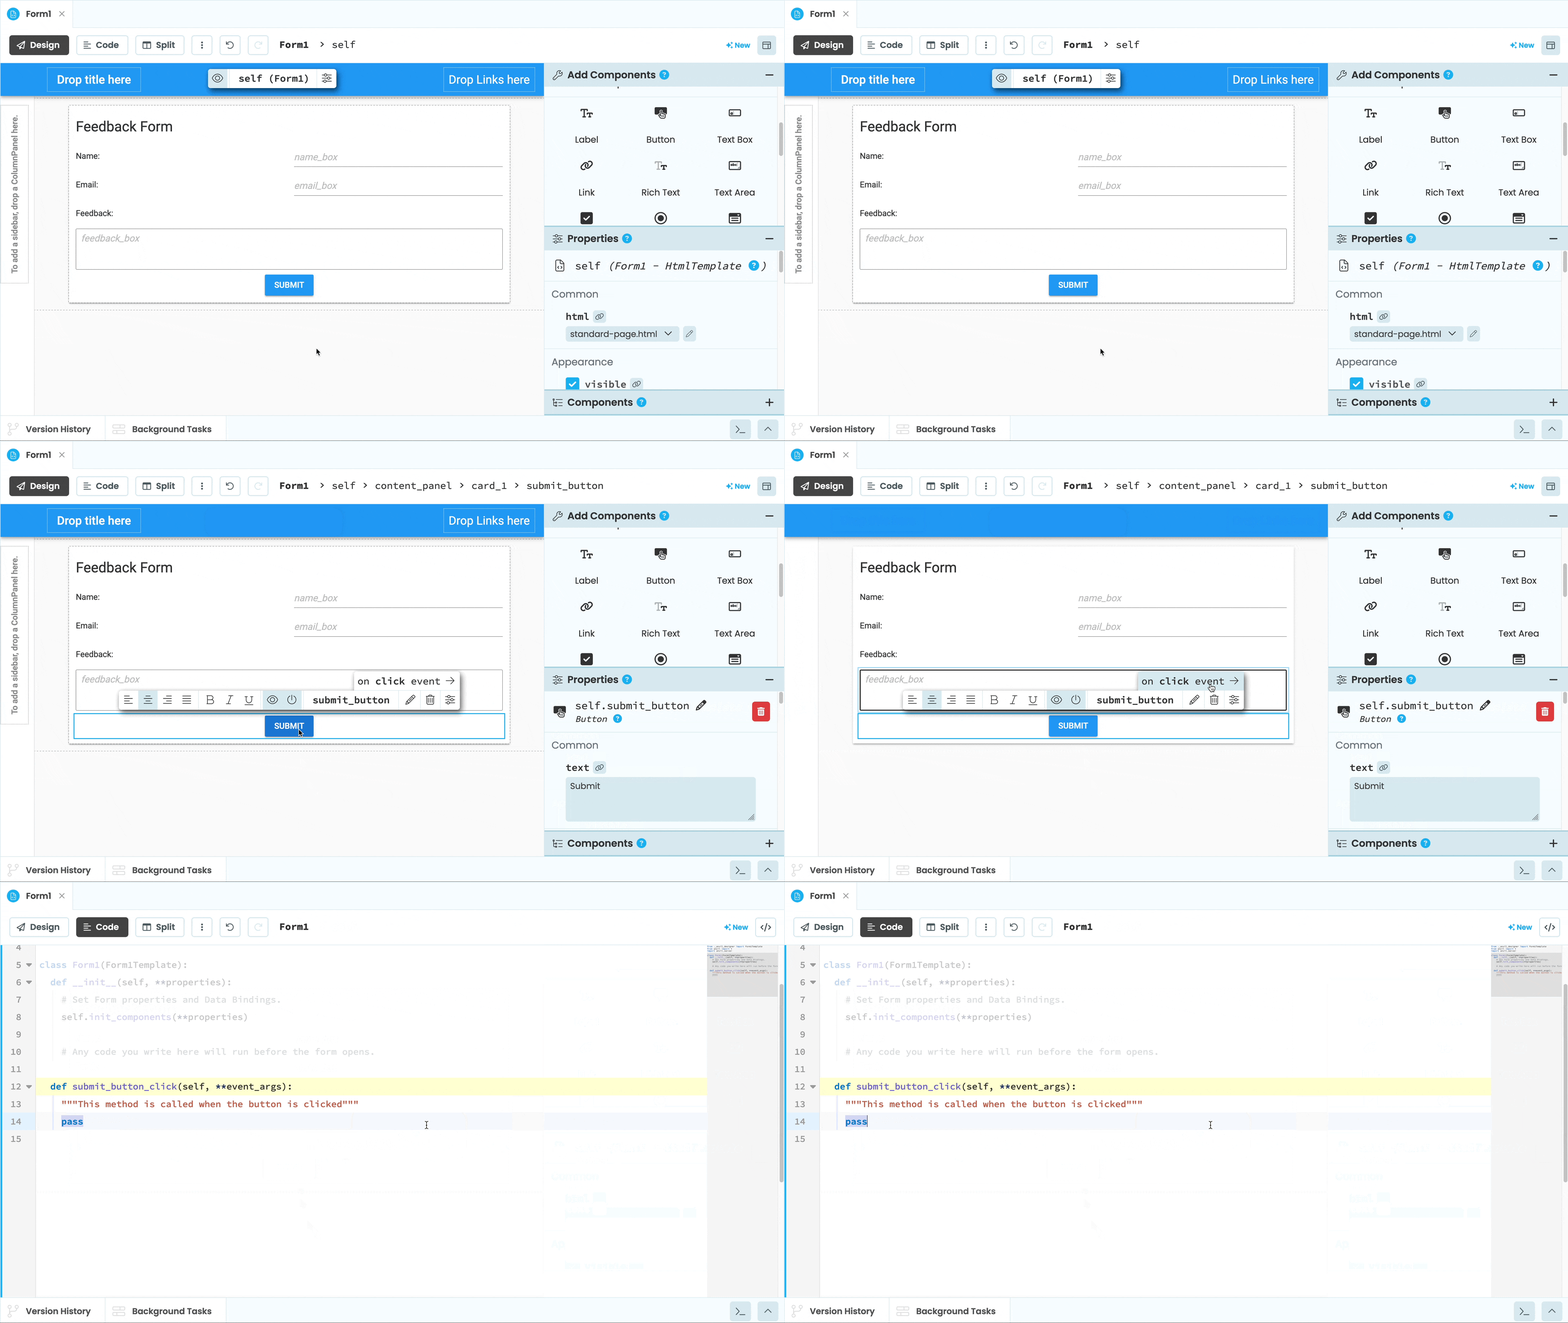
Click on the ‘Submit’ Button, and click on click event -> in the Object Palette.

You will be taken to the Form Editor’s ‘Split’ view, where you’ll see the Code Editor. This is where you write your client-side Python code that runs in the browser.
You’ll see a submit_button_click method on your Form that looks like this:
  def submit_button_click(self, **event_args):
    """This method is called when the button is clicked"""
    pass
This is the Python method that runs when the ‘Submit’ Button is clicked.
For example, to display a simple popup with the text ‘You clicked the button’, edit your submit_button_click function as follows:
  def submit_button_click(self, **event_args):
    # Display a popup that says 'You clicked the button'
alert("You clicked the button")Step 2: Run your app
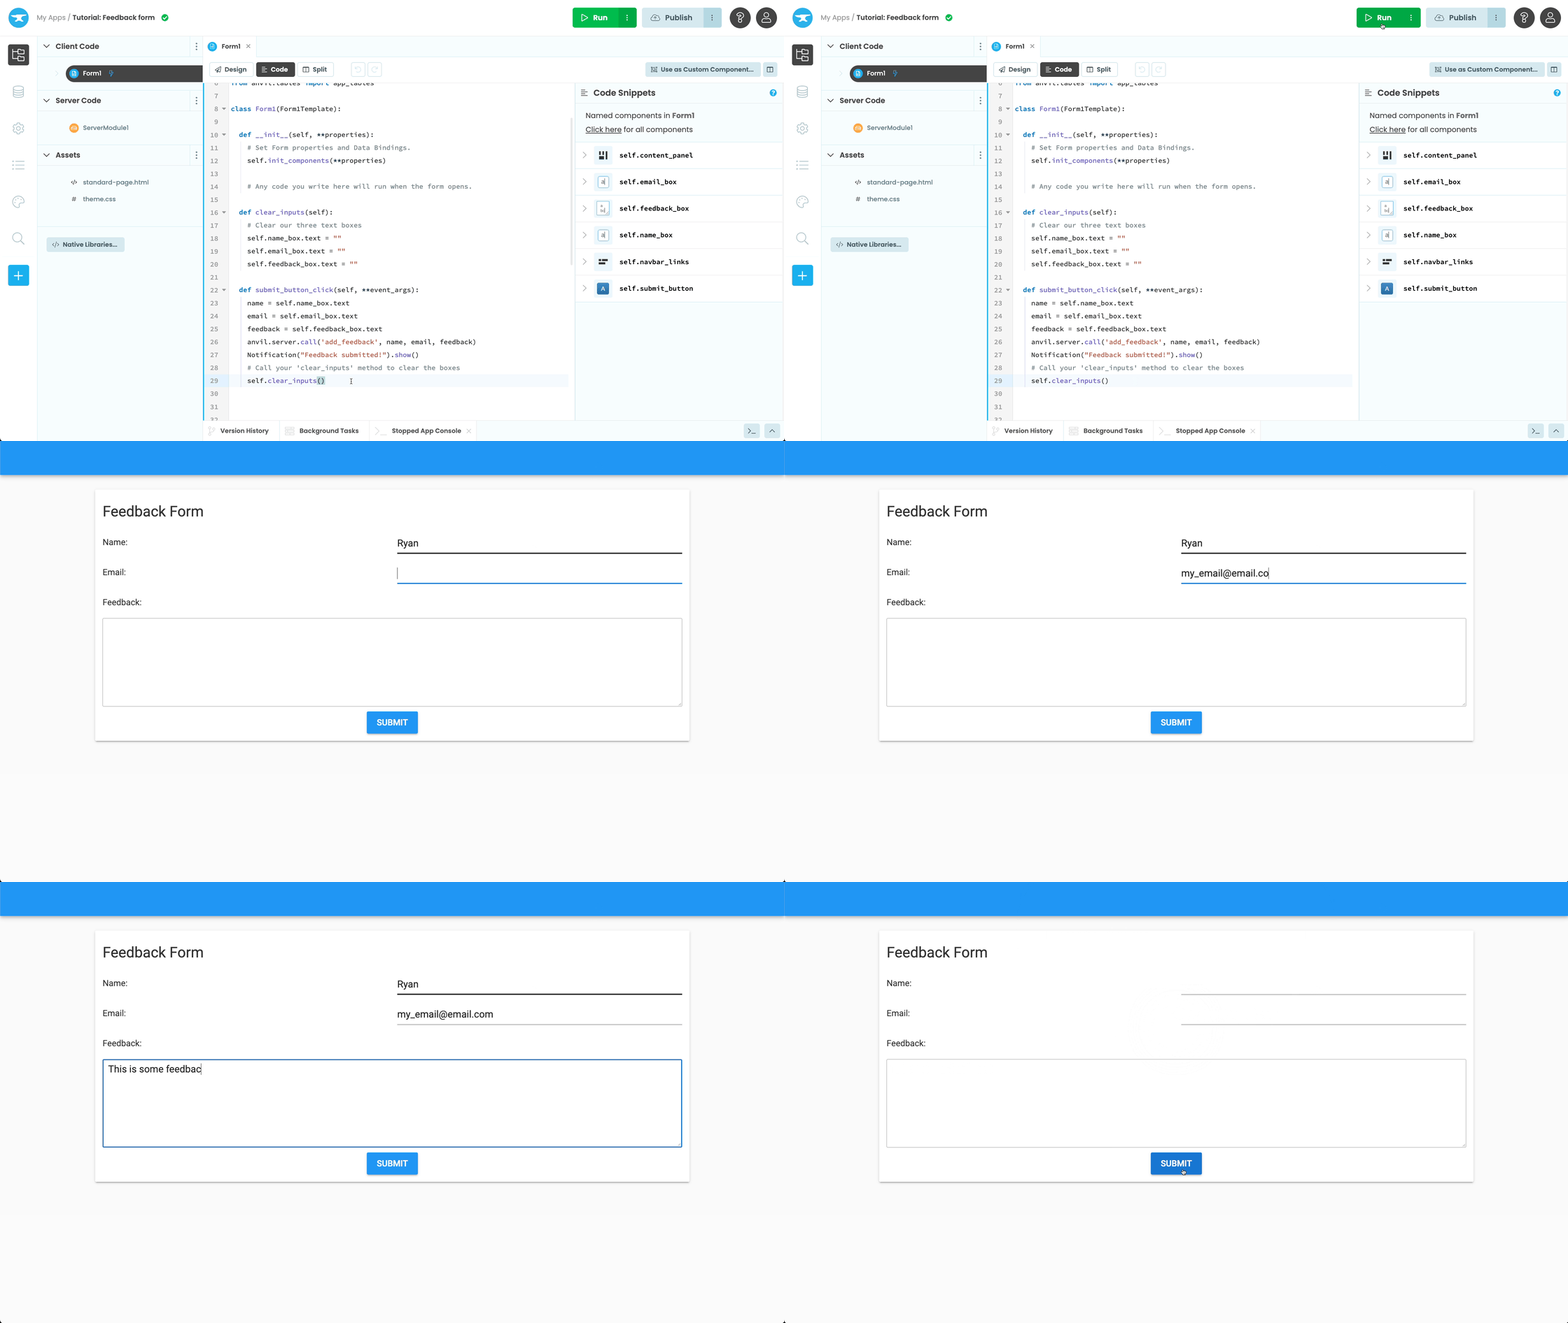
To see it in action, click the ‘Run’ button at the top of the screen:

Click the Submit button and your popup should appear!
Step 3: Capture user inputs
When someone clicks Submit on our feedback form, we want to store a name, email address, and some feedback for that person in our Data Table.
We can read data from our input components by reading their properties. For example, we can read the text in our TextBoxes using their text property.
Edit your submit_button_click function to look like this:
  def submit_button_click(self, **event_args):
    # Set 'name' to the text in the 'name_box'
    name = self.name_box.text
    # Set 'email' to the text in the 'email_box'
    email = self.email_box.text
    # Set 'feedback' to the text in the 'feedback_box'
    feedback = self.feedback_box.text
Great! Now we’ve captured the name, email, and feedback that we want to store in our Data Table.
We want to call our add_feedback server function when the button is clicked, and pass in the user inputs. We made our add_feedback server function available to our client-side code by decorating it as @anvil.server.callable.
This means we can call it from our client-side code using anvil.server.call('add_feedback', <arguments>)
Let’s call our add_feedback server function from our submit_button_click function:
  def submit_button_click(self, **event_args):
    name = self.name_box.text
    email = self.email_box.text
    feedback = self.feedback_box.text
    # Call your 'add_feedback' server function
    # pass in name, email and feedback as arguments
anvil.server.call('add_feedback', name, email, feedback)Step 4: Display a notification
We’ll also display a temporary popup using a Notification to let our users know their feedback has been submitted.
Edit your submit_button_click function to look like this:
  def submit_button_click(self, **event_args):
    name = self.name_box.text
    email = self.email_box.text
    feedback = self.feedback_box.text
    anvil.server.call('add_feedback', name, email, feedback)
    # Show a popup that says 'Feedback submitted!'
Notification("Feedback submitted!").show()Step 5: Clear our user inputs
There’s one final step left, and that’s to clear our user inputs each time someone submits feedback.
We’ll do this in a separate function to keep our code nice and clean.
Add this method to your Form, underneath your submit_button_click() method:
  def clear_inputs(self):
    # Clear our three text boxes
    self.name_box.text = ""
    self.email_box.text = ""
    self.feedback_box.text = ""
Finally, let’s call this from our submit_button_click method, so that we clear our inputs each time feedback is submitted.
Edit your submit_button_click function to look like this:
  def submit_button_click(self, **event_args):
    name = self.name_box.text
    email = self.email_box.text
    feedback = self.feedback_box.text
    anvil.server.call('add_feedback', name, email, feedback)
    Notification("Feedback submitted!").show()
    # Call your 'clear_inputs' method to clear the boxes
self.clear_inputs()Step 6: Run your app
Time to Run your app! Click the ‘Run’ button at the top of the screen, fill in a name, email address, and some feedback and click Submit.
Then, stop your app, and go to your Data Tables. You’ll see you have a new row of feedback in your Data Table!

In Chapter 5, we’ll make the app email you whenever somebody enters feedback.
 By
By