 By
By Building a Time Tracker in One Day
Typically we tend to overestimate what’s possible in a short time, and underestimate what’s possible over a longer time frame. But in showing people Anvil we’ve found an odd exception – they tend to underestimate what they can build in as little as a day!
So I decided to put it to the test. I asked, What can I build in one working day with Anvil?
Since I’m tracking my own time for this challenge, it seemed natural to build a time tracking app - something like Clockify. Clockify has a ton of features, so I decided to pick some essentials and aimed for a Minimum Viable Product (MVP). This is my project report, detailing the progress and timings.
Everything I built here, I wrote between lunchtime one day and lunchtime the next – so, I did this all in one working day!
Spoiler:
Here’s how it looked in the end:
Clockify intro
You can open the source code for the final app here:
Scoping my MVP
To build an MVP, you you need to work out how much functionality you really need to be viable. I decided my MVP would need:
- Multi-user support allowing for new user sign-ups
- One or Zero live Time Trackers per user at any one time
- Each Time Tracker should:
- be linked to a Project
- have notes and tags
- be easily editable and deletable
- Each Project should have:
- a color
- a client
- an hourly rate
- Graphical Reports by project and day
1. App Structure (1 hour)
With a project this big, it took me an hour to get a skeleton of the app in place. That included the database, login and signup, and placeholders for all the screens in the app.
The first 15 minutes were dedicated to setting up and organising the Data Tables, and creating the Forms which make up the UI:
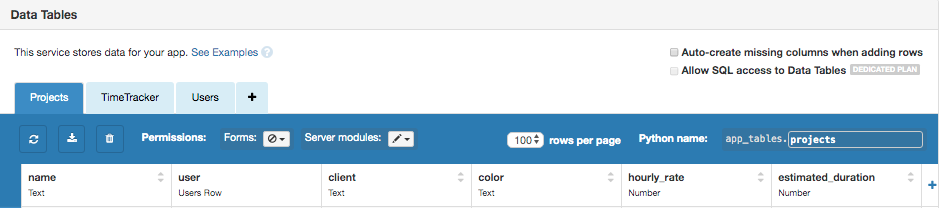
Data Table Structure
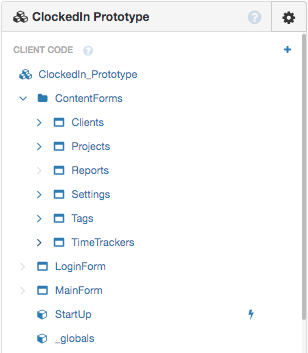
Form structure
The next 15 minutes were spent adding multi-user support with Anvil’s Users Service, and redirecting the user to either a Login Form or Main App depending on whether the user had a remembered login or not.
Next, I spent 15 minutes creating and wiring up the Login / Signup UI:
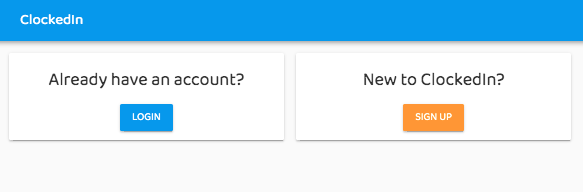
Sign-up Form
Finally, I implemented the Main App navigation. I linked the side nav and top nav bar to relevant pages within the app, changing the role of the active side nav link to 'selected' when clicked.
Navigation
2. Global Data and User Settings (40 mins)
From the requirements, some basic user data would need to be created after a new sign up.
Once logged in, I made single server call to get relevant user data from the Data Table to the client, then stored it as variables in a Data Module. To speed up development, it seemed sensible to send client writable views of data associated with the logged-in user.
# Get the current logged-in user
user = anvil.users.get_user()
# Client writable view of the timetracker table containing rows belonging to the current user
time_trackers = app_tables.timetracker.client_writable(user=user)
return time_trackers
Next, I implemented a settings page to edit the default hourly rate and preferred currency. I used an modal dialog for data entry, and included some data validation to ensure the hourly rate was non-negative.
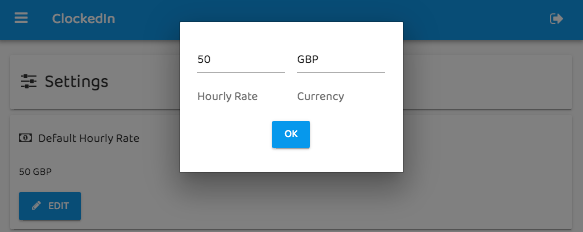
Settings Page
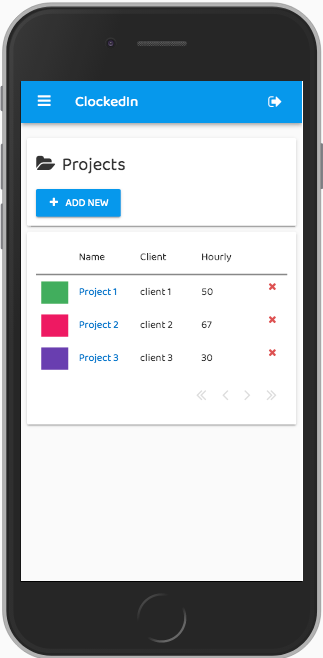
3. Projects Page (40 mins)
The Projects Page was its own CRUD app. The user can create a new Project with a title, color, client and hourly_rate. All projects are listed in a Data Grid. The alert/modal used to create a new project was reused to update a current project.
Selecting a color was a nice UI feature. I wrote the UI for this in code rather than Anvil’s Drag and Drop interface, creating a 9x9 grid of selectable colours.
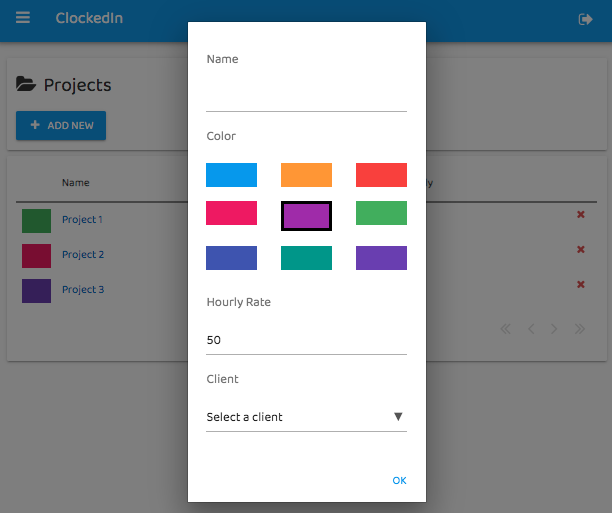
Projects Page
I used a client writable view of the ‘Projects’ Data Table, so that there was no need to worry about sending data back to the server – I could securely update my data from client code. (If you’re interested in how this works, Meredydd gave a short talk about it at PyCon 2018.)
4. Clients and Tags (30 mins)
The Clients and Tags pages were two more mini CRUD apps. These were far simpler than the projects page. The interfaces were identical. I considered refactoring them into a single Form but figured, at this stage, it was best to keep them separate. The modularity of Anvil Forms meant I could reuse the Clients/Tags Forms in the Settings page.

Tags
5. A False Start (1 hour 30 minutes)
Next, I started on the Time Tracking Page – but by this point it was the end of the afternoon, and I was getting tired. I could tell my working memory was getting overloaded with manipulating the data views.
It wasn’t completely wasted, but I did end up going down some blind alleys. Lesson learned: I should should have taken a break sooner!
6. Next Morning - Finish Time Tracking Page (1 hour 15 mins)
Having slept on it, I came back fresh the next morning, and the issues I’d experienced at the end of the previous day seemed obvious now! I finished the time tracking page in just over an hour:
Final Time Tracking Page
7. Reports Page (1 hour 30 mins)
Now that I had time tracking data, it needed to be organised by date and project. It took 40 minutes to get the data into a format that could be plotted.
The next 50 mins were spent creating the Plots. Most of that time was spent reading Plotly documentation to format the plots the way I wanted, using the right colors, adjusting the headings, changing the hover text, etc. The results looked pretty nice:
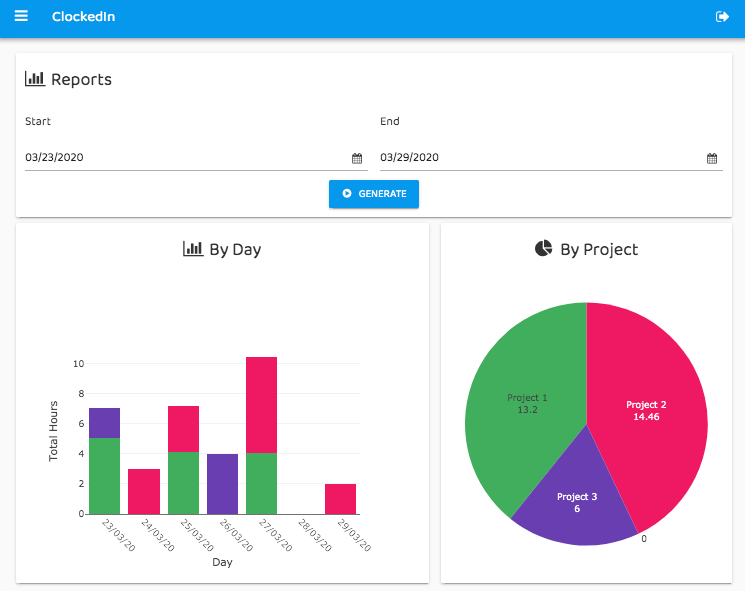
Reports page
8. Testing and Cherry on the Top (40 mins)
I spent the last hour testing the UI and fixing a few obvious bugs – that took around 30 minutes. Just before lunch, I added a cherry on top: I used Javascript to the tab title display the time from the active Time Tracker, if one existed:
Tab Timer
9. Responsiveness - No Time
Anvil takes care of much of the responsiveness. And so I got a mobile-friendly UI for free!
Total Build Time - 7 hrs 45 minutes
In one day, I built a multi-user time tracker with data, reports, projects – and it’s not bad looking, either! Each time tracker is linked to projects, tags and clients, and there are screens to configure all of them. I also created a reports page and implemented a neat javascript function to display the value of the current time tracker in the tab title.
Here it is! A fully-featured time tracking system, built entirely in Anvil:
Clockify
Click the following link to clone the finished app and explore it yourself.
Want to dig into how this app works? Our tutorials show you all the pieces these apps are made from, and more.