 By
By The 8-bit allure of cross-stitch
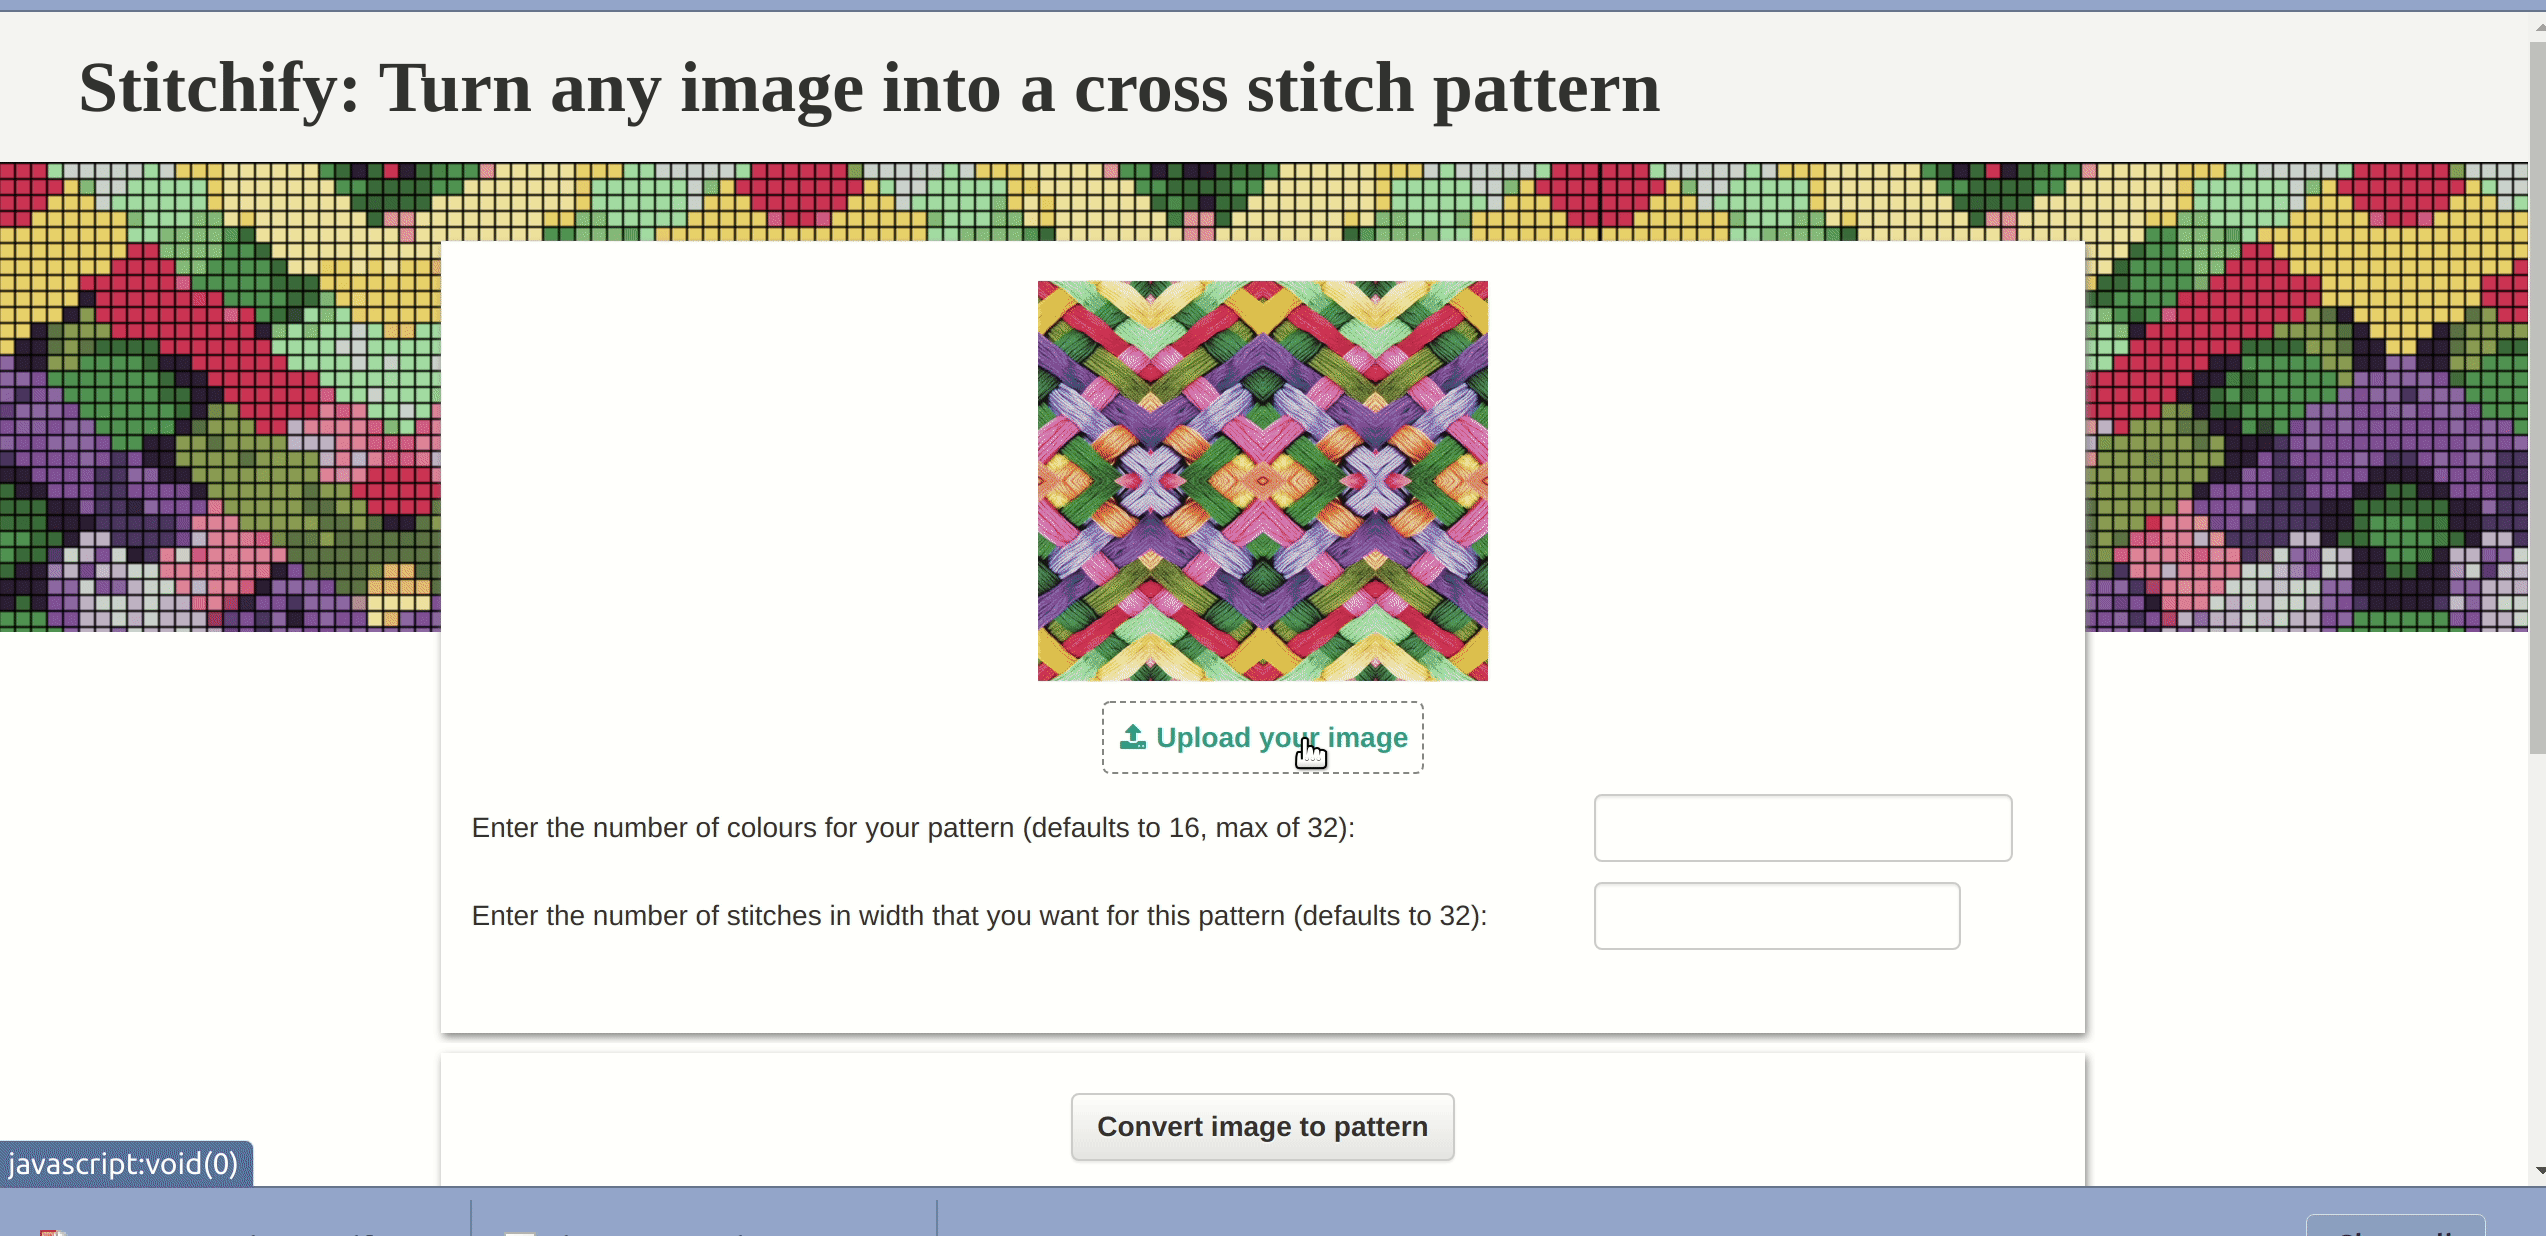
I’ve always loved crafts of all kinds - knitting, crochet, building elaborate cardboard forts for my cat - and I’m always on the hunt for ways to make my crafting life easier and more fun with technology. In today’s blog post, I’m going to show you how I combined my love of cross-stitch with my love of Python to build an Anvil app that takes images and turns them into patterns.
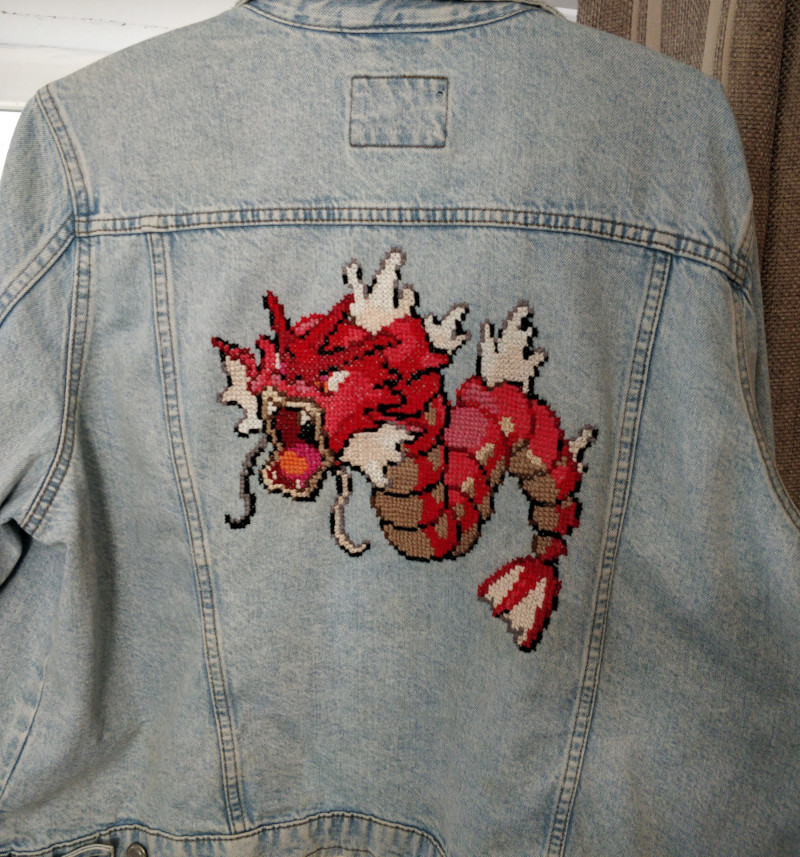
Stitching through denim is tough, but worth it!
Using Pillow, the powerful Python library for image manipulation, with Anvil’s quick and clean front-end and seamless backend made this an absolute breeze - even though I’d never used Pillow before starting this project.
When I turned the pixel art (from Pokemon Diamond) into a cross-stitch pattern to put on my jacket a few years ago, I did it in Photoshop, making heavy use of the magic wand tool and a lot of layers. I spent a lot of the time it took thinking ‘there’s got to be a way to automate this!’. And now there is, because now I’ve made it!
Read on for a tour of what I’ve made, or skip down to see how the image processing works.
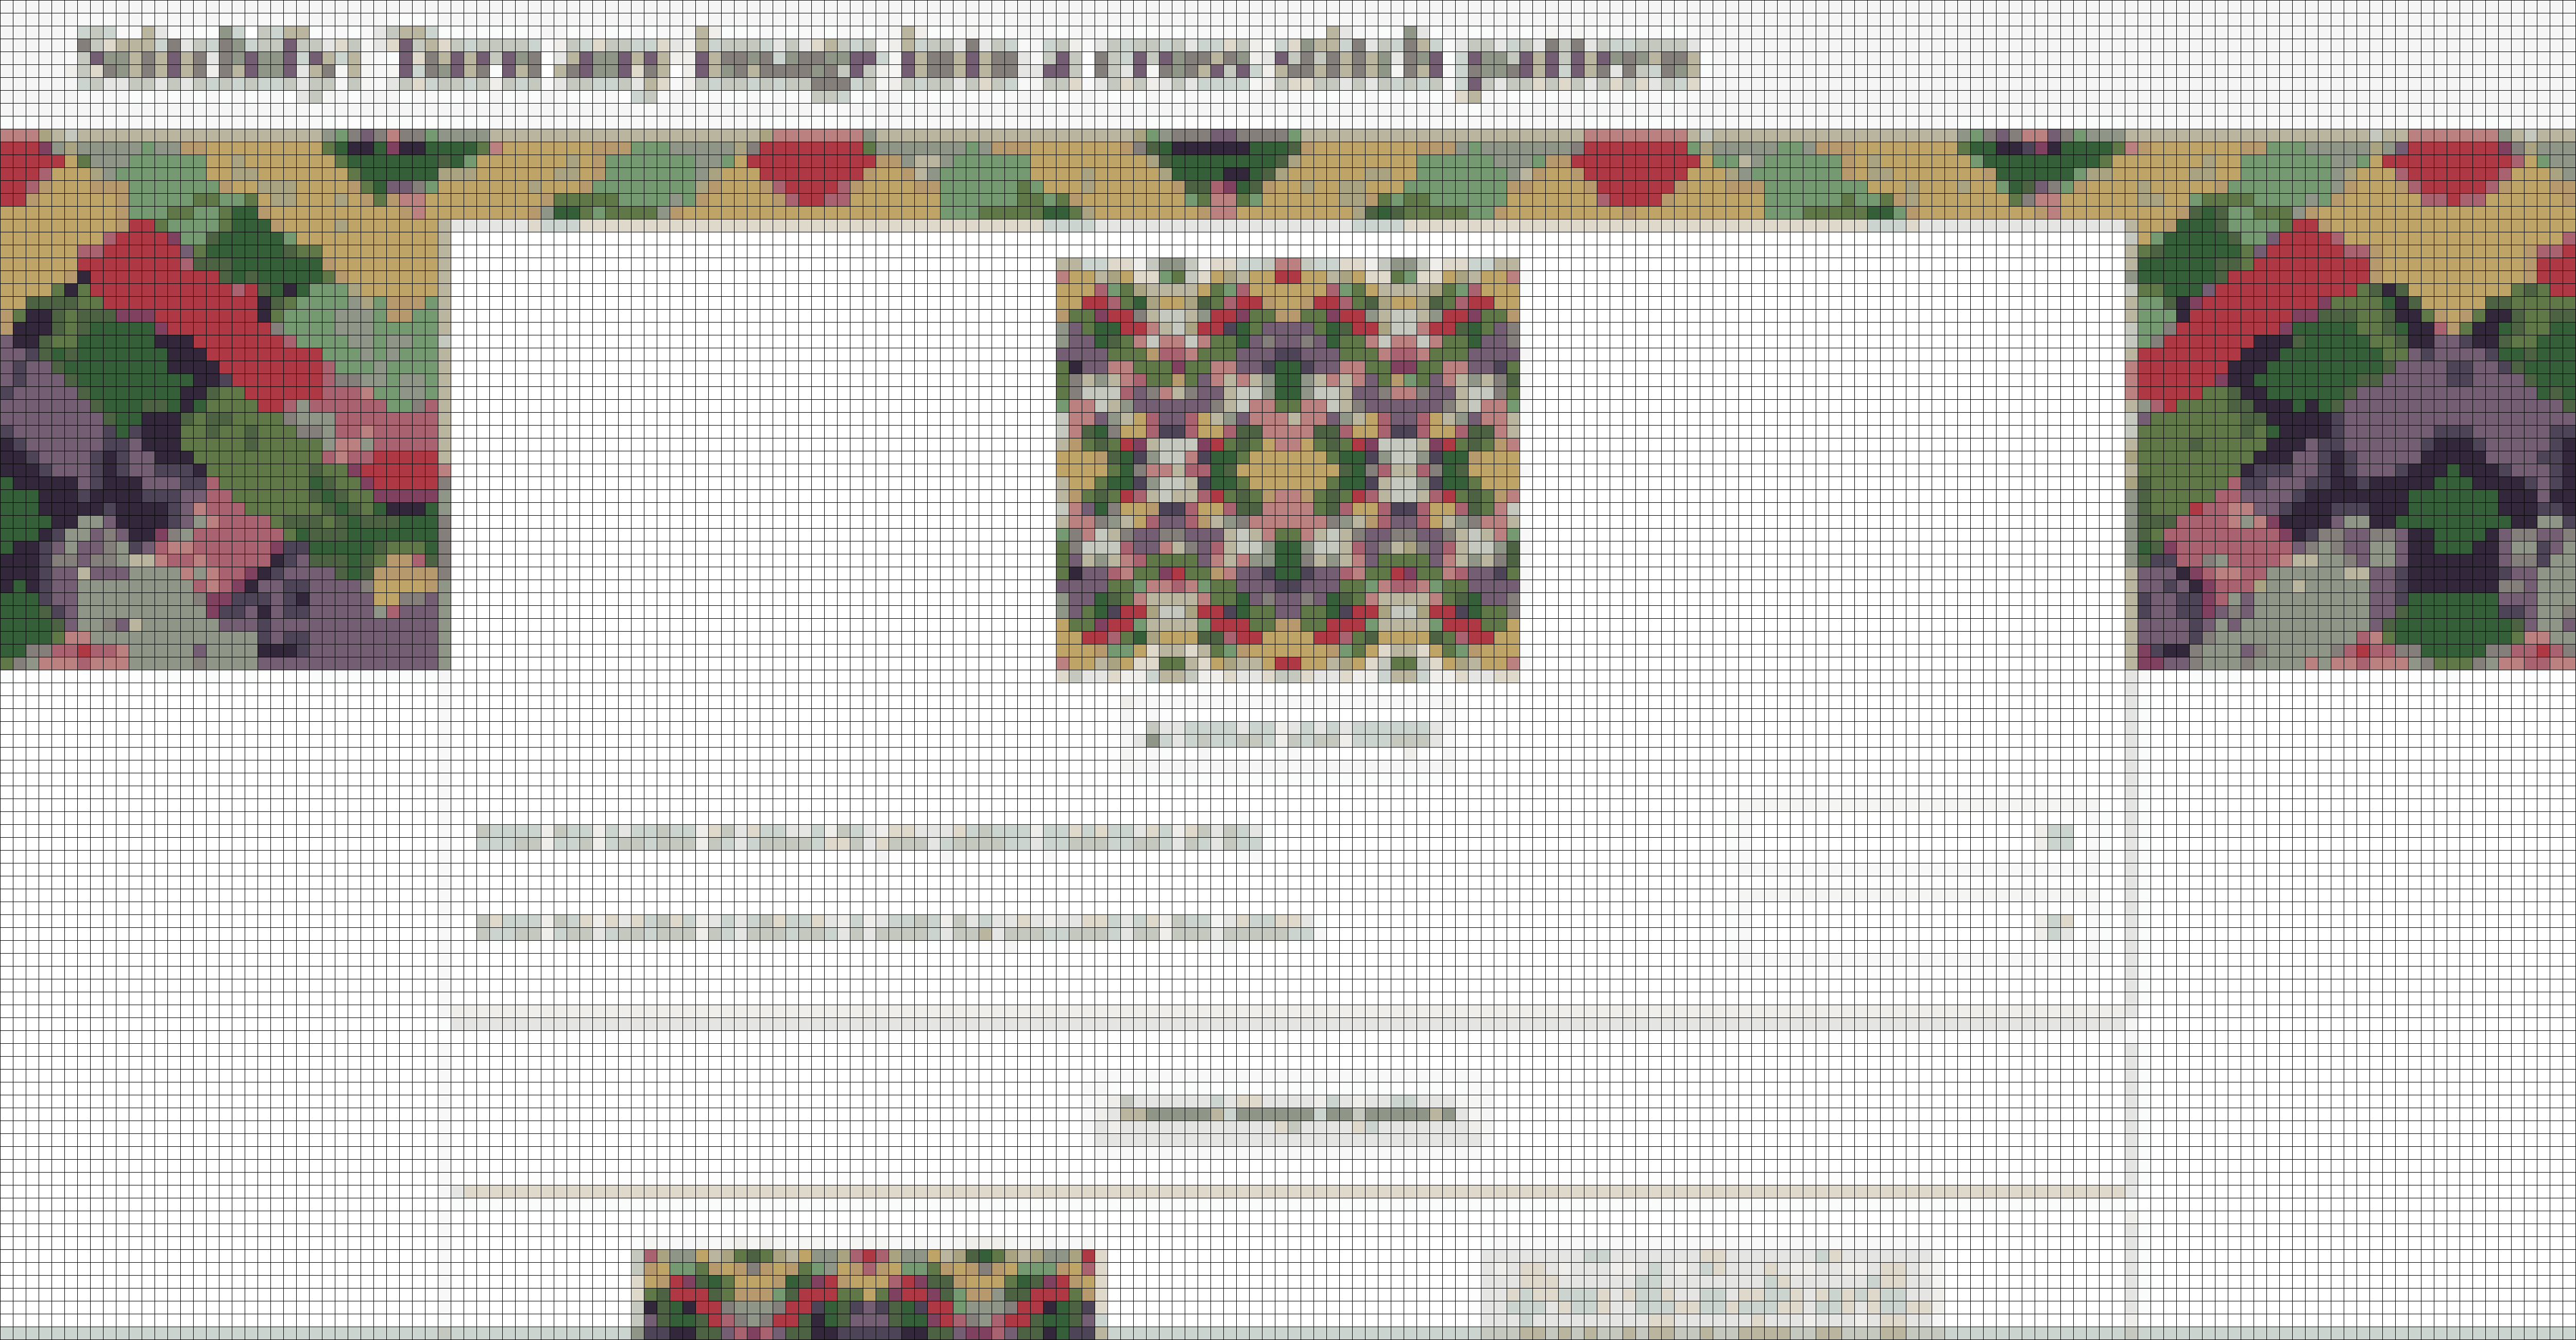
This photo I took on a trip to the Botanical Gardens in Cambridge is now a cross stitch pattern!
A quick overview
Before we dive into the nuts and bolts of how it works, let’s discuss cross stitch patterns. They’re a representation of an image where there aren’t very many colours involved - because each colour has to be a different thread, and that gets expensive quickly! - and where the image is broken up into a grid, so that the embroidery can be done with a piece of fabric that has the grid lines already demarcated, or is otherwise designed for the purpose.
So, Stitchify has to be able to change the number of colours used in an image, and it has to be able to ‘pixellate’ it into stitches. I chose to give the user control over the degree to which each of these changes is done - how many colours there are in the final pattern, and how many stitches.
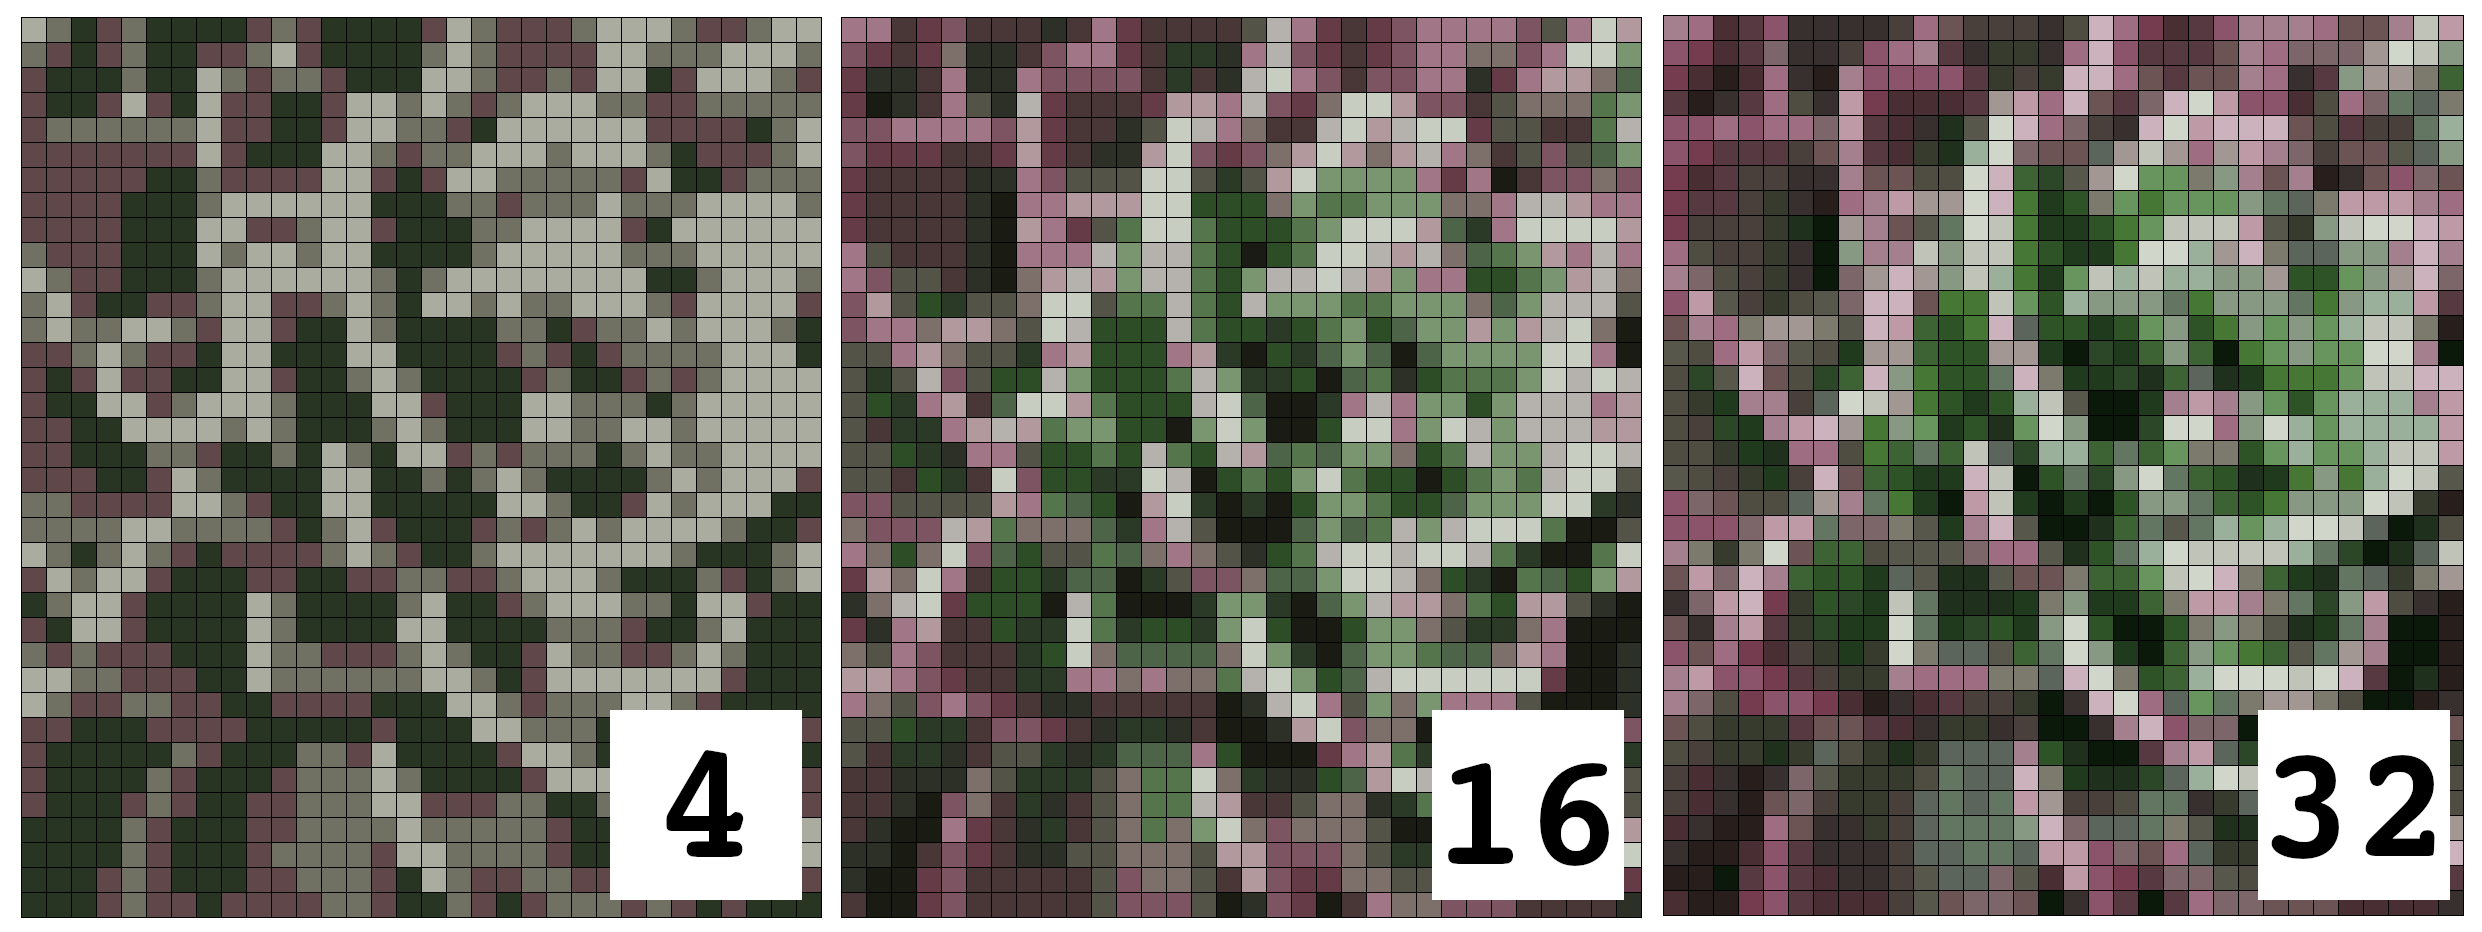
A comparison between the outputs when different numbers of colours are selected.
My neighbours’ cat, in varying degrees of pixellation.
A pattern with more colours is more complicated to stitch, and potentially more expensive; a pattern with more stitches will naturally take longer to embroider, but you’ll get a more faithful representation of the original image. This way, the user can choose a happy medium that works for them.
But this isn’t all we need to do to create a user-friendly pattern. What if two colours are hard to distinguish visually? What if the user can’t find a thread colour that matches the one given by Stitchify?
We can solve these problems with code too. Stitchify provides a PDF that includes:
- The colour pattern as it’s shown in the web page
- A black-and-white version of the pattern where each ‘stitch’ box has a number inside it denoting what colour should go there, like a paint-by-numbers image
- The list of colours along with their hex codes, each linking to this site to help the user find a matching thread
The ‘paint-by-numbers’ style image is something that’s standard in cross-stitch patterns, precisely to solve the problem that arises when two colours are very similar. Some patterns will include numbers on the colour pattern itself, but since Stitchify can’t guarantee that that would always be clear to read, it creates an entirely separate black-and-white image.
If you’d like to see some example output, check out the PDFs generated by the images we saw above! The plant photo’s PDF is here, and the cat photo’s PDF is here.
Or, open up the app itself and upload any image you like!
I heard you like Stitchify.
So how does it work?
Two things made this tool possible. The first is Pillow, a fork of the Python Image Library, which is the go-to Pythonic way of manipulating images. The second is Anvil, the framework for building web apps entirely in Python.
No brain, just Pillow.
I’d never used Pillow before, but the learning curve was gentle and fruitful, and turned the potentially complex image manipulations into no-brainers; meanwhile, Anvil let me build a a functional web front-end as I developed the back-end, making the feedback loop short and clear.
No more opening up GIMP every 5 seconds to check my work; my Anvil app fed the output right back to me on the same screen.
Let’s see how it’s done!
To actually turn an image into a pattern, we do the following:
- Get the image from the user and send it over to the server with
anvil.server.call() - Shrink the image with
Image.resize() - Colour-flatten it with
Image.quantize() - Enlarge the image, again with
Image.resize()- but keep the pixellated look - Add a grid over the top for extra clarity with
ImageDraw.Draw.draw() - Create a numbered representation with
Image.paste()
If you want to see the code itself, you can clone the app and follow along!
Let’s get take a closer look at each of these steps.
Getting the image onto the server
This part is beautifully trivial in Anvil. All you need to do is get the image from a FileLoader component, pass it as an argument to a function on the server, then load it from a file into an Image instance with Image.open().
Shrink the image
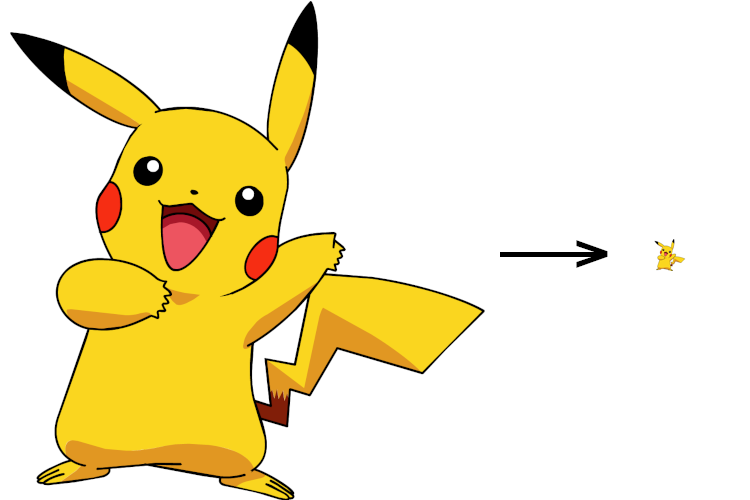
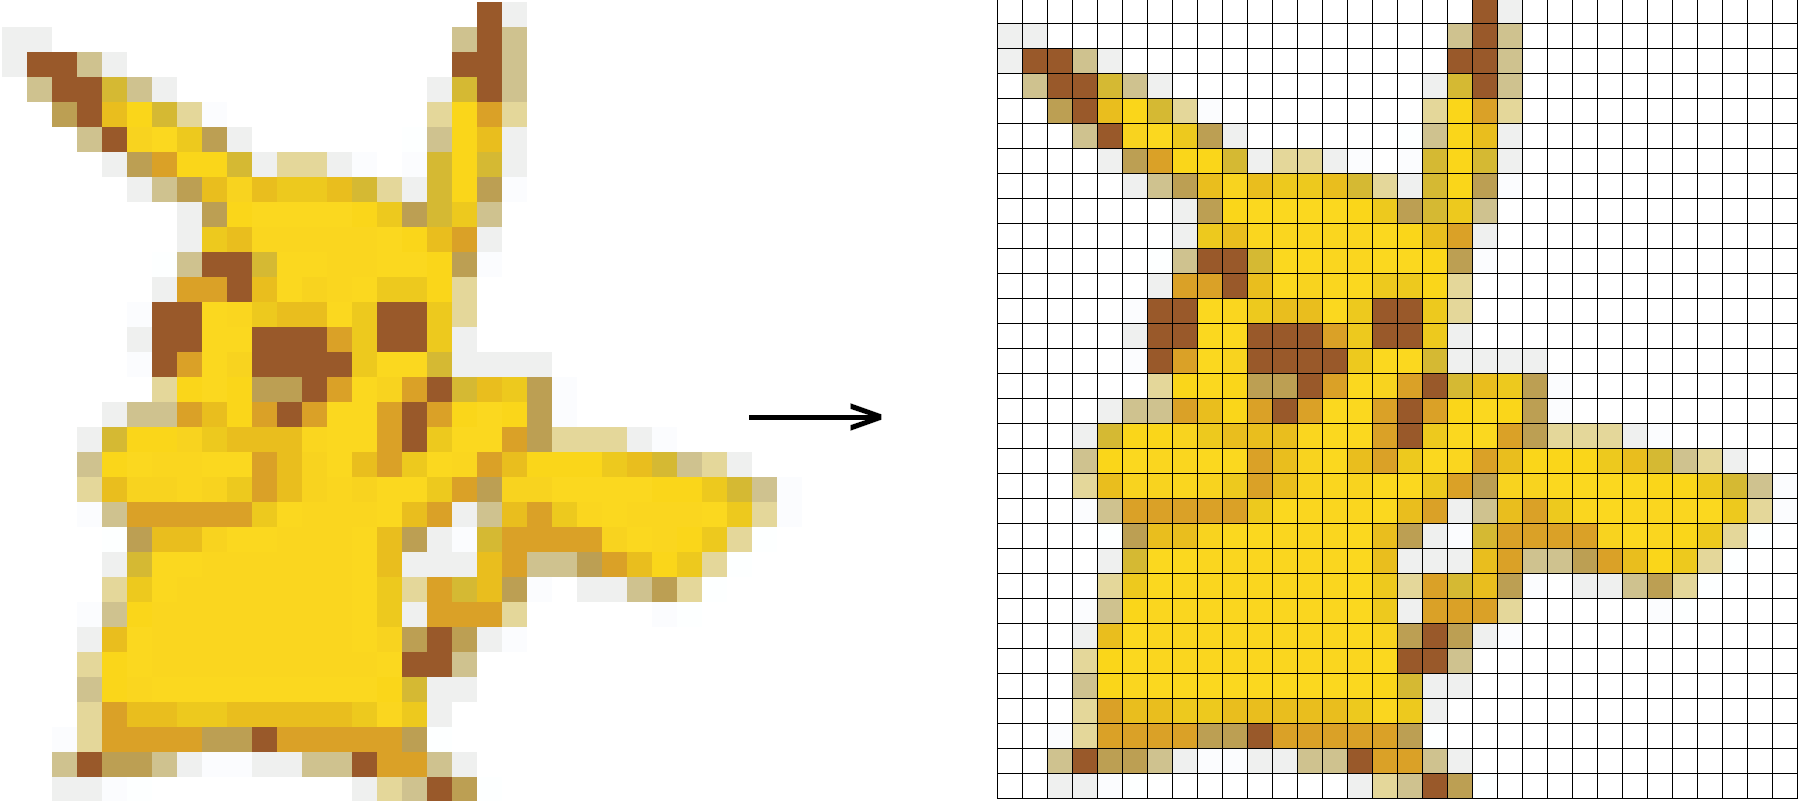
Now we’re getting into the image manipulations. Let’s see what happens to our good friend Pikachu at each stage of this process. Number one is pixellating the image into stitches.
Scale the image right down.
We do this by shrinking the image down so that its width in pixels is the same as the number of stitches that the user asked for. Preserving the height-to-width ratio means that we now have a tiny version of our original image, where one pixel is equivalent to one stitch.
This also helps reduce the amount of memory it’s using - if we uploaded a 2500x1500 pixel image, and we only wanted it to be 50 stitches wide, it’s now a 50x30 pixel image. That’s way faster to manipulate.
Reduce the number of colours in the image
Step two is the ‘colour-flattening’ we talked about earlier. We want to reduce the number of colours in our tiny image, and luckily Pillow makes it super easy!
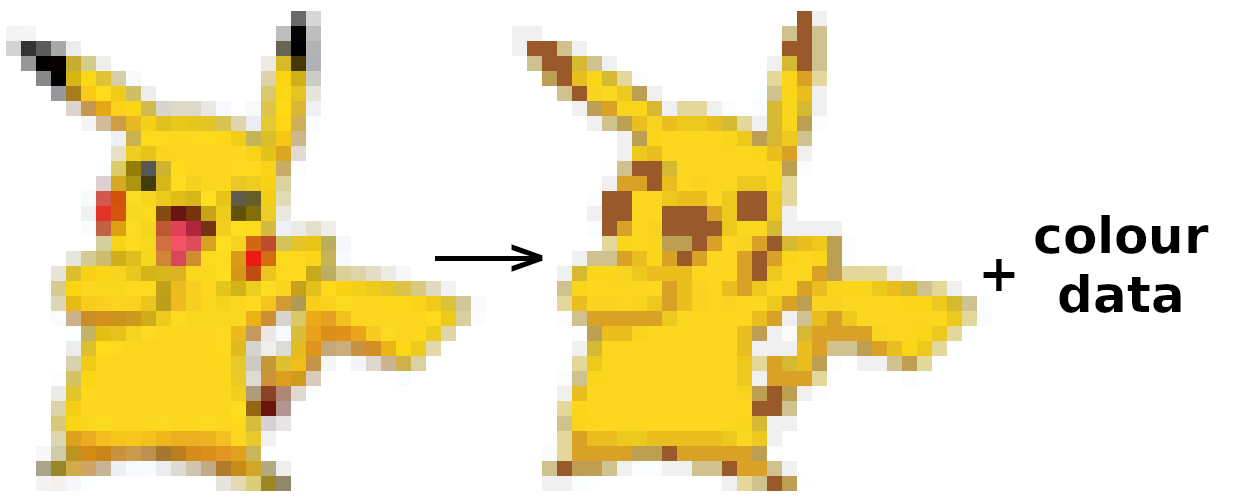
Quantise the colours and extract them all. The image is still tiny at this point, so I’ve enlarged it here to better show what’s going on.
Pillow’s Image class has a quantize method, used to do exactly what we want - specify the number of colours in an image. In theory, this could be the most complex part of the algorithm, but Pillow makes it a literal one-liner.
new_image = old_image.quantize(colors=desired_number_of_colours)Under the hood, we’re actually converting the image to ‘Palette’ mode. We mostly work in RGB mode for these manipulations, but switching modes is as easy as calling Image.convert() immediately afterwards.
The fact that this step is so simple does mean that the user has no input into the precise colour choices, however. Any funky colour decisions that the Pillow algorithm makes are out of our control! (Of course, once you’ve actually got the pattern, you can later decide to replace a colour that doesn’t quite work - just because Stitchify gave you a pattern, that doesn’t mean you have to follow it precisely.)
We also store the hexcodes of all the colours at this point and assign them a canonical ordering, by creating a dictionary. This number-colour mapping is then later used by the server to create the numbered image (where each colour cell is replaced by a number representation), and by the client to display colour information in the UI.
colour_dict = {
  "#FFFFFF": "1",
  "#0b7a81": "2",
  ...
}
Enlarge the image
We won’t be sending a tiny image back to the user; at some point we have to enlarge it again. We do, however, want to preserve the pixellated ’look’, where each stitch is represented by a square of solid colour.
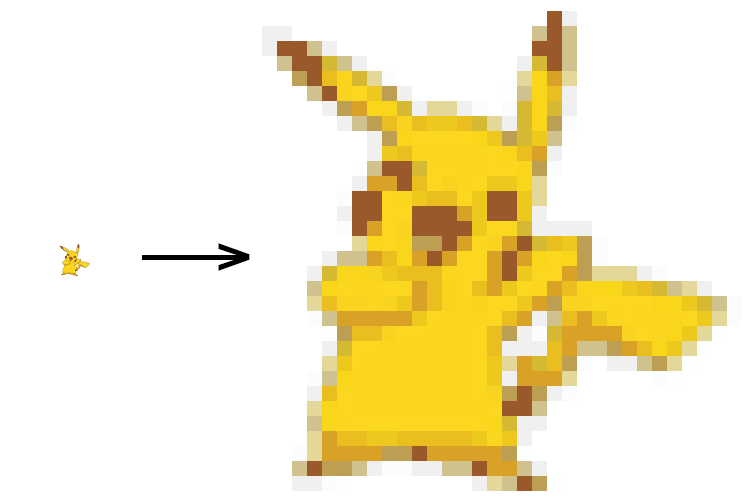
Blow the image back up to a reasonable size.
Image.resize() accepts a few different resampling filters; it turns out passing resample=Image.NEAREST does precisely what we described above when enlarging an image. It’s the equivalent of choosing ‘Interpolation: None’ in GIMP, and we get a beautiful ‘pixellated’ image - but large.
We enlarge by a factor of 25, meaning that in the final images, each ‘stitch’ is represented by a square 25 by 25 pixels in size. This does make patterns with large numbers of stitches quite big (in pixel terms), but it ensures that the stitches will always be big enough to distinguish visually.
Overlay a grid in black
To help with demarcating the 25-pixel stitches, we draw a grid over the top of the image. This especially helps with images made up of large sections of a single colour; imagine trying to figure out if a given line was 12 or 13 stitches long purely by eye!
Add the grid over the top of the image.
For this, we use Pillow’s ImageDraw module, which allows us to treat our image like a canvas and draw things (like lines or circles) onto it in-place.
Create a numbered representation
At this point, the colour image is done. We make a new copy of it - the ‘paint-by-numbers’ image - which gets the colour in each box replaced with its corresponding number.
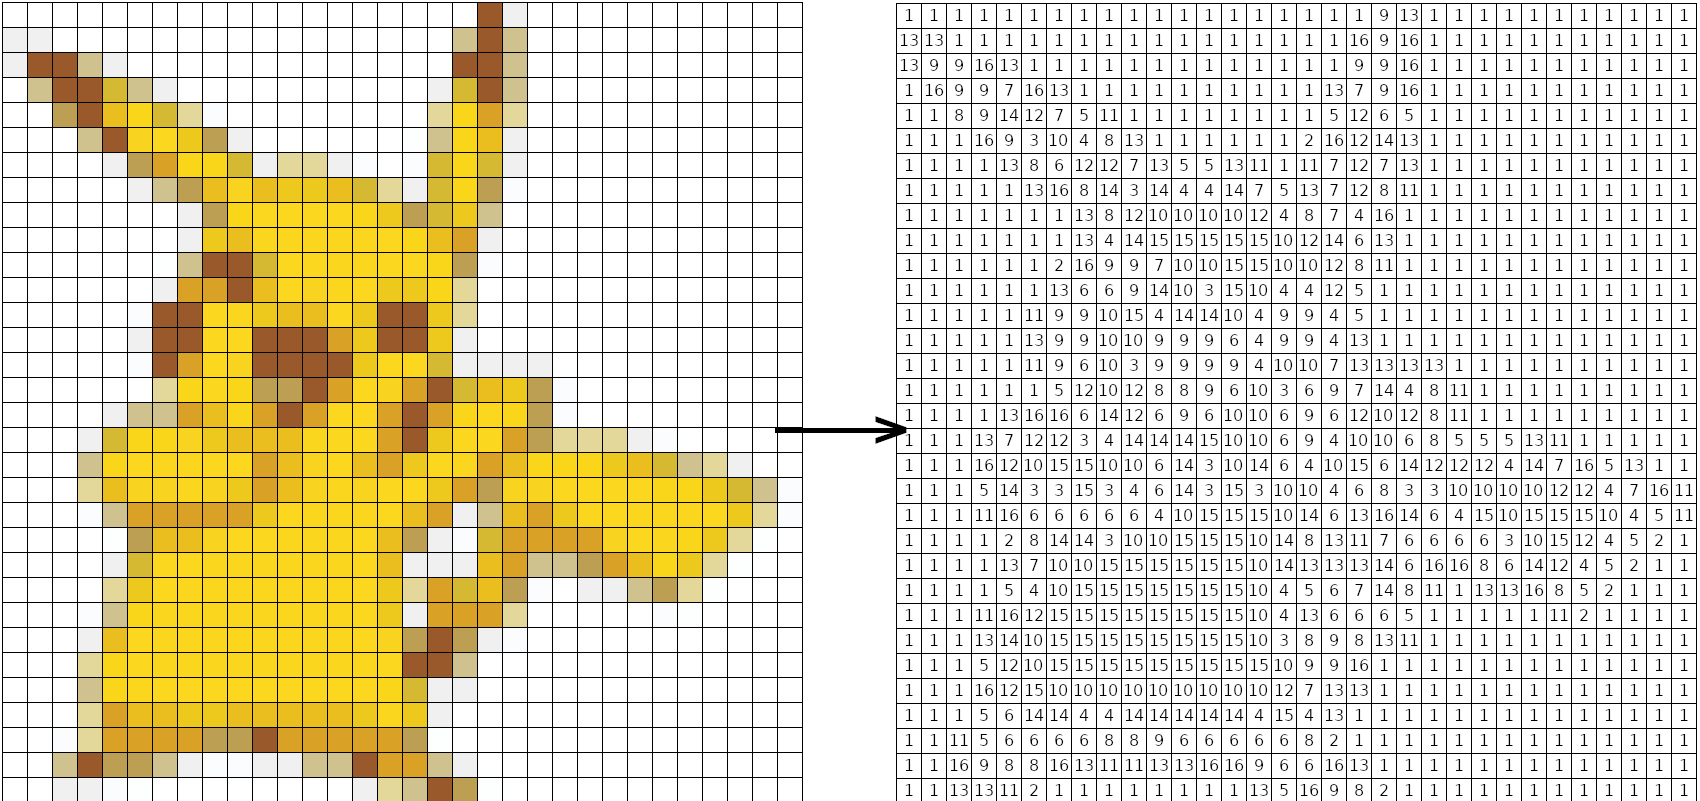
Create a new image by replacing each block of colour with its respective number.
The ’numbers’ that replace the colour cells are actually image assets uploaded to the app (for example, here’s number 5) and there are 32 of them, so that if a user asks for 32 colours we’ll have all the numbered images we need.
This is actually my reason for putting an upper limit on the number of colours a user can ask for in their pattern. In theory we could allow up to 256 colours using the Image.quantize() method, but given that I created each ’numberbox’ manually in GIMP, I didn’t want to allow that many! 32 colours is a lot for a cross stitch pattern anyway, so I decided that this was an acceptable restriction.
The actual image manipulation is as simple as calling Image.paste() for each box, so we iterate over every colour cell and paste its corresponding number image into place.
Once we’re done looping over all the colour cells, we’ve created the numbered version, and we’re ready to send everything (colour image, numbered image, and colour-number mapping) back to the client for display!
Making the front-end pretty
We want to present all these results to the user in a clear, structured way. Anvil’s drag’n’drop UI designer makes it easy to create a layout by defining Python-based components for the elements we need on the page.
Then, it’s simple to dynamically display the image outputs with Anvil Image components just by changing their source property, and for the colour information I used a RepeatingPanel. This RepeatingPanel has a template called ColourInfoTemplate with components that use data bindings in order to set their own attributes, so that to populate it all we have to do is set the items property on the RepeatingPanel.
That RepeatingPanel ends up generating output that looks like this:
Some of the colours from the plant photo pattern
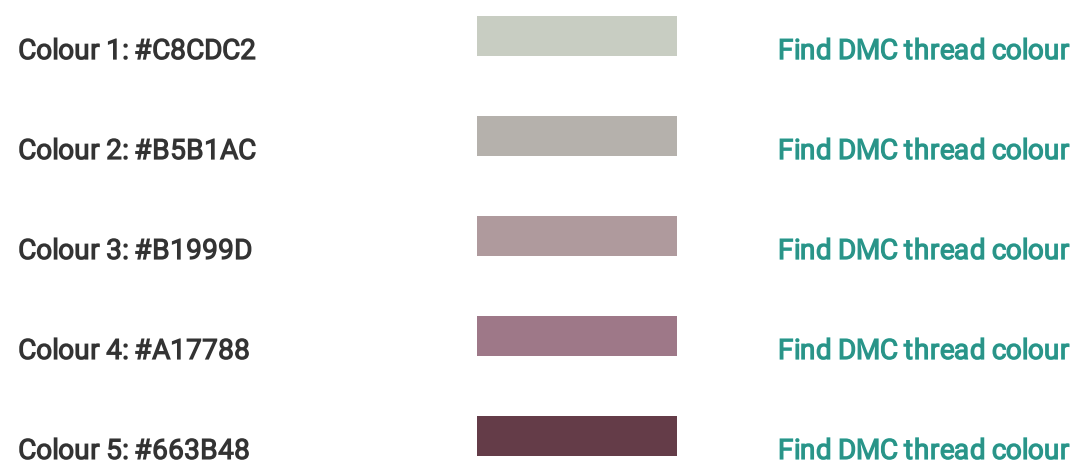
My aim here was to provide as much information as possible to the user without making it overwhelming. They have access to the hexcode - as precise a specification of the colour as we can give - and a swatch that shows exactly that that colour looks like, along with a link to the website that translates hexcodes into DMC thread designations (with the colour’s hexcode pre-loaded).
Generating PDF output
Finally, there’s a form for generating a PDF called PDF_Form; it’s very very simple. It has two Image components, whose sources are set to the colour and number patterns, and a RepeatingPanel component whose template is also set to use the ColourInfoTemplate form we created earlier.
This is very similar to the way we display output in the main form, but since each component is only a one-liner to set up, there’s no need to worry about duplicating lots of code. See how easy it is:
from ._anvil_designer import PDF_FormTemplate
from anvil import *
import anvil.server

class PDF_Form(PDF_FormTemplate):
  """This form defines the structure of the PDF that the user can download once a pattern is created."""
  def __init__(self,
               output_im_source,
               pbn_im_source,
               colour_info,
               **properties):
    # Set Form properties and Data Bindings.
    super().__init__(**properties)

    # Populate the form
    self.output_image.source = output_im_source
    self.pbn_image.source = pbn_im_source
    self.colour_repeating_panel.items = colour_info
Apart from laying out the Image components in the drag’n’drop designer, all of this form is created with code, and it’s still only a few lines!
If we did the PDF rendering at pattern creation time, we wouldn’t have to send images back and forth to the server, but it’s likely that a user will tinker with an image a few times before wanting to download a PDF, so we don’t want to do all that PDF processing every time. That’s why I chose to implement it as a separate step from the image manipulations; this way it’s ’lazy’ (another way of saying ’efficient’).
See the code yourself!
Now, not only do you have the power to go forth and generate all kinds of cross stitch patterns, you also know how it works. If you want an even closer look, you can clone the app by clicking below, and see the code in full.
I hope you have as much fun tinkering with this as I did writing it!
Build your own app with Anvil
If you’re new here, welcome! Anvil is a platform for building full-stack web apps with nothing but Python. No need to wrestle with JS, HTML, CSS, Python, SQL and all their frameworks – just build it all in Python.
Want to build an app of your own? Get started with one of our tutorials:
Build Database-Backed Apps
Build a Simple Feedback Form
Build a data-entry app, and learn the techniques fundamental to building any Anvil app. In this tutorial, you will:
- Build your User Interface
- Write client-side Python
- Write server-side Python
- Store data in a database
- Deploy your app