 By
By Anvil Advent Calendar
Build a web app every day until Christmas, with nothing but Python!
Spread the Christmas spirit
It’s December 20th – probably time to get those Christmas cards sent out! Even better, why not send personalised e-cards?
https://merry-christmas.anvil.app
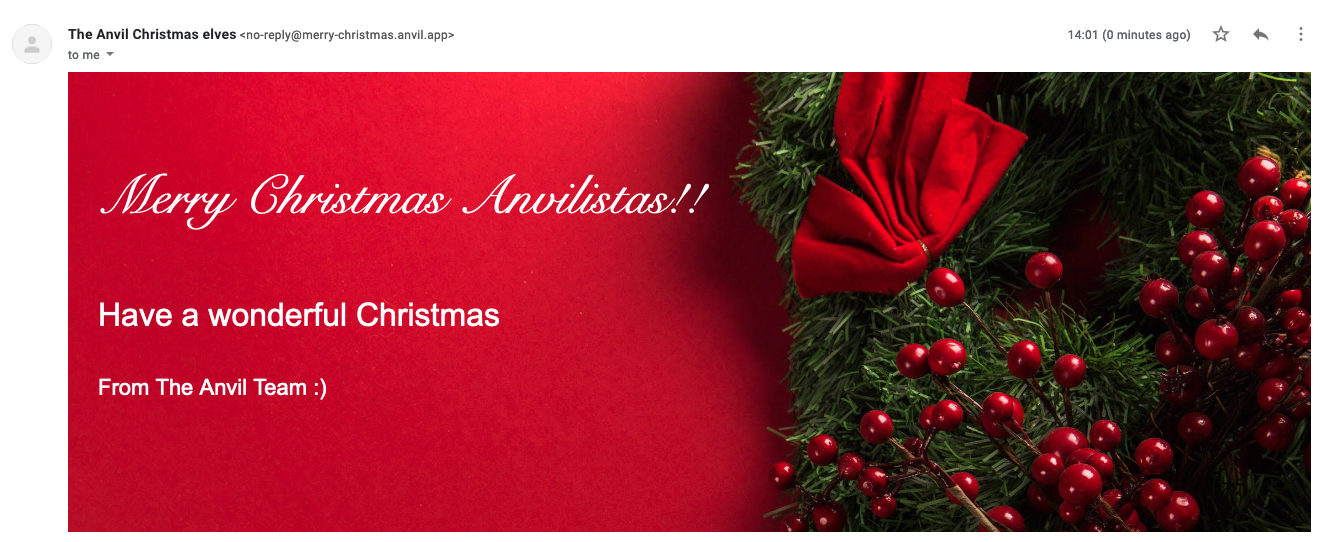
In today’s advent app, we show you how to create custom Christmas e-cards and send them out to all your friends and family.
Create your app
We’ll create a simple UI using TextBoxes and TextAreas for our user inputs.
To create our custom e-card, we’ll ask our users for:
- the background image they’d like to use
- the recipient’s email address
- the recipient’s name
- their personal greeting
- their name
Our basic UI looks like this:
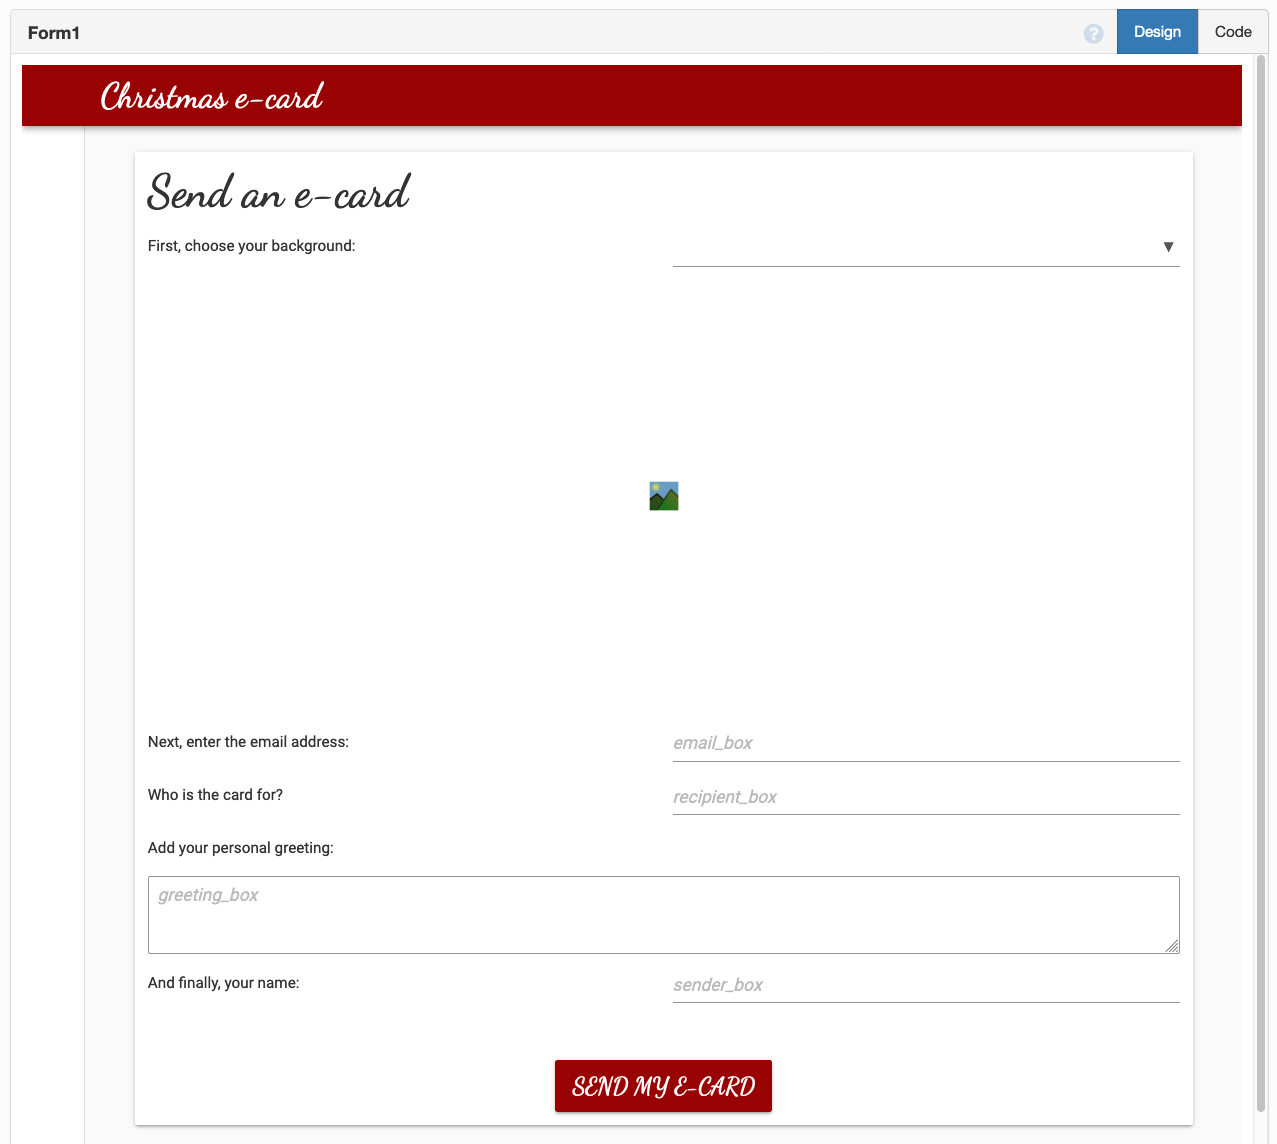
Choose your background
We’ll use Anvil’s Data Tables to store background images for our users to choose from when creating their card.
We create a table called ‘backgrounds’ which has a text column for the name of the image and a media column to store the images. I have uploaded three images to my Data Table which looks like this:
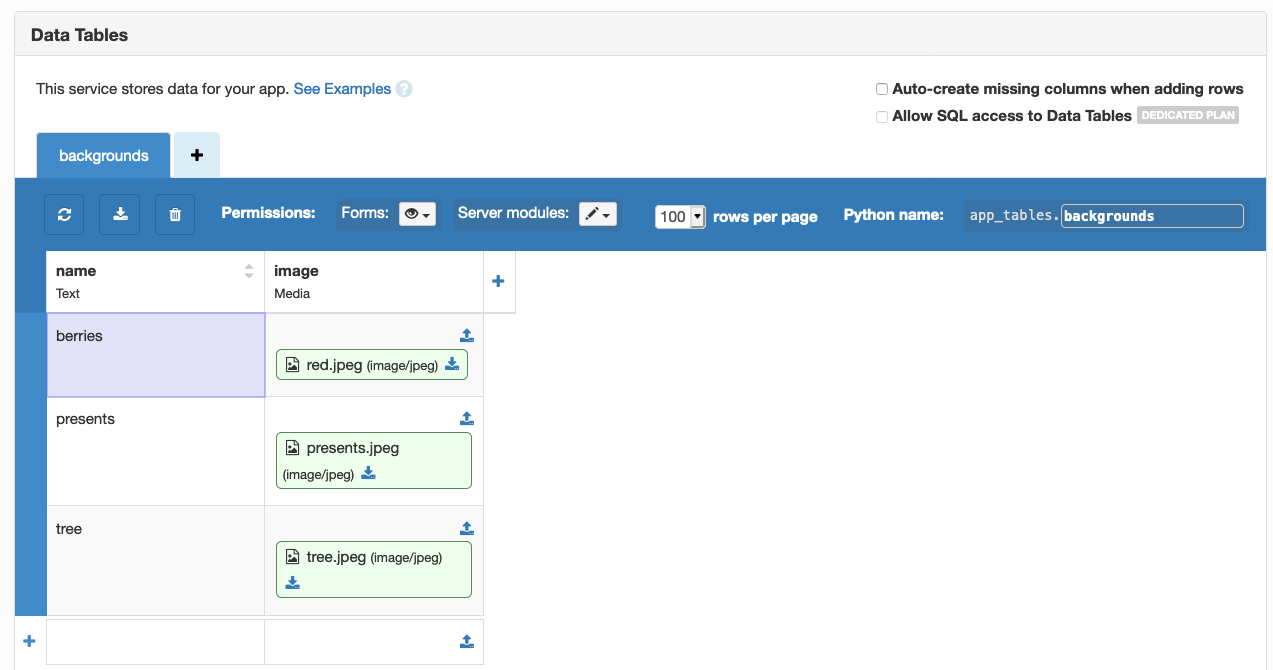
Preview backgrounds
Back in the UI, we’ll use a DropDown component to let our users choose the background image for their e-card. We’ll also show a preview of the selected image using an Image component.
We add this code to our Form’s __init__ method to:
- Populate the DropDown
- Show a preview of the image
    # get images from the data table
    cards = app_tables.backgrounds.search()
    # populate the DropDown
    self.card_dropdown.items = [(x['name'], x) for x in cards]
    # Show a preview of the image
    self.card_image.source = self.card_dropdown.selected_value['image']
We’ll also change the image preview when the user chooses a different image. We do this in our card_dropdown_change function which runs when the user selects a different value from the DropDown:
def card_dropdown_change(self, **event_args):
    card = self.card_dropdown.selected_value
    self.card_image.source = card['image']
Capture user inputs
All that’s left to do is capture user inputs and then send them to a Server Module which will handle sending the e-card.
We’ll send the inputs to the server when the ‘Send my e-card’ button is clicked:
def button_1_click(self, **event_args):
    email_address = self.email_box.text
    recipient = self.recipient_box.text
    sender = self.sender_box.text
    greeting = self.greeting_box.text
    image = self.card_image.source
    anvil.server.call('send_ecard', image, email_address, recipient, greeting, sender)
Send emails
We’ll need to enable the Anvil Email Service - just click the ‘+’ next to Services in the App Browser. We can now use anvil.email.send to send emails from our app.
Once that’s enabled, we add a Server Module and define our send_ecard() function to send our custom e-card. We use inline attachments to include the background image:
@anvil.server.callable
def send_ecard(image, email_address, recipient, greeting, sender):
  anvil.email.send(inline_attachments={'img':image},from_name="The Anvil Christmas elves",
               to=email_address,
               subject="Merry christmas from {}".format(sender),
               text="Please open in a different email service to see your e-card in its true glory",
               html=f"""
               <div style="background: url(cid:img); background-size: cover; width: 100%; ">
                 <div style="min-height:400px; padding: 30px;">
                  <p style="font-size: 54px; color: white; font-family: 'Snell Roundhand';">Merry Christmas {recipient}!</p>
                  <p style="font-size: 32px; color: white;">{greeting}</p>
                  <p style="font-size: 22px; color: white;">From {sender}</p>
                </div>
               </div>
               """
               )
Outgoing email is subject to a monthly quota, depending on your account plan.
Email sent through a custom SMTP server does not count towards your monthly quota.
Voila!
That’s it!
And that’s it! Go forth and spread the Christmas spirit!
Give the Gift of Python
Share this post: