
Connecting a DropDown component to a Data Table
A common use case for the DropDown component is to populate it with rows from a Data Table. This how-to guide will show you how to populate a DropDown component with rows from a Data Table then write back to a Data Table after making a selection.
The example app in this guide is a simple suggestion box. Users add feedback to a TextArea component and choose a category from a DropDown. A row is then added to the Data Table with the feedback and selected category.
Step 1: Create Data Tables
You’ll first need a Data Table in your app. In this example, we have two Data Tables: categories and suggestions.
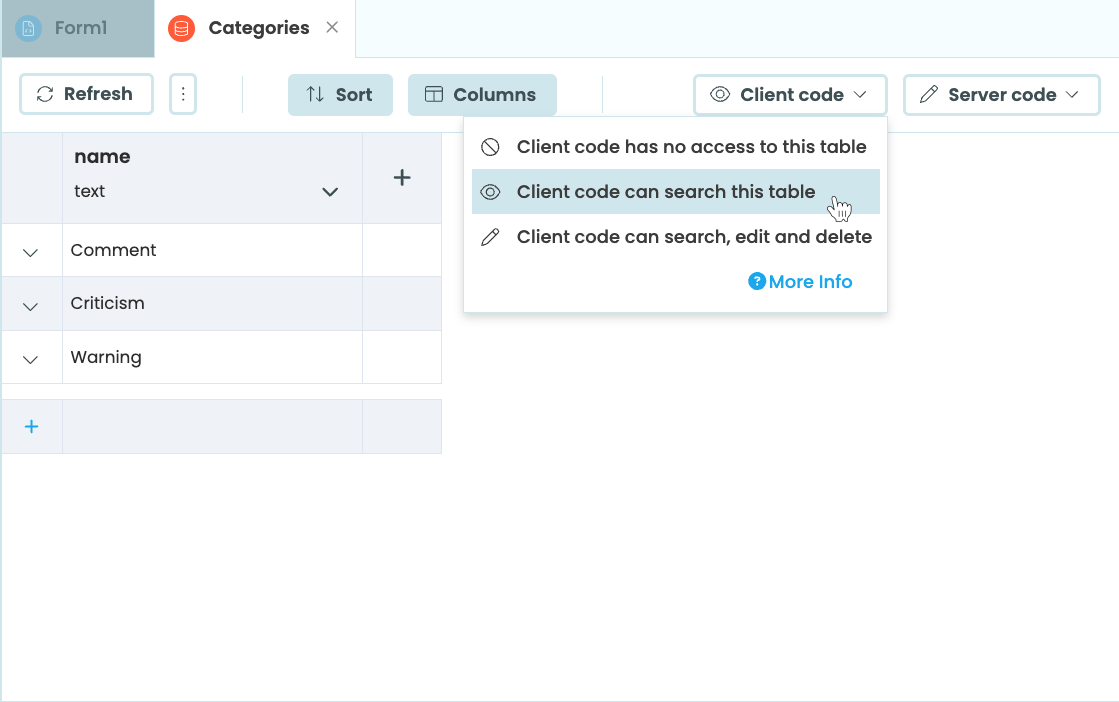
Categories has one text column called name with three rows: Comment, Criticism and Warning
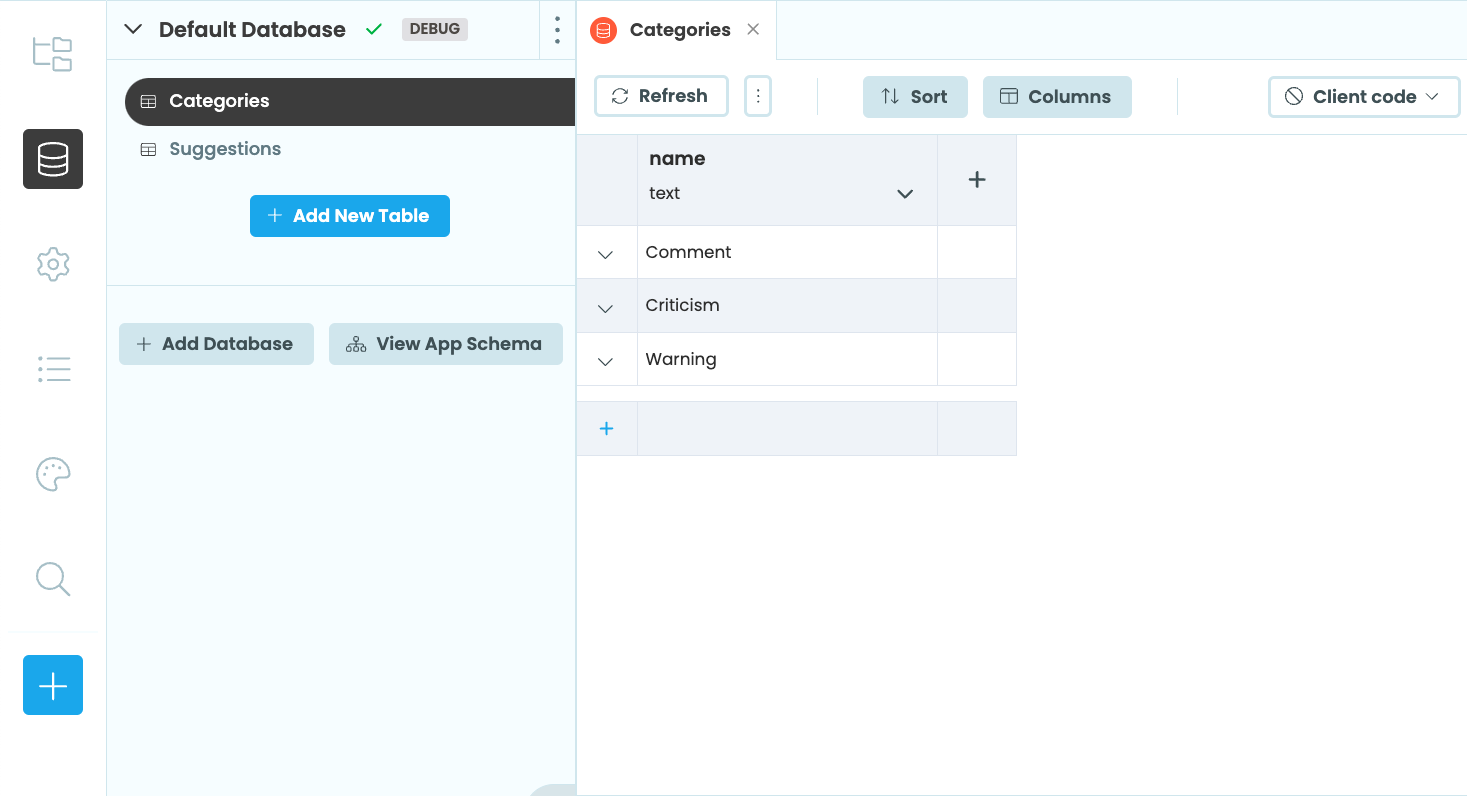
The categories Data Table
The second Data Table, suggestions, is where the we’ll store the user feedback. We’ll need two columns: one for storing the feedback added to the TextArea component and one for the category selected in the DropDown component.
The first column should be a text column called text. The second should be called category and should be a link to the categories Data Table.
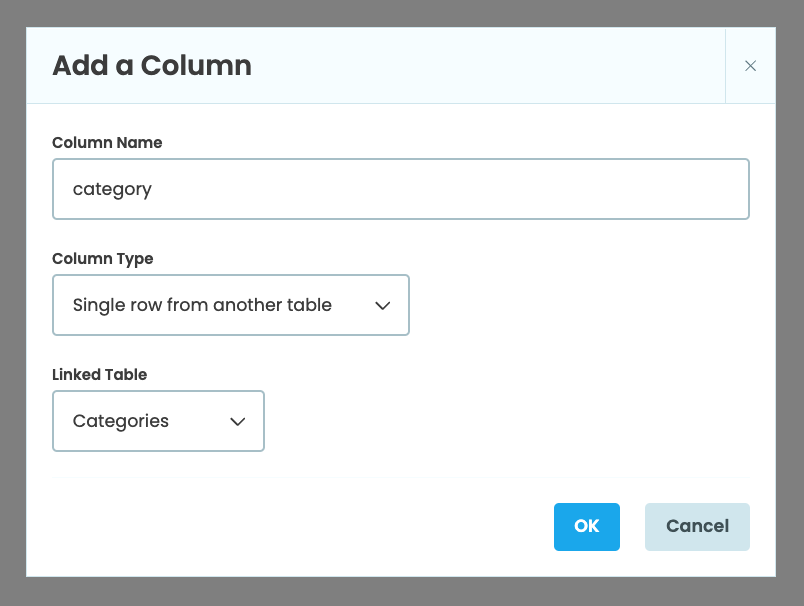
Adding a link to the categories table
The suggestions Data Table should look like this:
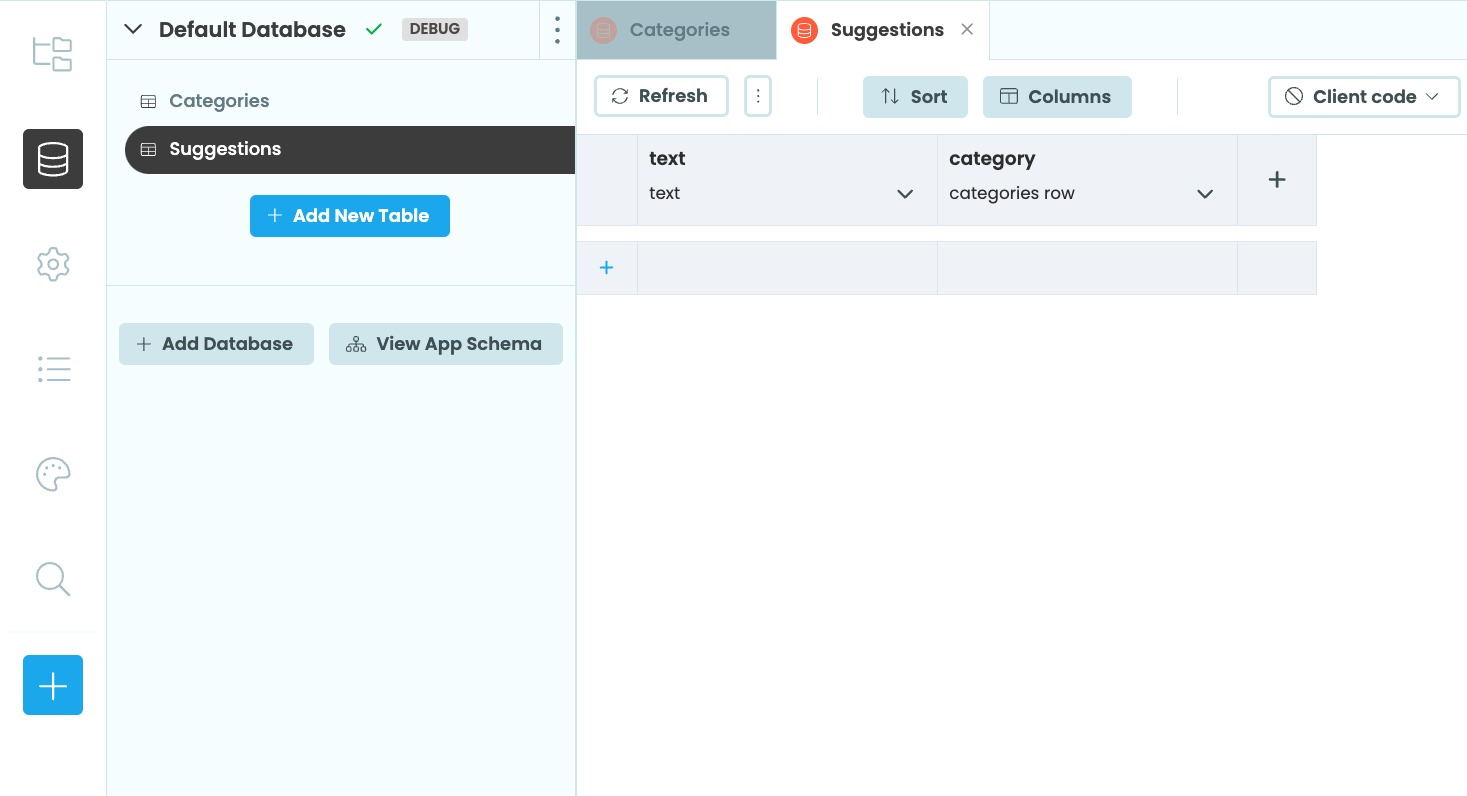
The suggestions Data Table schema
Step 2: Build the User Interface
Next, we’ll build the user interface for our example app. We’ll need to add a Card, two Labels, a TextArea, a DropDown and a Button to our Form. Change the text of the Button to be “Save”. The finished UI should look something like this:
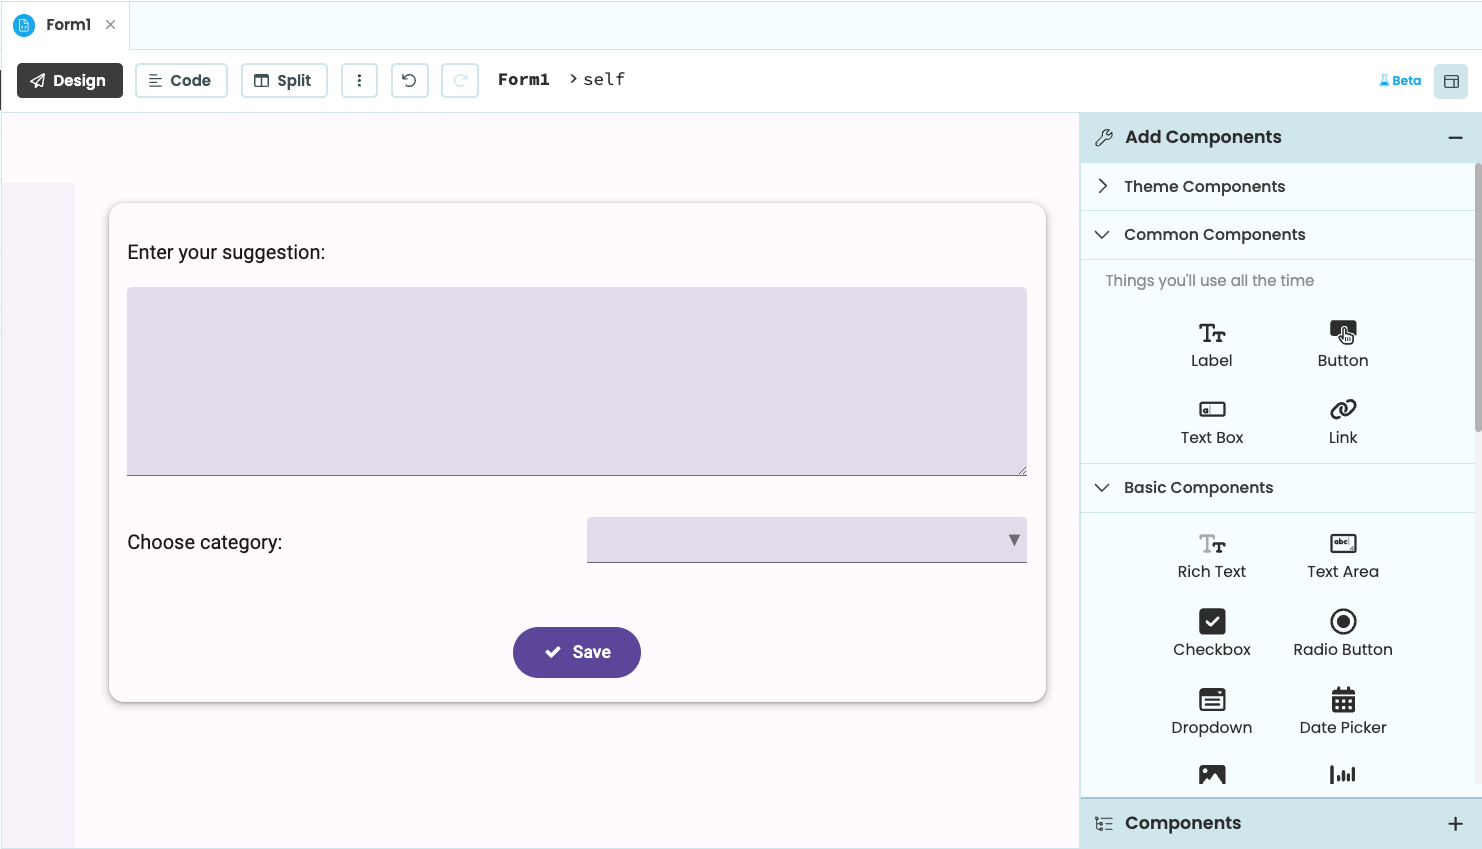
The UI for the suggestion box app
Step 3: Populate the DropDown
We want the choices in the DropDown to be the categories listed in our categories Data Table. To do this, we need to set the items property of the DropDown to a list of rows from the Data Table.
If we set the items property to be a list of 2-tuples, the first element of each tuple will be displayed in the DropDown. When a user selects an item in the DropDown, the second element of the tuple becomes the selected_value property of the DropDown.
We can set the DropDown so that the categories from the categories Data Table are displayed in the DropDown, but the associated row from the Data Table will be the selected_value.
item_list = []
for row in app_tables.categories.search():
    item_list.append((row["name"], row))

self.drop_down_1.items = item_list
The above code can be refactored more succintly using a list comprehension:
self.drop_down_1.items = [(row["name"], row) for row in app_tables.categories.search()]In order for the code above to run, we’ll need to make it so the categories Data Table can be searched by the client. By default, Data Tables are only accesible via server code.
Changing the permissions of the categories Data Table
Step 4: Set up the Button click event
Now we want the Button we added to the Form to do something. We’ll set up a click event that will take the text from the TextArea and the selected_value from the DropDown and add them to the suggestions Data Table. After adding the row, we’ll clear the TextArea:
def self.button_1_click(self, **event_args):
  app_tables.suggestions.add_row(text=self.text_area_1.text, category=self.drop_down_1.selected_value)
  self.text_area_1.text=""
For this code to run, we’ll also need to make the suggestions Data Table editable by the client.
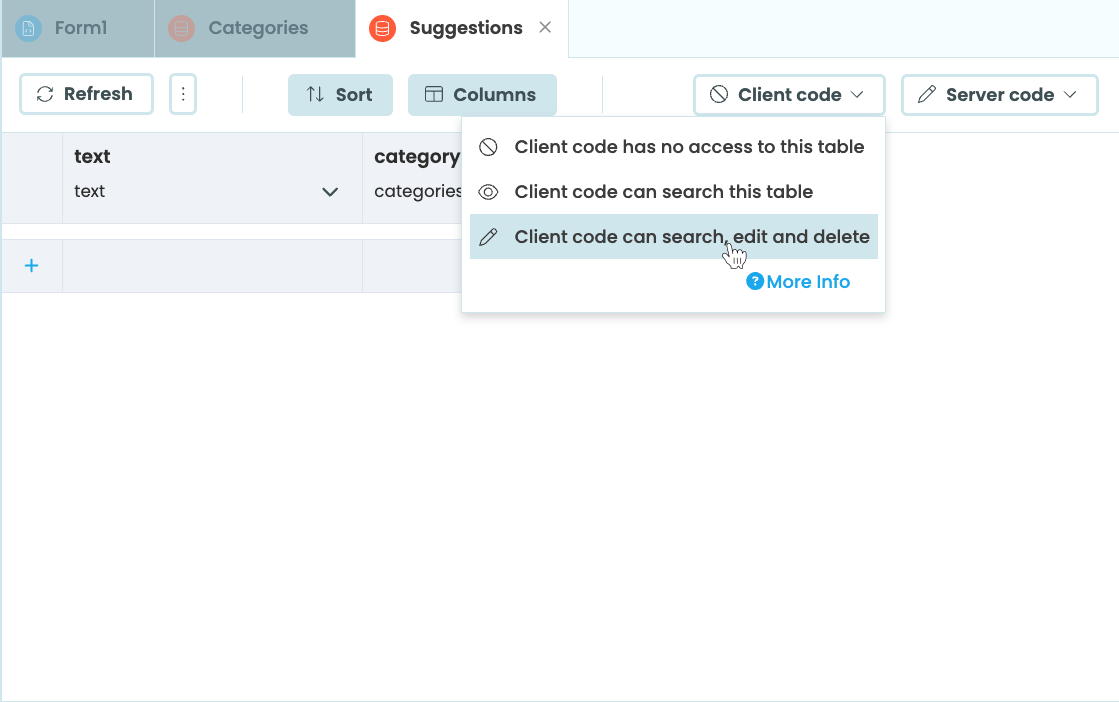
Changing the permissions of the suggestions Data Table
Run the app, add text to the TextArea and choose a category from the DropDown. Click the “Save” button then stop the app. Your suggestions Data Table should have a new row added:
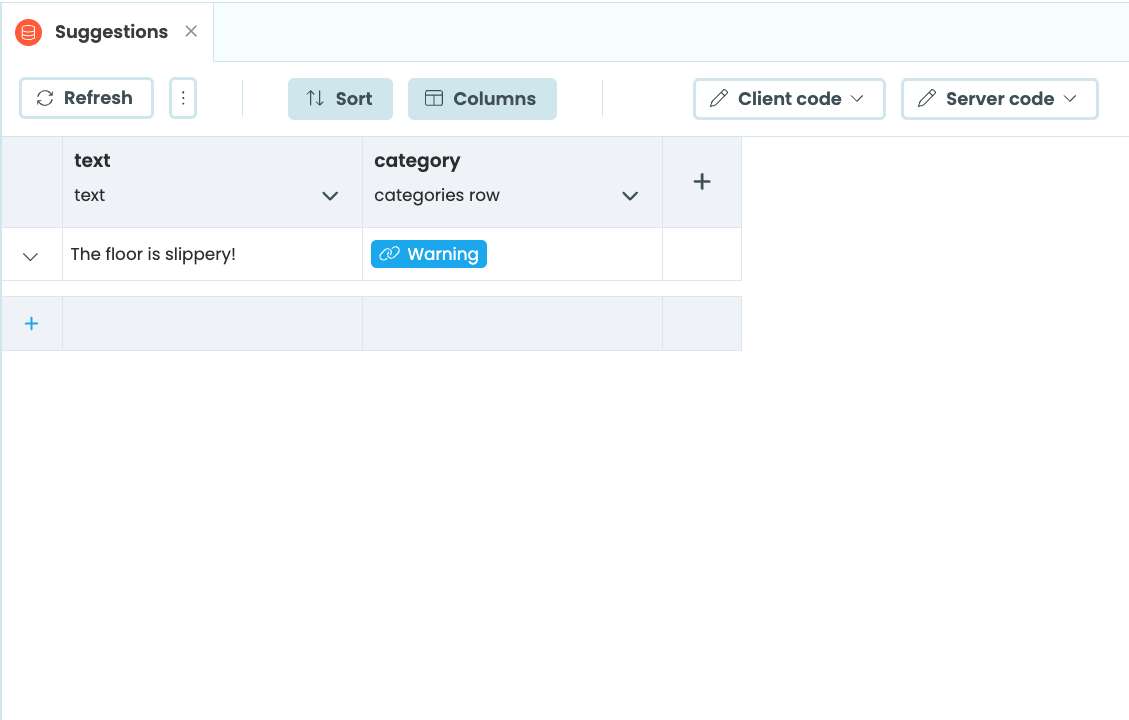
The suggestions Data Table with a row added
(Optional) Step 5: Make the app more secure
By default, Anvil Data Tables are only searchable and editable by the server. This is because client code runs on the user’s browser, so users have access to that code. To build a secure app, you’ll want to run sensitive code in a Server Module.
To make our example app more secure, we’ll need to change the permissions of the suggestions Data Table back to “No access”.
Next, we’ll need to create a Server Module and add to the suggestions Data Table from a server function instead of from the Button click event. Create the following function in the Sever Module:
@anvil.server.callable
def add_suggestion(text, category):
  app_tables.suggestions.add_row(text=text, category=category)
Make sure the function has the @anvil.server.callable decorator so that we can call it from our client Form.
Go back to the code-view of Form1, and change the Button click function. It should now call the server function and pass in self.text_area_1.text and self.drop_down_1.selected_value as arguments:
def self.button_1_click(self, **event_args):
  anvil.server.call("add_suggestion", self.text_area_1.text, self.drop_down_1.selected_value)
  self.text_area_1.text=""
Run the app again to test it out! It should work the same as before, but now users have no access to the suggestions Data Table.
If you prefer a video explanation, we have a YouTube video explaining how to do the above. The video was made using an older version of Anvil, so it won’t look the same as Anvil does now. However, the concepts and steps are the same.
Note: This guide includes screenshots of the Classic Editor. Since we created this guide, we've released the new Anvil Editor, which is more powerful and easier to use.
All the code in this guide will work, but the Anvil Editor will look a little different to the screenshots you see here!
For more information about Anvil, check out anvil.works
Do you still have questions?
Our Community Forum is full of helpful information and Anvil experts.