 By
By A little while ago I came across a fabulous talk by Celia Cintas from PyCon UK, about using deep learning to classify Star Wars ships.
She’s a machine learning researcher at IBM Research and, along with Pablo Navarro and friends at LinuxChix Argentina, put together a Jupyter notebook to classify different Star Wars ships as part of an educational hackathon for PyCon Argentina. This later became a talk at Nerdear.la and then PyCon UK.
Inspiration struck, and I decided to make her notebook into a new web app using Anvil!
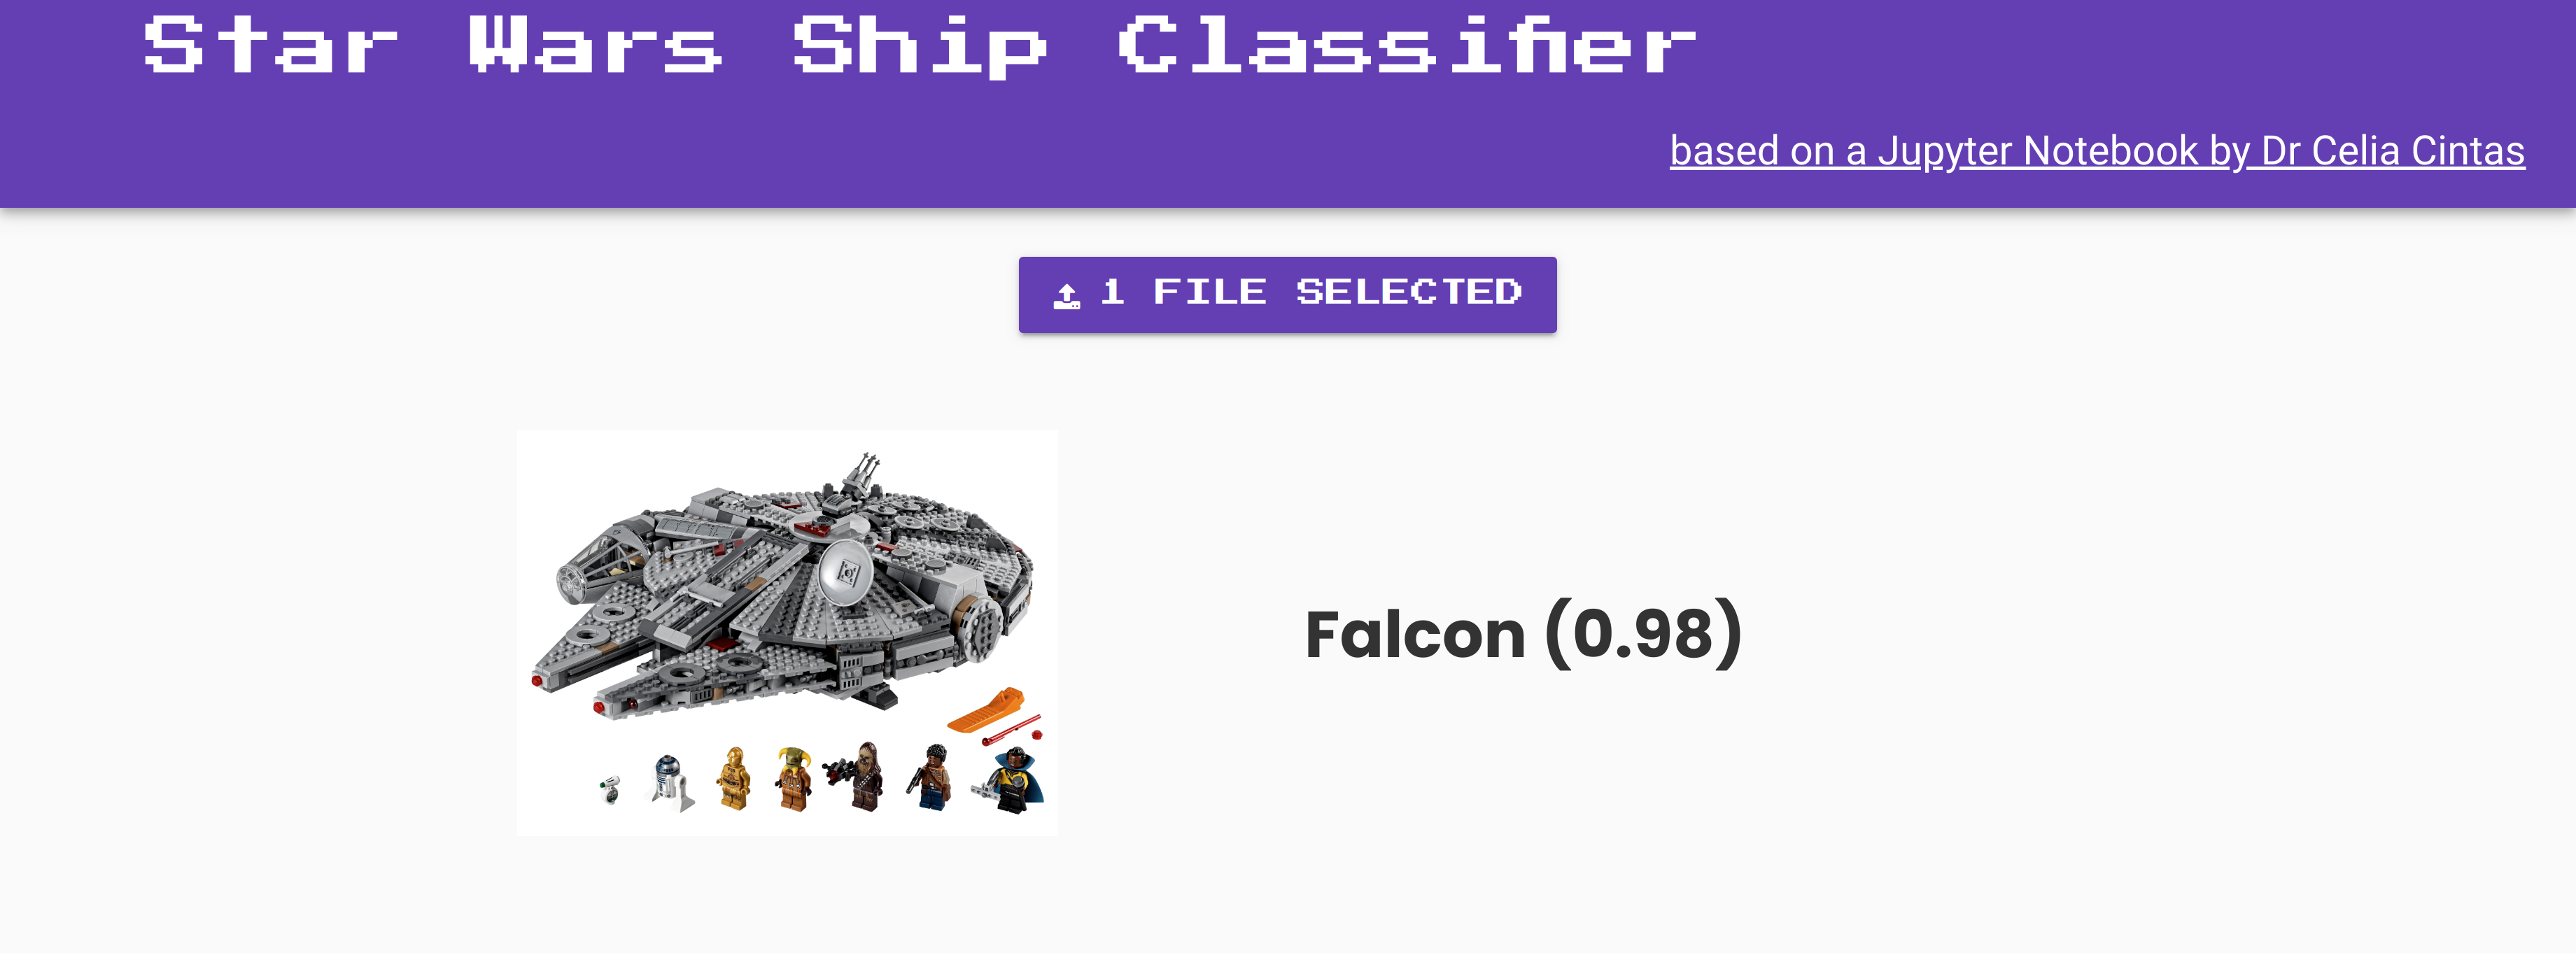
The classifier in action! Correctly identifying a Lego Millenium Falcon.
The Ships
The Millennium Falcon is of course Han Solo’s smuggling ship. K-Wings are starfighter ships from the New Republic and the Lambda shuttle is an Imperial craft designed to carry passengers like Darth Vader. It’s obviously important that our neural network be able to tell these different ships apart!
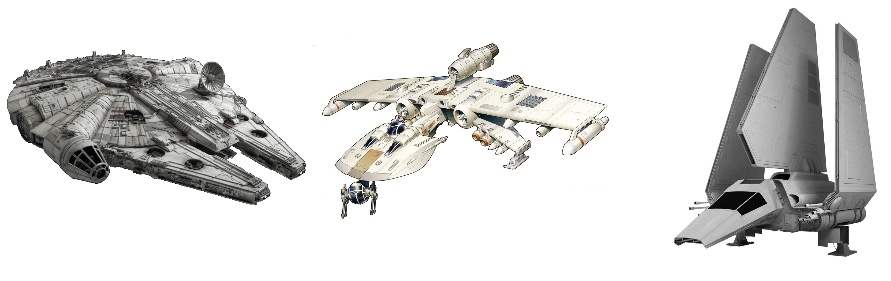
Millennium Falcon, K-Wing fighter and Lambda shuttle craft.
From a Jupyter Notebook to a web app
Anvil is a great tool for a task like this because it allowed me to make an interactive web app purely in Python, and attach it to code running on my laptop. I dragged and dropped a simple component onto the app template - a FileLoader for the ship images that users wanted to classify. Then I customised the font of the app to make it look more Star Wars like!
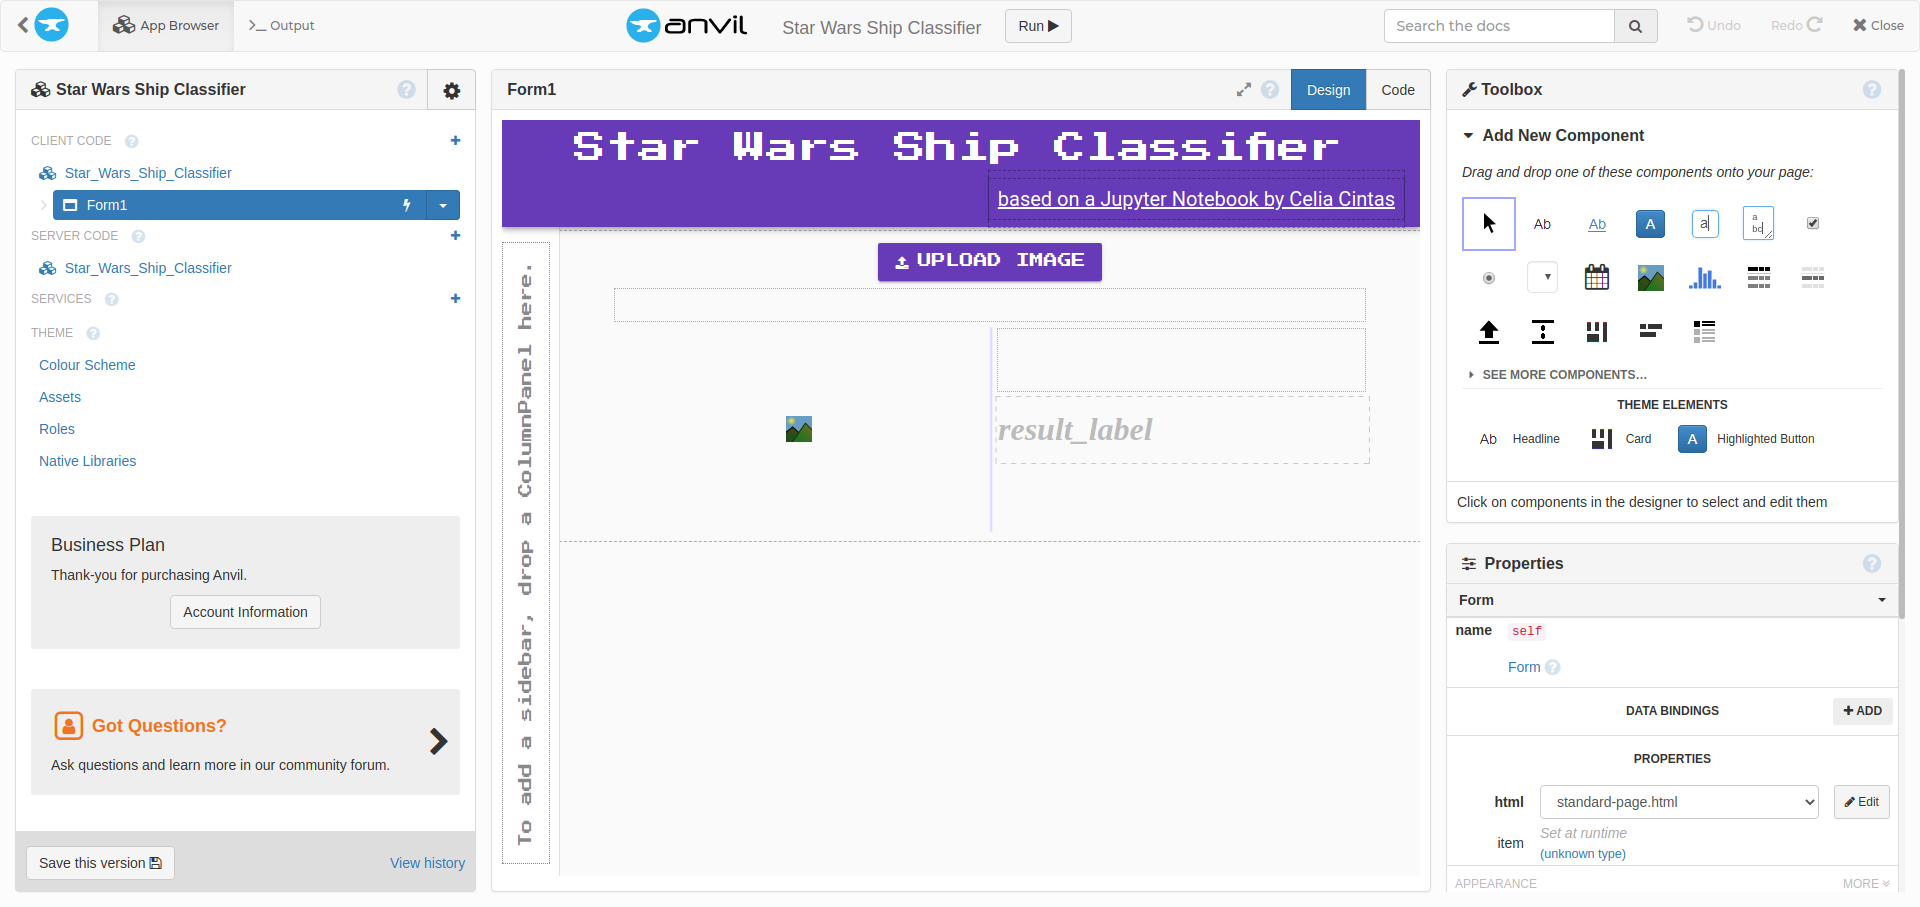
Putting the app together in the Anvil Editor.
Using Anvil’s Uplink I could then hook up my new web app to Celia’s Jupyter notebook running on my laptop. That way, the app could call the neural network I had running locally and ask it to classify ship images that users would upload online.
I adapted Celia’s Jupyter notebook code to classify ships inside a new function, what_kind_of_ship_is_it and decorated that function with an @anvil.server.callable to make it available over the Uplink.
I also added an anvil.media import to allow the function to take an Anvil media file as input, so that I could load images into the Anvil webpage and process them with this function, like so:
import anvil.media

# This decorator means I can call this function from the web browser
@anvil.server.callable
def what_kind_of_ship_is_it():
  with anvil.media.TempFile(file) as filename:
        # load as grayscale
        my_image = cv2.imread(filename, 0)
  ...
Then we just add the Uplink code itself, to connect my notebook to my app and keep the connection going. I grabbed an Uplink key for my app from the Anvil Editor.
import anvil.server

with open("<file containing key>", 'r') as fin:
    uplink_key = fin.readline()

anvil.server.connect(uplink_key)  # our Ship Classifer app
anvil.server.wait_forever()  # So executed notebook will not close
And that’s it, my web app can now call functions from my Jupyter notebook’s environment. As long as the notebook is running, the app will continue to identify ship images we load in.
Note that I’m not just connecting using the text of my Uplink key in the notebook. Because I am sharing my notebook code with other people online, that would be insecure. Instead I added a new file that is not in git - make sure to .gitignore it - with the key inside, and read this from the notebook instead. You could also do this with environment variables.
You can run this notebook anywhere, as long as it has an internet connection. So that I don’t have to leave my laptop on all the time, I actually now have this notebook running on an Amazon EC2 instance to drive the app.
The Rise of Deep Learning
Celia’s work is an example of supervised machine learning. We start with a set of labelled images and use them to train a neural network so that it can classify new images it hasn’t seen before.
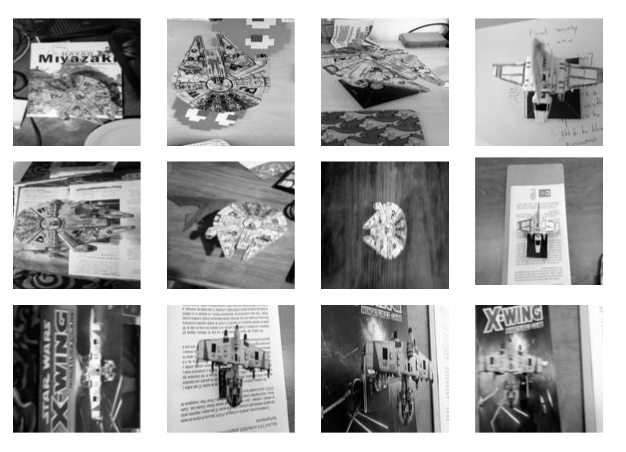
Some of the images used to train the neural network.
In this case, each of the example images is labelled ‘falcon’, ‘k-wing’ or ’lambda’, so we can train the network to distinguish between these three options.
What is a neural network?
Neural networks are one of the most beautiful programming paradigms ever invented. In the conventional approach to programming, we tell the computer what to do, breaking big problems up into many small, precisely defined tasks that the computer can easily perform. By contrast, in a neural network we don’t tell the computer how to solve our problem. Instead, it learns from observational data, figuring out its own solution to the problem at hand.
– Michael Nielsen in the free online ebook “Neural Networks and Deep Learning”
The name “neural networks” comes from biology: these mathematical frameworks were originally supposed to reflect the structure of the brain’s neurons and their connections.
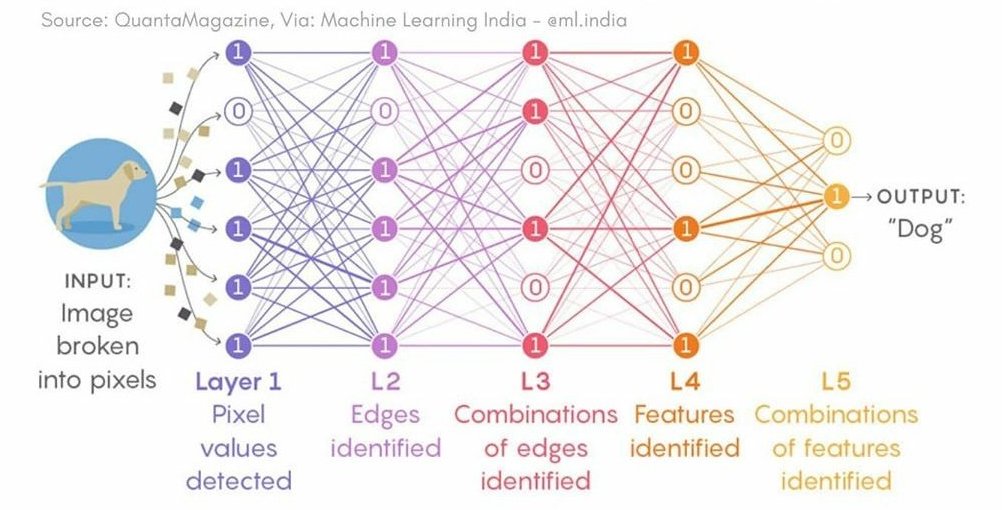
Example neural network diagram from Quanta Magazine
The basic structure of a neural net is an input layer, which takes values such as pixels of an image, and one or more hidden layers which perform non-linear transformations on those values. Then there is an output layer with a node for each different class of possible output. The idea is that, given an input image, the net should output a greater probability for the correct class than any other class.
Neural networks have been around for a while, but they are much more sophisticated than they used to be because of the computational power we can now give them. Modern GPUs allow for faster construction and training of these nets, and we also have access to much larger data sets to train them on - so called ‘Big Data’.
Another way that neural networks have become more powerful in recent years is through Deep Learning. This is a set of modern techniques that people have discovered for making and training deeper networks with more hidden layers. It improves the performance of neural networks compared to conventional processing methods in a wide range of fields, from image processing to speech recognition.
Python tools for making our neural net
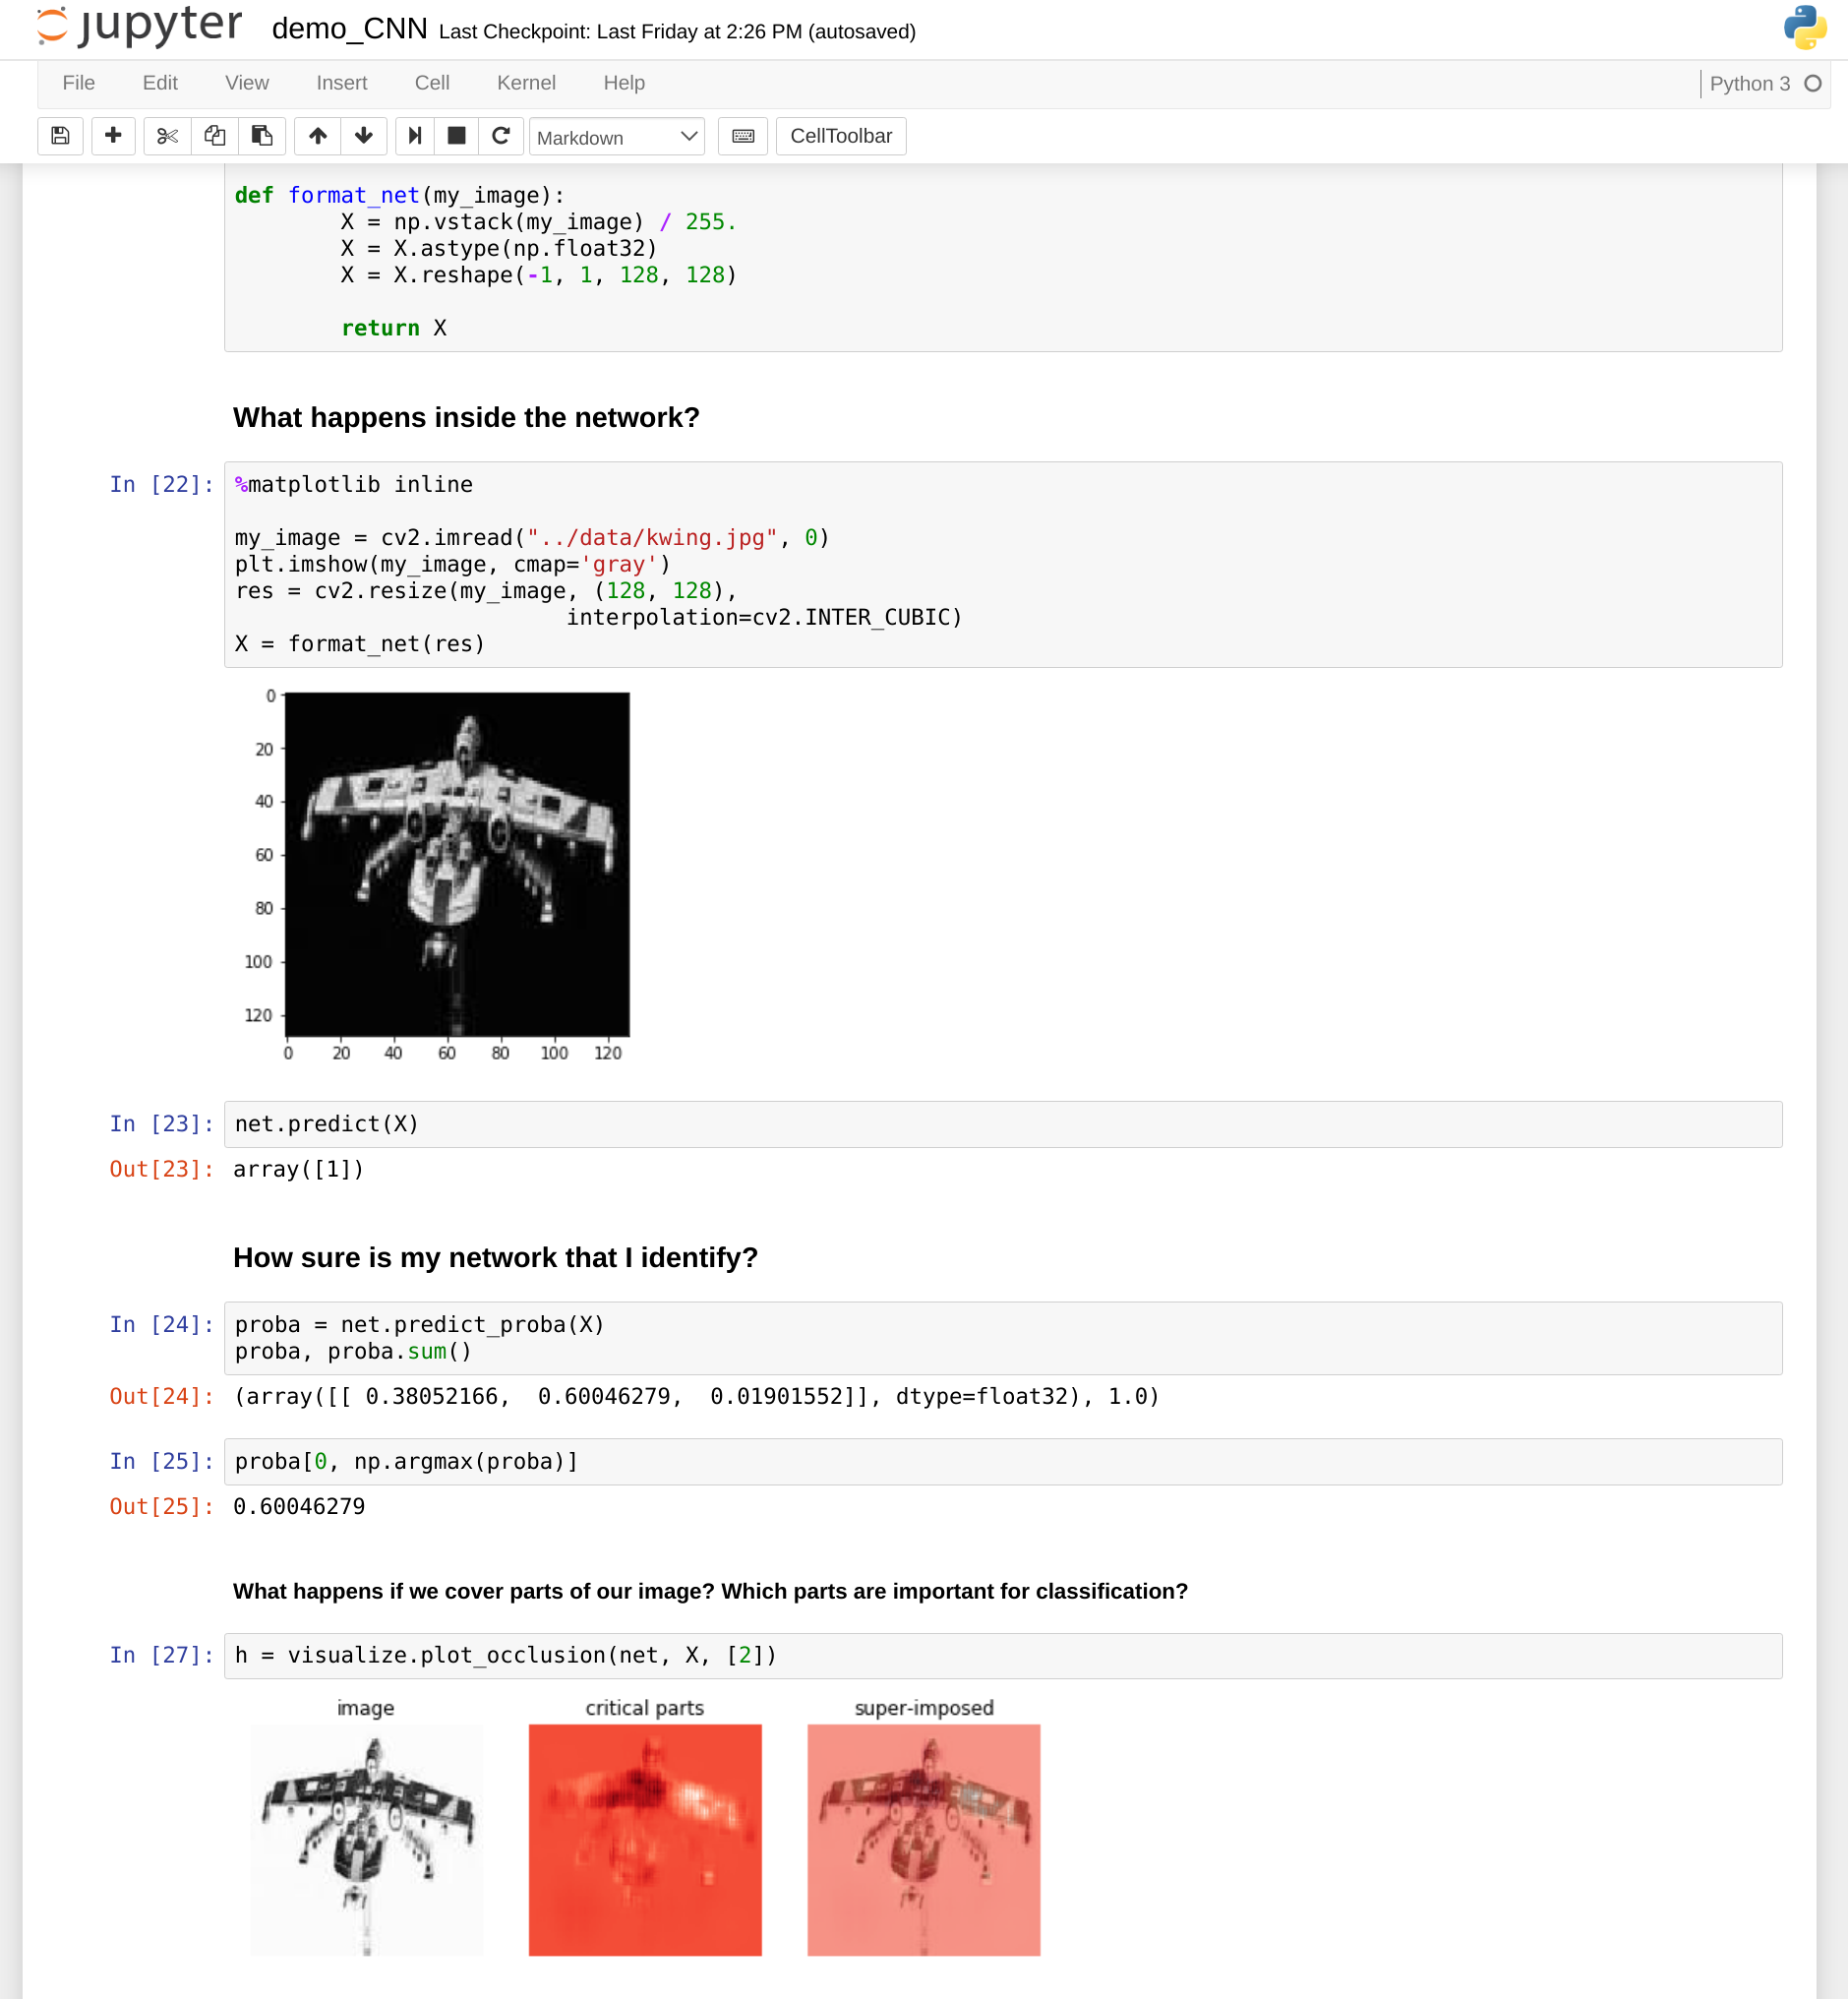
We use OpenCV to read in the images and resize them to dimensions that our neural net can handle (128x128 pixels).
Then we use Pandas and NumPy for getting the data into the right shape ready to be consumed by our neural network.
Finally, we use Theano, Lasagne and SciKit Learn for neural net construction, training and testing.
What bits of a ship image are most important for identification? We can use nolearn.lasagne’s visualize.plot_occlusion tool to examine them. This works by hiding different parts of the image and seeing what affects the prediction from the neural network the most.
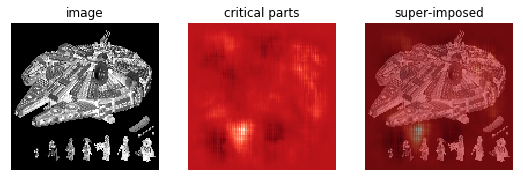
Critical parts of image highlighted
This is different for each image and gives us some useful insight into how the network prioritises parts of our pictures such as edges and particular shapes. Here’s an interesting example of how occlusion tells us what’s most important for handwriting recognition with a neural net.
Occlusion calculated on another image with the notebook.
If you run the notebook locally, you can try this on different images yourself.
I’ve got a bad feeling about this
You would think that more training of a neural network is always better, if you have the time and computational power, but this isn’t actually the case. If you train too many times, the network may ‘over-fit’ to the data set it is given. This means it is just memorising each image it has seen before. It means the network may work badly with new images, not categorising them properly.
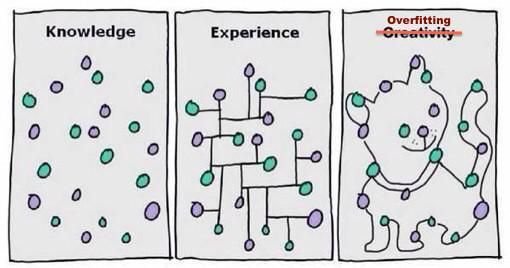
It’s easy to go too far!
To prevent this, we can measure how well the trained net classifies unseen data. This will help us to decide how many training cycles (“epochs”) to perform.
The notebook uses SciKitLearn’s train_test_split tool to keep aside some of the labelled image data to test the network and measure its performance. That way we can stop training our network at a point which is a good balance between performance against the training data set and performance against previously unseen images.
Hard to see, the hidden layers are
The network Celia put together for classifying Star Wars ships actually has twelve layers. We can see the details of each of them by calling PrintLayerInfo()
 # Neural Network with 43699 learnable parameters

## Layer information
  #  name        size
---  ----------  ---------
  0  input0      1x128x128
  1  conv2d1     8x126x126
  2  maxpool2d2  8x63x63
  3  conv2d3     8x61x61
  4  maxpool2d4  8x30x30
  5  conv2d5     8x28x28
  6  maxpool2d6  8x14x14
  7  conv2d7     16x12x12
  8  maxpool2d8  16x6x6
  9  dense9      64
 10  dropout10   64
 11  dense11     64
 12  dense12     3
One particular layer is useful to help prevent over-fitting - dropout10, which is a “dropout” layer. Dropout layers remove nodes at random while training the network. This makes the network more robust to the loss of individual pixels of input, and thus less likely to rely on small idiosyncrasies that only exist in our training data set of images.
If you’re interested to discover more about what all the different layers are doing, Nielsen’s ebook has a good chapter about Convolutional Neural Network layers.
Storing the results
If you run this notebook locally, you’ll notice it uses a lot of processing power! Don’t be disturbed if it takes several minutes to work through each of the notebook steps.

The pickle module helps us store the neural network we made.
Fortunately, we only need to construct and train the neural network once. After that, we pickle the results and use those on subsequent runs. The reason we pickle these and don’t just add them to our git repository is that the resulting files are very large - GitHub will complain that it can’t handle files that size.
import os.path

PICKLE_FILE = '../data/ship_classifier.pickle'
net = None

if os.path.isfile(PICKLE_FILE):
    # We have run this notebook before and have a pickled net stored!
    print("Yay, pickle found!")
    with open(PICKLE_FILE, 'rb') as f:
        net = pickle.load(f)
else:
    # We don't have a net yet, so make one then pickle it for the future.
    net, X_test, y_test = make_and_train_net_from_ship_data()

    with open(PICKLE_FILE, 'wb') as f:
        pickle.dump(net, f, -1)
If we already have a pickled network stored this piece of code detects it and loads it into the notebook. Otherwise it makes and trains a new net and then pickles the results for later.
Use the source, Luke
If you’re interested in how the ‘Star Wars Ship Classifier’ app works, below is the clone link for the app, and Celia Cintas’ Jupyter notebook which I adapted to connect via the Anvil Uplink.
More resources
-
Michael Nielsen’s free Neural Networks and Deep Learning ebook
-
Celia recommends this online course from Stanford on Convolutional Neural Networks for Visual Recognition
Build your own app with Anvil
If you’re new here, welcome! Anvil is a platform for building full-stack web apps with nothing but Python. No need to wrestle with JS, HTML, CSS, Python, SQL and all their frameworks – just build it all in Python.
Want to build an app of your own? Get started with one of our tutorials:
Build Database-Backed Apps
Build a Simple Feedback Form
Build a Simple Feedback Form
Build a data-entry app, and learn the techniques fundamental to building any Anvil app. In this tutorial, you will:
- Build your User Interface
- Write client-side Python
- Write server-side Python
- Store data in a database
- Deploy your app