
Setting up the Uplink
To set up the Uplink, you need to:
- Enable the Uplink in the Anvil IDE.
- Install the Uplink Python library on your machine.
- Connect your Python program to your app by calling
anvil.server.connect.
Enabling the Uplink
The Anvil uplink is a library you add to your own code, running outside Anvil. It connects securely to the Anvil server, and allows your Anvil app to call functions in your project. You can also call server modules within your app from your uplinked code. The Anvil uplink works through most firewalls, as it initiates the connection to the Anvil server. Because the Uplink process initiates the connection to the Anvil server, it works through most firewalls.
To enable the Uplink in your app:
Click the + button in the sidebar menu and choose Uplink:
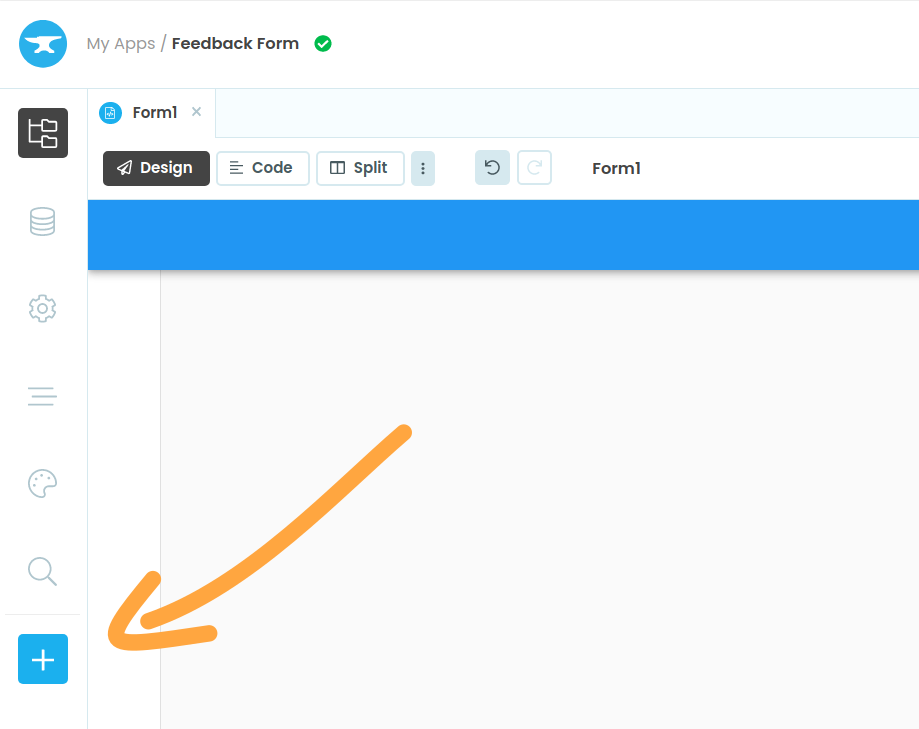
Click the + button, then select Uplink
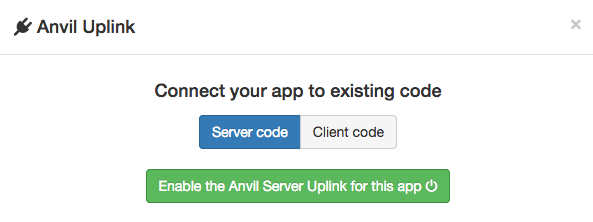
If you have one deployment environment, you’ll be prompted to choose between a Client Uplink and a Server Uplink. Click your choice.
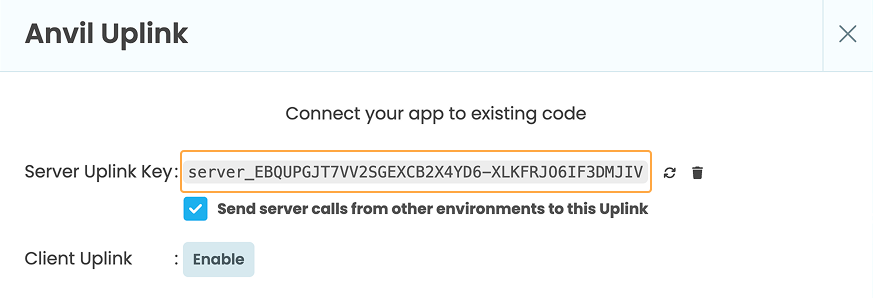
If you have multiple environments, you’ll see a list of them. Select the environment you want to connect the Uplink to, then click Enable next to either Server Uplink Key or Client Uplink Key (learn about the difference).
This generates a secret key you will use to connect your external code to your Anvil application.
Connecting
In your local Python code, call anvil.server.connect() with your app’s connection key in order to link this program with your Anvil app. This establishes a connection in a background thread and will keep attempting to reconnect to Anvil if it fails (for instance, if you lose your local internet access temporarily).
# In a script on your own machine (or anywhere)

import anvil.server
anvil.server.connect("<your Uplink key>")

@anvil.server.callable
def get_file():
  # Return a file from this local machine
  return anvil.media.from_file("./image.jpg", "image/jpeg")

anvil.server.wait_forever()
The function anvil.server.wait_forever() keeps your script running so your app can call functions in it using anvil.server.call.
You can use other ways to keep the process alive, for example:
anvil.server.connect("<your Uplink key>")

@anvil.server.callable
def get_file():
  return anvil.media.from_file("./image.jpg", "image/jpeg")

while True:
  # keep the process alive to respond
  sleep(1)
You can even run the Uplink in a Python REPL!
Disconnecting
If you only need to connect temporarily, call anvil.server.disconnect() when done:
Sometimes you may only want to connect your code temporarily using the Anvil Uplink. To safely close down an Uplink connection, call anvil.server.disconnect() when you are ready to end the connection.
import anvil.server

def open_anvil_connection(uplink_key):
    anvil.server.connect(uplink_key)
    do_something_cool_using_uplink()
    anvil.server.disconnect()
This can be done within a context manager. For example:
import anvil.server
from contextlib import contextmanager

@contextmanager
def open_anvil_connection(uplink_key):
    anvil.server.connect(uplink_key)
    yield
    anvil.server.disconnect()
You can then use it in a with statement to cleanly open and close the connection:
with open_anvil_connection("<your Uplink key>"):
    data = anvil.server.call("some_remote_function")
    results = perform_local_calculation(data)
    anvil.server.call("write_back_crunched_data", results)
Advanced setup
Custom setup code
Sometimes, it is necessary to initialise an uplink’s session before interacting with your app. For example, a client (unprivileged) uplink process might need to authenticate with the app before it will be allowed to perform certain operations.
If you pass the init_session= keyword parameter to anvil.server.connect, it will be called after the uplink connection is established, but before any other interaction (such as server calls or function registrations) have occurred. If connection is lost and the uplink library reconnects, init_session will be called again before any interaction occurs. This guarantees that init_session has completed whenever you interact with the Anvil app.
import anvil.users

def setup():
  anvil.users.login_with_email("my_user@example.com", "MY_PASSWORD")

anvil.server.connect("<your Uplink key>", init_session=setup)

anvil.server.call("some_func")
If init_session raises an exception, all subsequent Anvil interactions will fail and raise exceptions.
Suppressing connection messages
By default, the Uplink prints some output during the connection phase:
Connecting to wss://anvil.works/uplink
Anvil websocket open
Authenticated OK
You can pass an optional keyword argument “quiet” to anvil.server.connect() to suppress this. Errors (such as connection failure and reconnection attempts) will still be printed.
# Connect without printing to console
anvil.server.connect("<your Uplink key>", quiet=True)
Customising Uplink Logging
The Uplink uses Python’s built-in logging system, so you can control how log messages are displayed. For example, you can set the output format, date format, and log level before calling anvil.server.connect().
In your Python program, import the logging module and configure it just before connecting:
import anvil.server
import logging

logging.basicConfig(
    format="{asctime} - {levelname} - {message}",
    style="{",
    datefmt="%Y-%m-%d %H:%M",
    level=logging.INFO,
)

anvil.server.connect('your-uplink-key')
The Uplink log output will then look like this:
2025-08-04 10:29 - INFO - Connecting to wss://anvil.works/uplink
2025-08-04 10:29 - INFO - Anvil websocket open
2025-08-04 10:29 - INFO - Connected to "Default Environment" as SERVER
Do you still have questions?
Our Community Forum is full of helpful information and Anvil experts.