
Uplink: Code outside Anvil
The Anvil Uplink lets you connect Python code running anywhere, such as your laptop, a server on your company network, an IoT device, or a Google Colab notebook to your Anvil app.
For example, you can define an @anvil.server.callable function in a Python script running on your company’s private server to return processed data. Your Anvil app can then call this function with anvil.server.call() and display the result, just as if it were a normal Anvil module.
To set up the Uplink:
- Enable the Uplink in your Anvil app to get your Uplink key.
- In your external Python code:
- Install the Uplink package:
pip install anvil-uplink. - Connect to your Anvil app:
anvil.server.connect("<your Uplink key>").
- Install the Uplink package:
See the Quickstart to get up and running.
Types of Uplink
There are two kinds of Uplink:
- Server Uplink: Code connected to your app with a Server Uplink has the same privileges as Server Module code.
- Client Uplink: Code connected to your app with a Client Uplink has the same privileges as Form code.
Server Uplink
The Server Uplink makes any Python code behave like a Server Module. This is useful when your code requires resources that cannot run on Anvil’s servers, such as access to your company’s internal network or your local machine.
With the Server Uplink, you can:
- Define functions in your external python code and call them from your Anvil app using
anvil.server.call. - Call into your app from the external python code using
anvil.server.call. - Perform any action available in a Server Module, such as accessing Data Tables, managing users, or registering new server functions with
@anvil.server.callable. For example, you can callanvil.users.get_user()to identify the currently logged-in user in your external code.
Use the Server Uplink key for trusted code. Because the Server Uplink key grants full privileges to your code, it should be treated as sensitive information and kept secure. For example, don’t share scripts that contain your Server Uplink key. See Uplink Security for more details.
Example
Here’s a code example you can run in Google Colab to connect an image classifier to your Anvil app:
import anvil.server
import anvil.media
from transformers import pipeline

# Load a pre-trained image classification model
classifier = pipeline("image-classification")

# Connect to your Anvil app with the Server Uplink key
anvil.server.connect("<your Server Uplink key>")

# Define a function that your Anvil app can call
@anvil.server.callable
def classify_image(file):
    # Convert the uploaded Media object into a temporary file
    with anvil.media.TempFile(file) as filename:
        # Run the local ML model on the temporary file and take the top classification result
        result = classifier(filename)[0]
    return result['label'], result['score']

# Keep the connection open
anvil.server.wait_forever()
To run this, you need to pip install transformers anvil-uplink in Google Colab, then enable the Uplink in the Anvil Editor to get your Server Uplink key. See Turning a Google Colab Notebook into a Web App for step-by-step instructions.
It’s also common to use the Uplink to connect a Jupyter Notebook to an Anvil app in order to build a front-end for data science models. See this tutorial video for an example.
Client Uplink
The Client Uplink gives external Python code the same privileges as your Forms and Modules.
Client Uplink code behaves like client-side code. It:
- Cannot access Data Tables, unless they are set to client-accessible.
- Cannot register server functions.
- Can still call server functions (so you can expose only the operations you are happy to allow).
This is the same security best-practice that applies to Form code as well. This is because the user can control the code that runs in their browser. See Client vs Server Code in Anvil.
Client Uplink is useful when you want to connect a system you do not fully trust to your app. It might be an IoT device that could be compromised, or a script running on a customer’s machine.
For example, you should use the Client Uplink to connect a weather station running on Raspberry Pi to your Anvil app. Because it sits outside where anyone could access it, you don’t want the weather station to have full read/write access to all of your app’s tables.
Example
Here’s a script you can run on your own machine to connect to your app:
import anvil.server

anvil.server.connect("<your Client Uplink key>")
anvil.server.call('my_exposed_server_function')
To run this, you need to pip install anvil-uplink and enable the Uplink in the Anvil Editor - see Setting Up. Then run this script in the command line with python my_script.py. It will connect to your app, call the server function, then exit.
Can you use both?
Yes! The Uplink and Publish dialogs allow you to create both server and client authentication keys, for each Deployment Environment that you run.
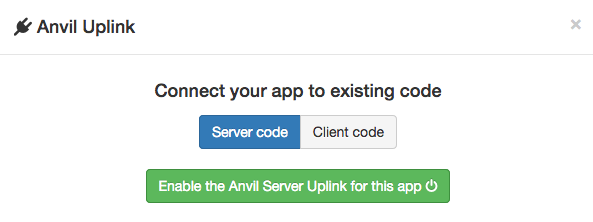
This screenshot shows the Uplink dialog.
You can also find these options in the Publish dialog, under Advanced Settings.
You can use both Server and Client Uplink keys at the same time from different local scripts.
Do you still have questions?
Our Community Forum is full of helpful information and Anvil experts.