 By
By Chapter 1:
Create and run a Script
Let’s start by creating the app and a Script to analyse files.
Step 1: Create a blank app
First, Log in to Anvil and click ‘Create a new app’. Choose the ‘Minimal’ theme.
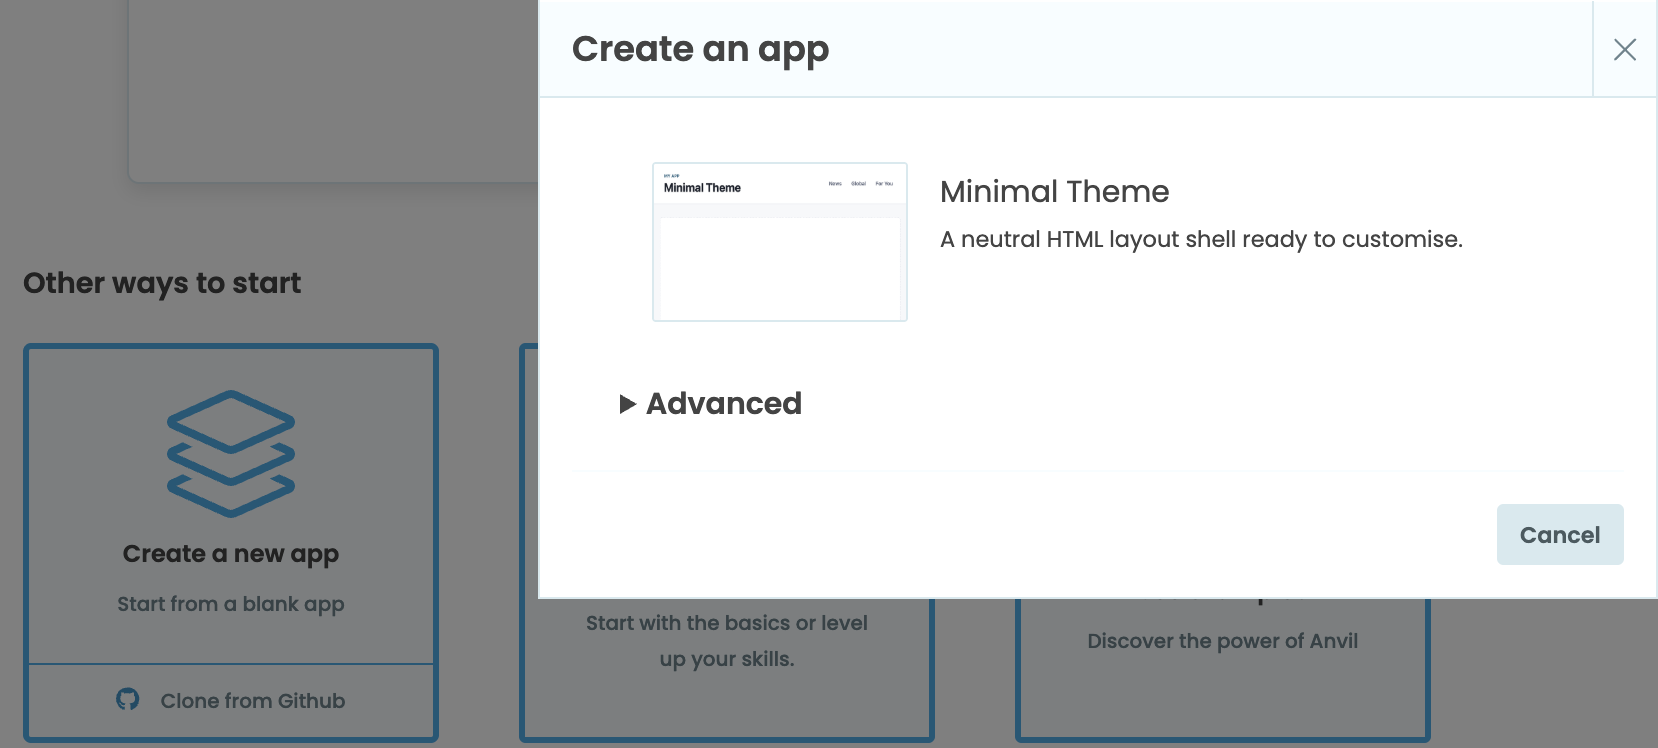
Create your app
Then, rename the app by clicking its name at the top of the screen after “My Apps/”, and changing it to “File Analyser”.
Step 2: Create a Script and set up dependencies
We’ll run our file analysis code in a Script, so let’s create a Script called AnalyseFile.
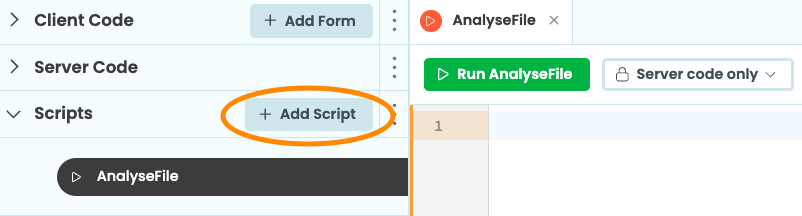
Create the Script
Before we write the Script, we’ll install the filetype package that we’ll use to identify the type of each file. Go to Settings > Python versions and add the filetype package.
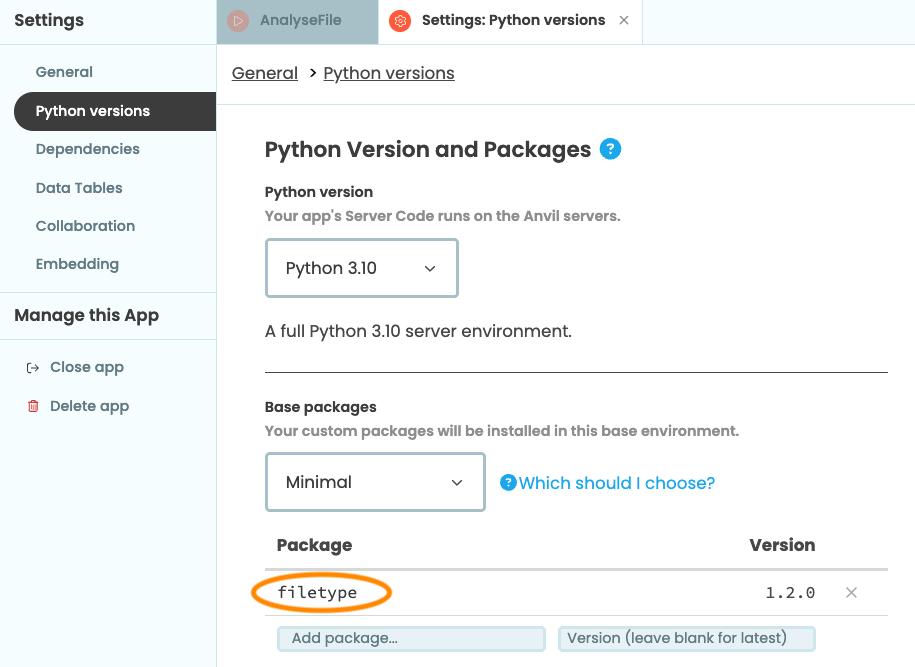
Add the filetype package
Step 3: Add a sample file
Before we pass a file to the Script from the front-end, we’ll give it a sample file to analyse. This lets us run and test the Script on its own first. We’ll use the Data Files service to store the file in our app so the Script can access it.
Click the + button in the Sidebar Menu and select Data Files.
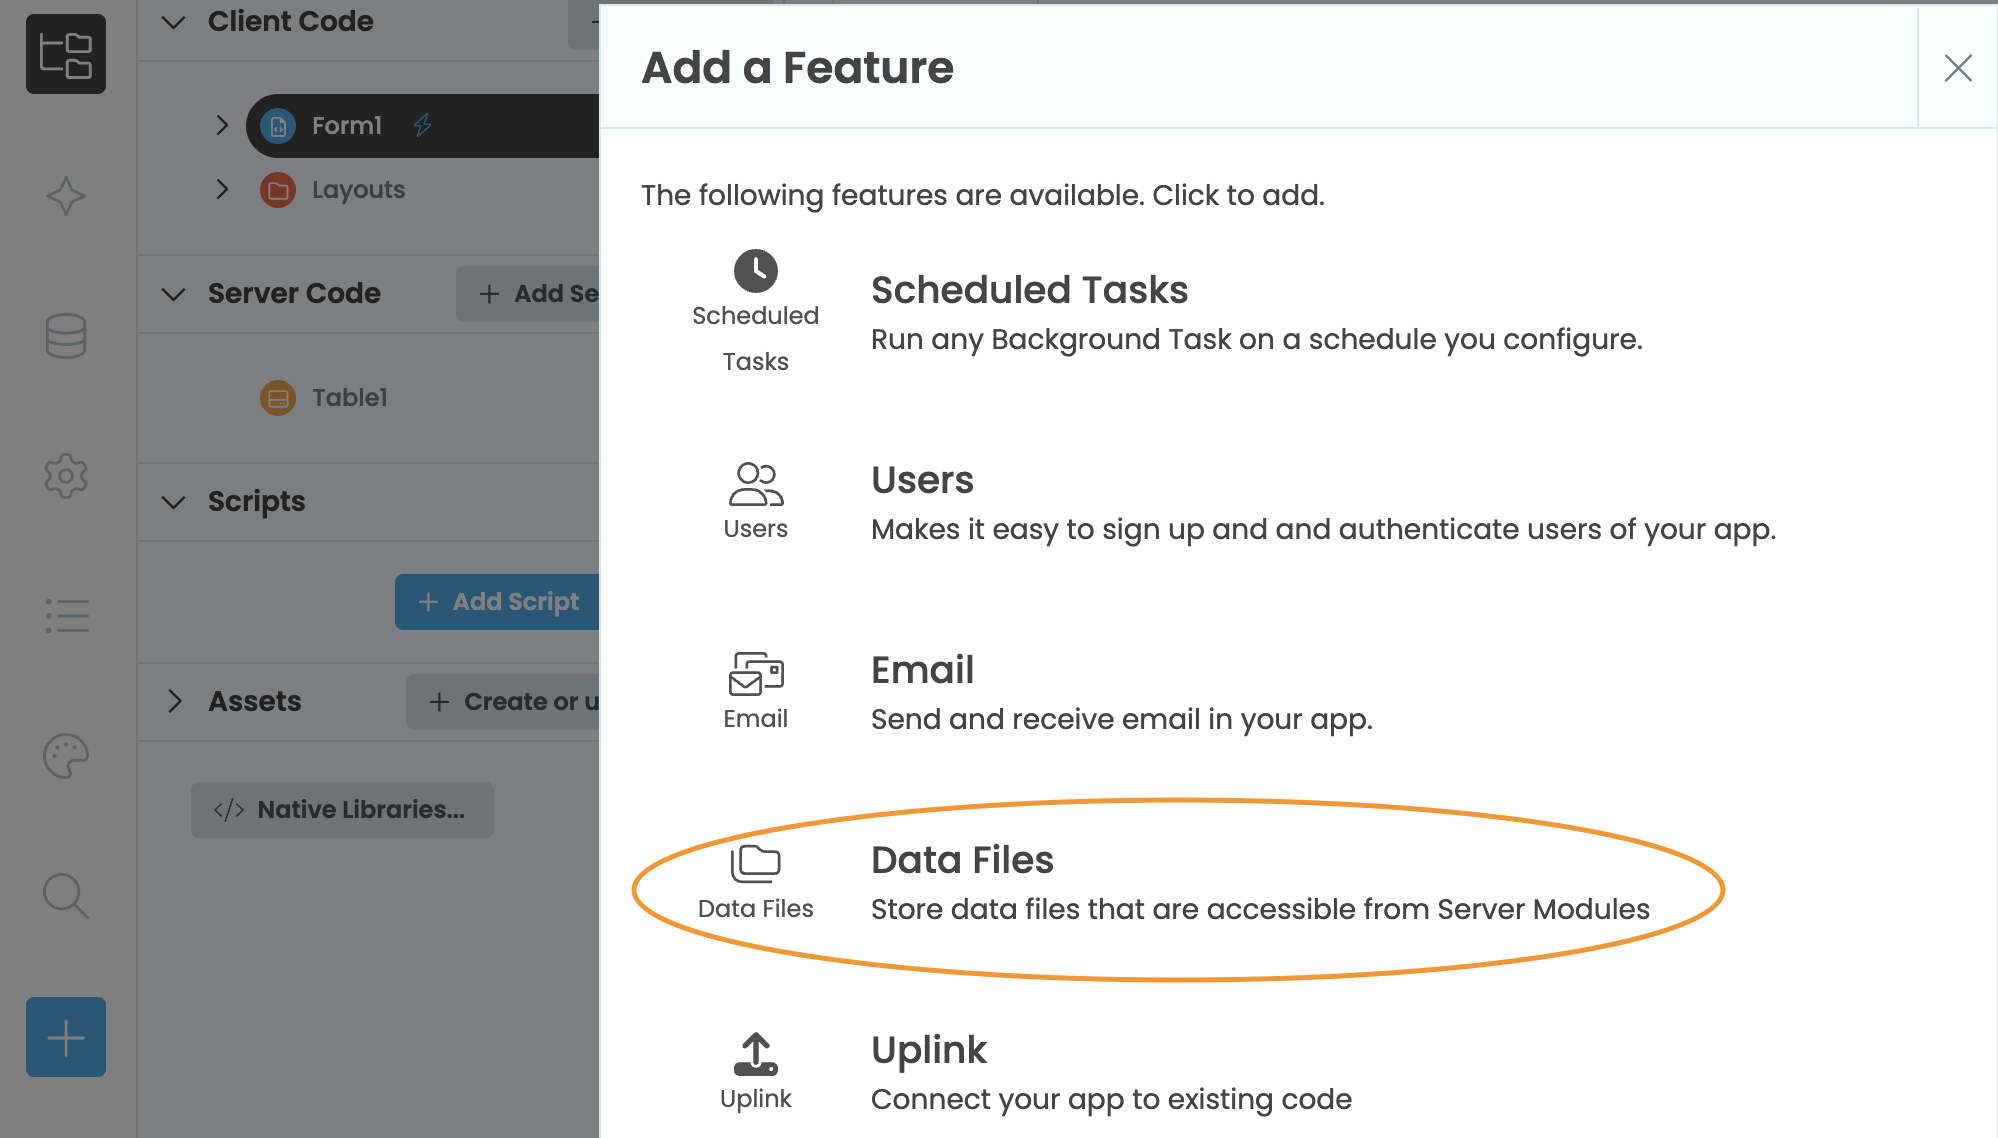
Add Data Files Service
In the ‘Data Files’ screen, click ‘Upload’ and upload any PNG image named sample.png.
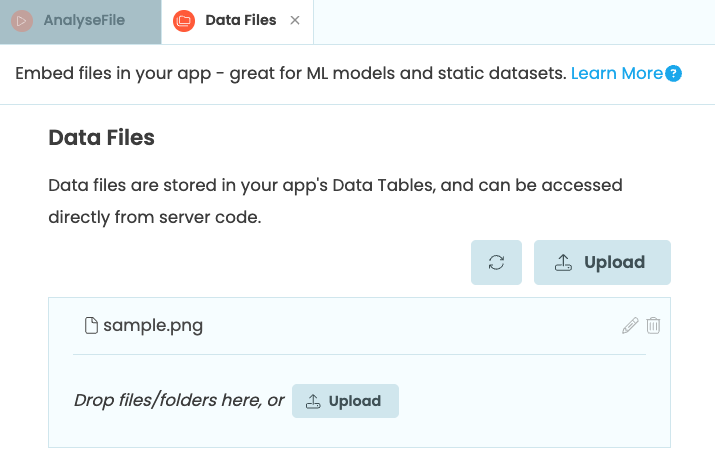
Upload the sample file
The Script will use sample.png when we run it from the Editor. Later, we’ll update it to analyse a file supplied by the front-end.
Step 4: Write the Script
Our Script and its dependencies are ready, so let’s write the code that analyses the sample file.
First, let’s import the modules we’ll need. Import anvil.files so we can access the file stored in Data Files, and filetype so we can identify the file’s type.
Open AnalyseFile and add the following imports:
import anvil.files
import filetype
We need to give filetype.guess() a file to analyse, so let’s retrieve sample.png from the app’s Data Files.
filename = anvil.files.data_files["sample.png"]Now that the file has been retrieved, we can pass it to filetype.guess(). It inspects the file and returns information about its type if it recognizes it, or None if it doesn’t. We’ll print the result so we can check what the Script analysed.
guess = filetype.guess(filename)
if guess is not None:
    print(f"Analysed file, guessed MIME type: {guess.mime}")
else:
print("Analysed file, couldn't guess a MIME type")Step 5: Run the Script
Let’s run the Script and check that it can analyse our sample file before we connect it to the front-end.
Click “Run AnalyseFile” to run the script.
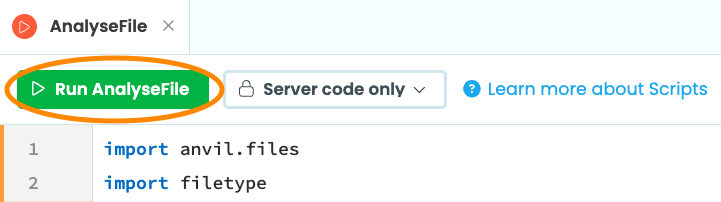
Run the Script in the Editor
If everything is working, the Script Output in the Bottom Panel will show the file’s MIME type. A PNG image, for example, has the MIME type image/png.
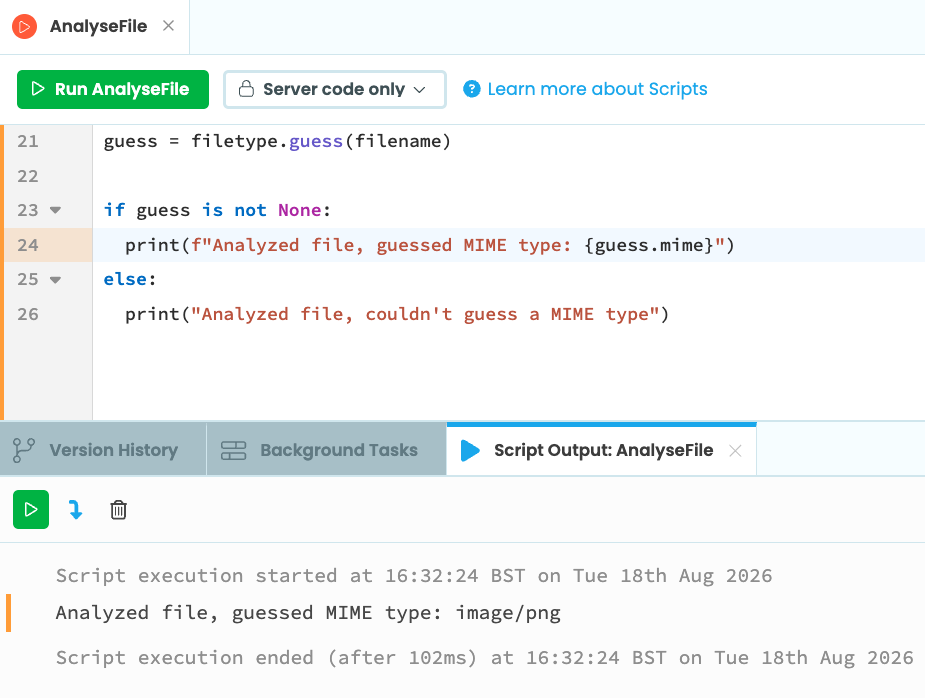
View the Script output
The Script is working, so we’re ready to connect it to the front-end. Before we move on, we need to allow the Script to be called from the app’s client-side. Open the permissions dropdown at the top of the Script screen and select “Anyone”.
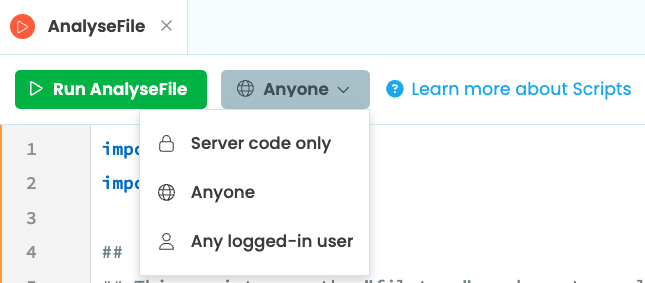
Allow client access
The Script is now running and analysing our sample file. In Chapter 2, we’ll build the front-end that will call it.