Connecting Azure to Anvil
For advanced use of Anvil’s Microsoft integration, you need to let Microsoft Azure know about your app.
If you want to do either of these things:
You need to tweak some settings in the Azure Portal so that Anvil can identify your Azure account.
Create an Active Directory in Azure
Sign in to the Azure Portal and click ‘Create a Resource’. Create a resource of type ‘Azure Active Directory’.

You will need to fill in an Organization Name and Domain Name for your resource.
Create an App Registration
Once your Azure Active Directory resource has finished creating, you can create an App Registration within it:

Click on the New Registration button to get this form:

An App Registration represents Azure’s knowledge of your Anvil App. Name it whatever you like - it does not need to be the same as the name of your Anvil App.
You have three options for who can access your app. You can restrict access to users in:
- this Active Directory only,
- in any Active Directory, or
- all Microsoft accounts, including Office 365 and Skype accounts.
You can use any of these options with Anvil.
In the Redirect URI field, enter https://anvil.works/apps/_/microsoft_auth_callback. You can add this later if
you forget at this stage.
You will see an overview screen with an ‘Application (client) ID’ and a ‘Directory (tenant) ID’. Make a note of each of these.

Create a Client Secret
Now click on Certificates and Secrets and click New Client Secret. This will create a secret that enables a secure connection between Anvil and Azure. Copy it now - it will not be available in full after you browse away from this page.

Copy the relevant IDs into Anvil
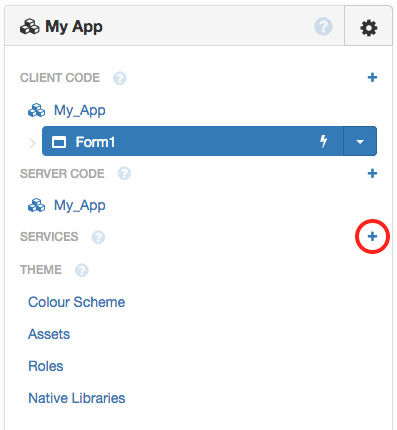
Open your Anvil app and click the blue plus button  in the in the Sidebar Menu .

You’ll see a list of available services and integrations. Click on Microsoft API ![]() .
.

Open your Anvil app in the Anvil Editor and enable the Microsoft API under ‘Services’.

You’ll see the view shown in the image below.
Check the box marked ‘Link to your own Azure app’. Some fields will appear that allow you to enter the IDs from the previous step.
In the box marked ‘Enter Application ID’, enter the ‘Application (client) ID’ from the previous step.
In the box marked ‘Enter Tenant ID’, enter the ‘Directory (tenant) ID’ from the previous step.
Select ‘Multi-tenant’ if you chose options 2 or 3 in the list above (allowing access to accounts in any Active Directory, or all Microsoft accounts). In this case you do not need to enter a Tenant ID.
Once you’ve entered the correct values, you’re done! Time to test it works.


Test that it works
To check it works, go to the Code view for Form1. Add these lines to the __init__ method:
    anvil.microsoft.auth.login()
    print(anvil.microsoft.auth.get_user_access_token())
If everything is working, you should successfully get an access token.
This checks that your Anvil app is successfully linked to your Azure app - if it were not linked, Azure would not provide an access token.
Next up
Access a Microsoft Azure API
Now you have your Anvil app set up to connect your Azure tenant, you can access a whole universe of Microsoft APIs. Read Accessing Microsoft Azure APIs to see how (you’re most of the way there already).
Do you still have questions?
Our Community Forum is full of helpful information and Anvil experts.
