
Connecting Entra ID to Anvil
For advanced use of Anvil’s Microsoft integration, you need to let Microsoft Entra ID know about your app. This is true if you want to do either of these things:
Follow this guide to create an Entra ID App Registration. An App Registration represents Azure’s knowledge of your Anvil App.
Create an App Registration
Sign in to the Entra Portal and choose ‘App registrations’ from the menu on the left. Then click ‘+ New registration’ at the top of that page:
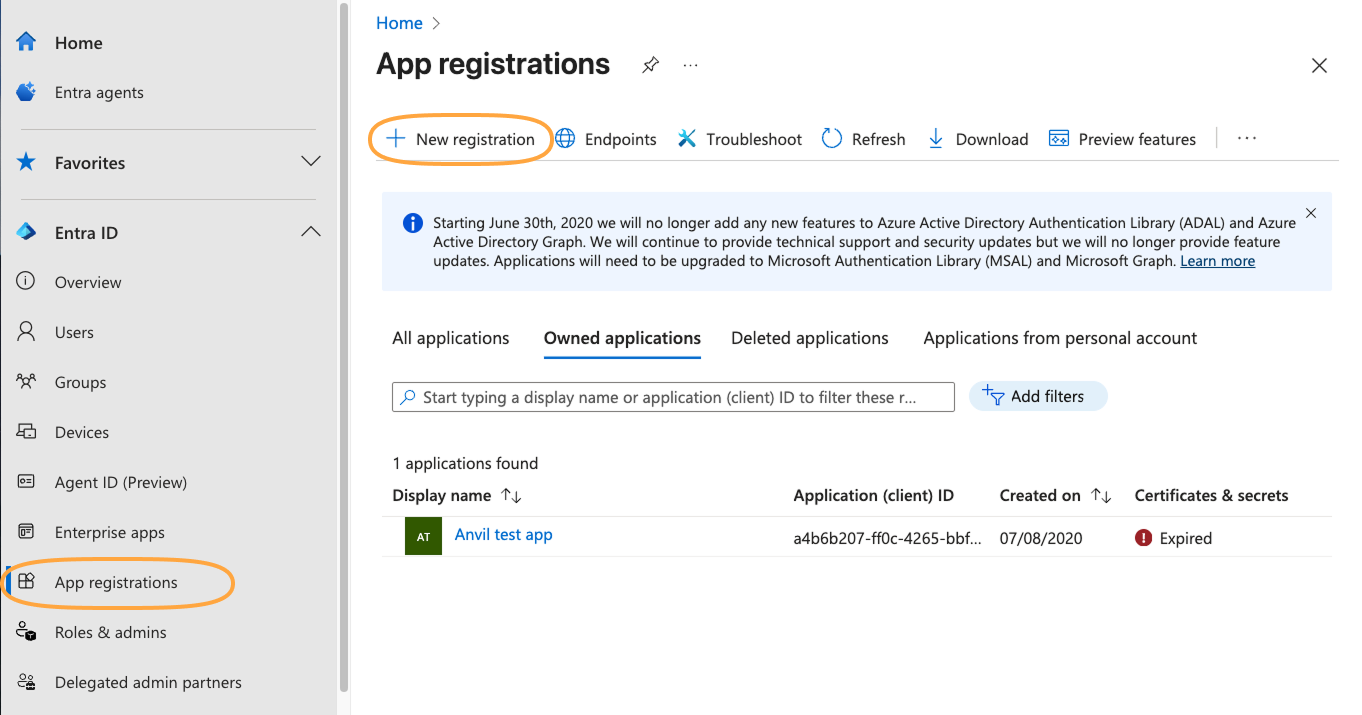
Create a new app registration in Entra
You’ll then be able to register an application by filling out the form.
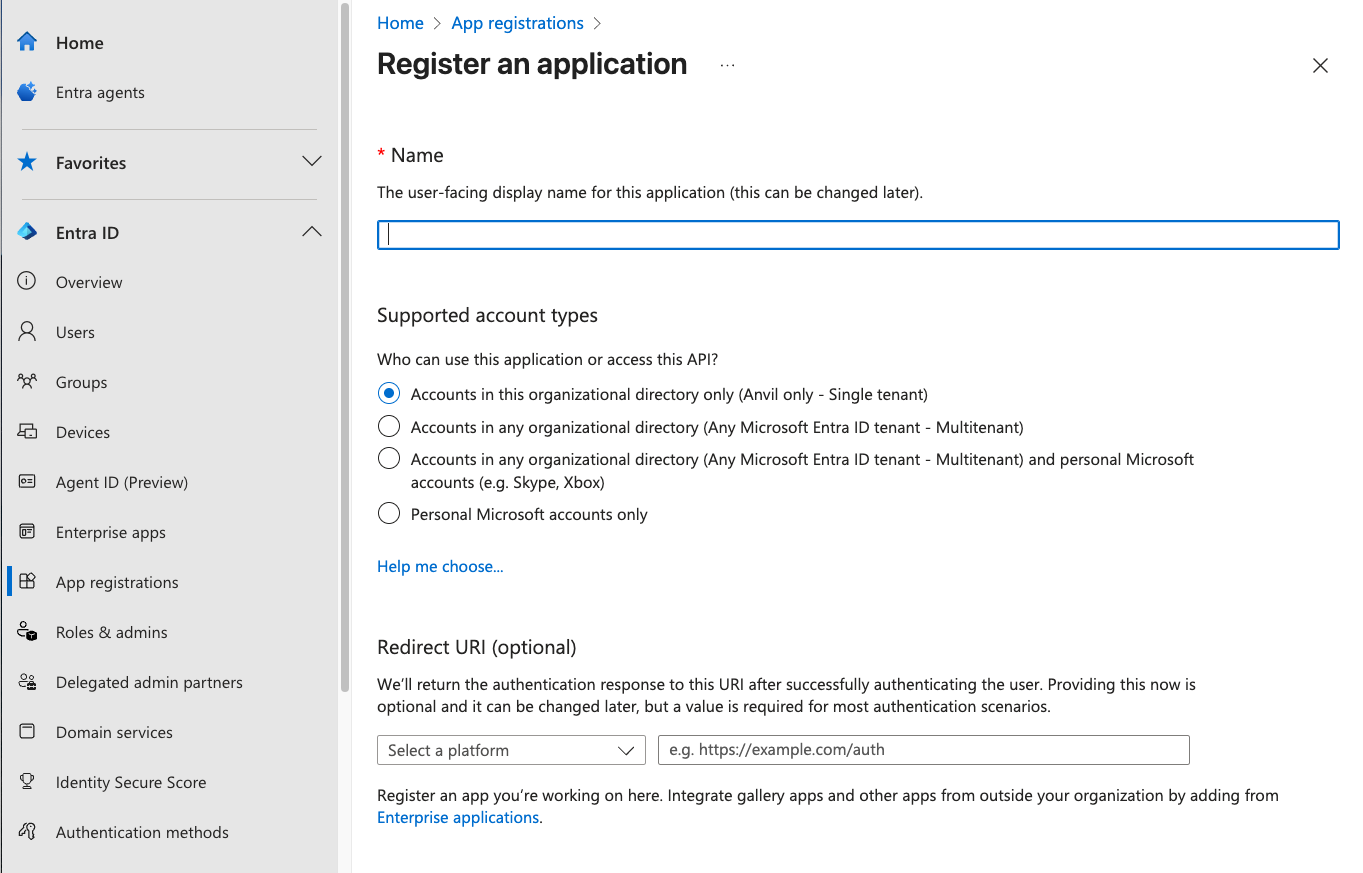
The Entra ID app registration form
You’ll need to fill out the form with:
Name
Name it whatever you like - it does not need to be the same as the name of your Anvil App.
Supported account types
You have four options for who can access your app. You can restrict access to users in:
- Accounts in this organizational directory only (Single tenant)
- Accounts in any organizational directory (Any Microsoft Entra ID tenant - Multitenant)
- Accounts in any organizational directory (Any Microsoft Entra ID tenant - Multitenant) and personal Microsoft accounts (e.g. Skype, Xbox)
- Personal Microsoft accounts only
You can use any of these options with Anvil.
Redirect URI
Choose ‘Web’ as the platform and enter https://anvil.works/apps/_/microsoft_auth_callback as the redirect URI. You can add this later if
you forget at this stage.
Copy the relevant IDs into Anvil
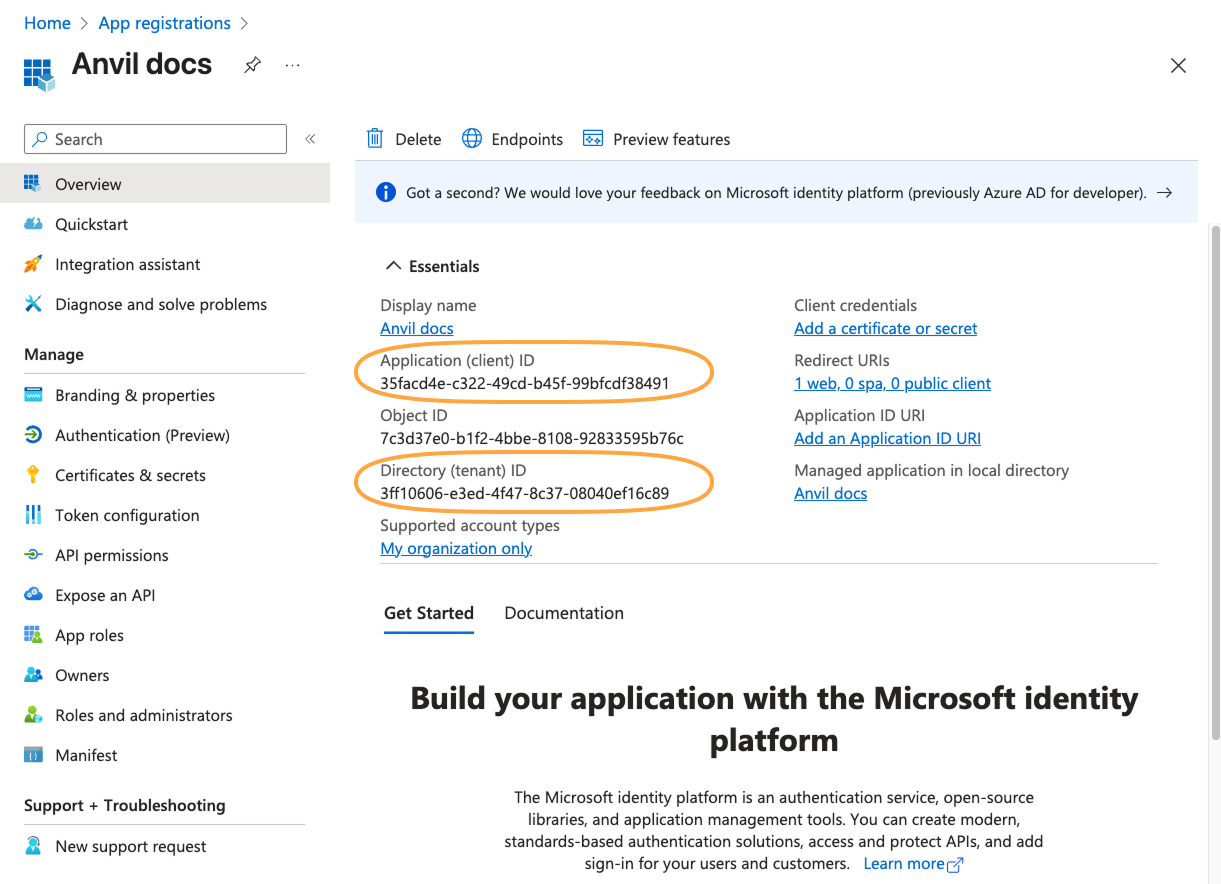
After you’ve created the app registration, you will see an overview screen, which has an ‘Application (client) ID’ and a ‘Directory (tenant) ID’. You will need to copy these values into Anvil.
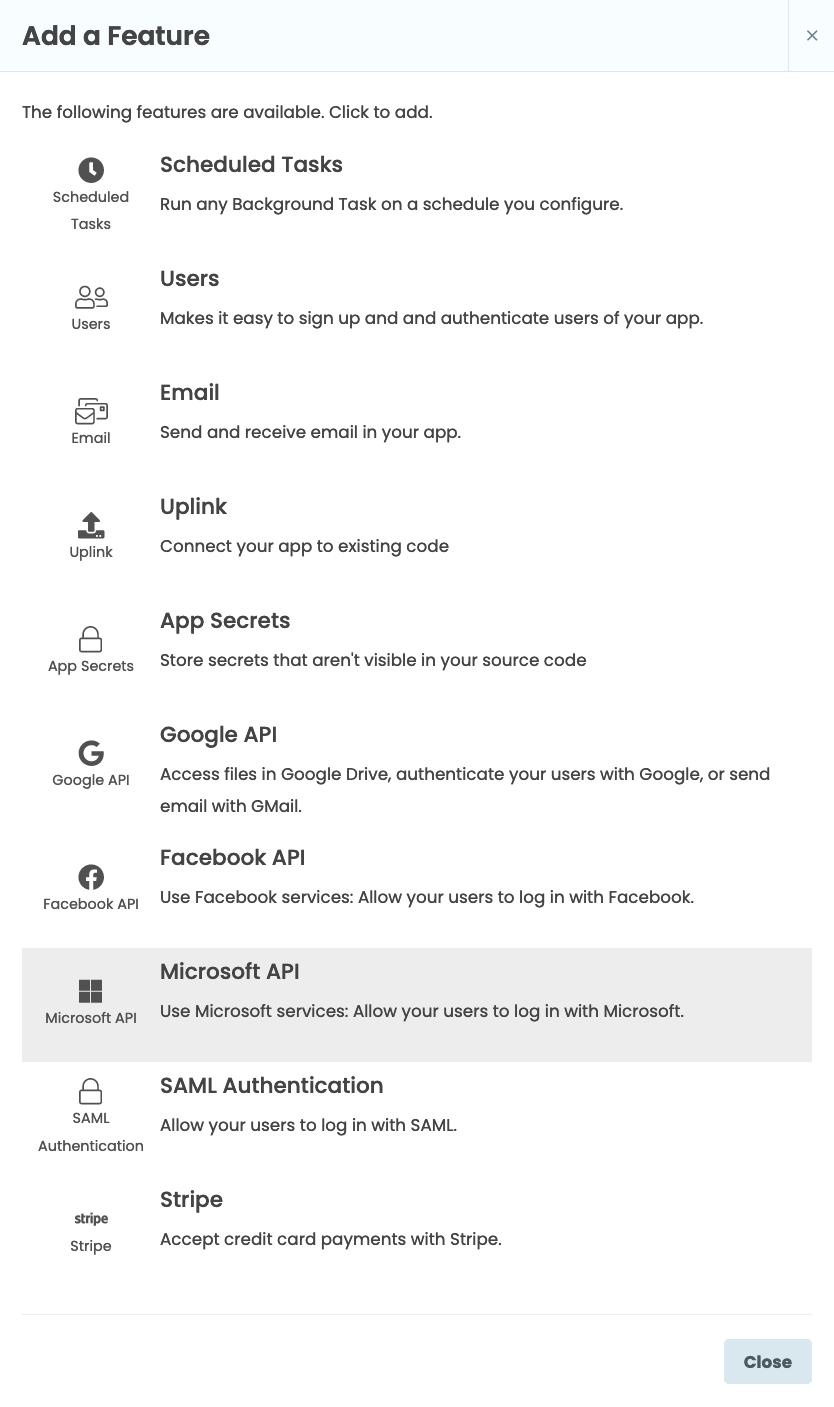
If your Anvil app doesn’t already have the Microsoft API service added, click the blue plus button  in the Sidebar Menu.
You’ll see a list of available services and integrations. Click on Microsoft API
in the Sidebar Menu.
You’ll see a list of available services and integrations. Click on Microsoft API ![]() .
.
In the Microsoft API tab that opens, tick ‘Link to your own Entra ID app’

Tick ‘Link to your own Entra ID app’ from the Microsoft API tab.
You’ll now be able to add the Application ID and Tenant ID from earlier. If you chose options 2, 3 or 4 in the list above (allowing access to accounts in any Entra ID tenent or all Microsoft accounts), select ‘Multi-tenant’. In this case you do not need to enter a Tenant ID.
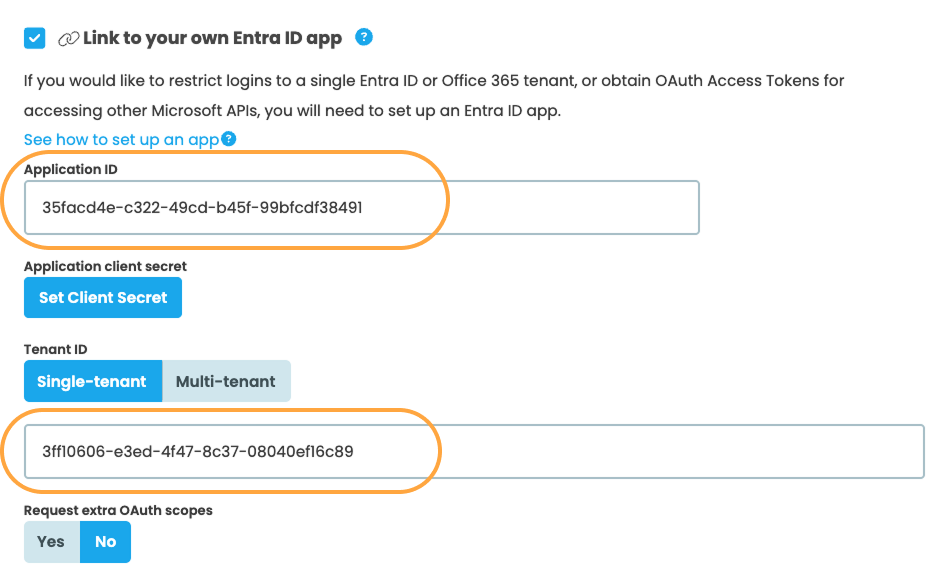
Enter your Application ID
Create a Client Secret
Back in your app registration overview, choose ‘Certificates & secrets’ and then click ‘+ New client secret’
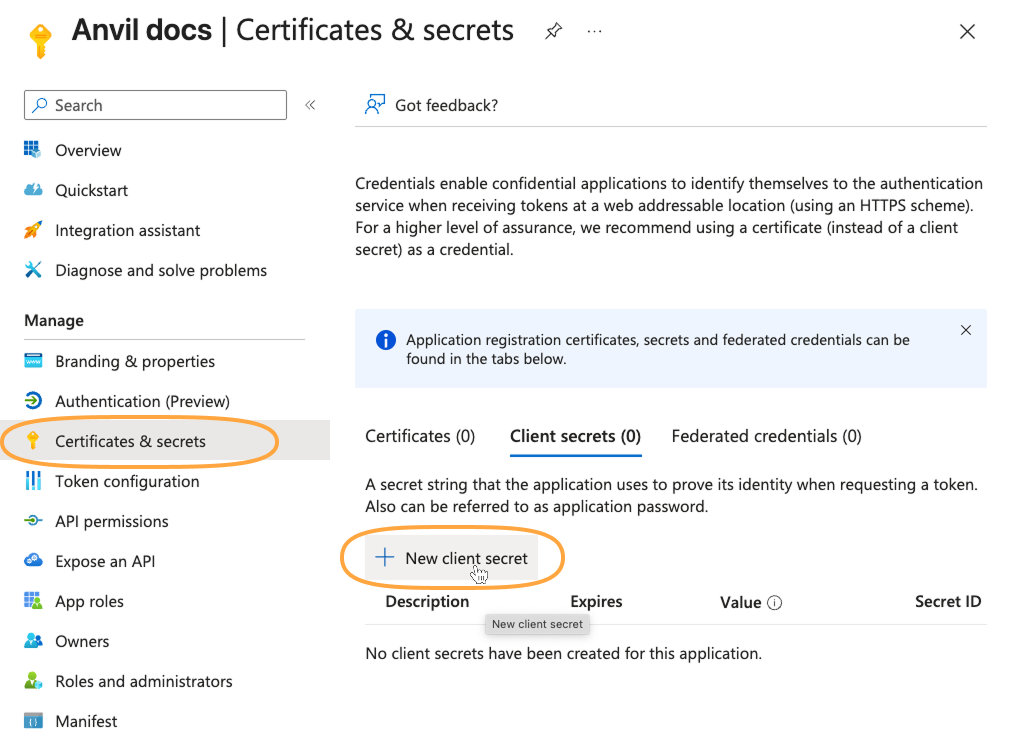
Create a new client secret in Microsoft Entra
Add a description for your secret and choose when you would like it to expire. A client secret will be generated for you. Copy its value now. You won’t be able to view the secret again if you close this page.
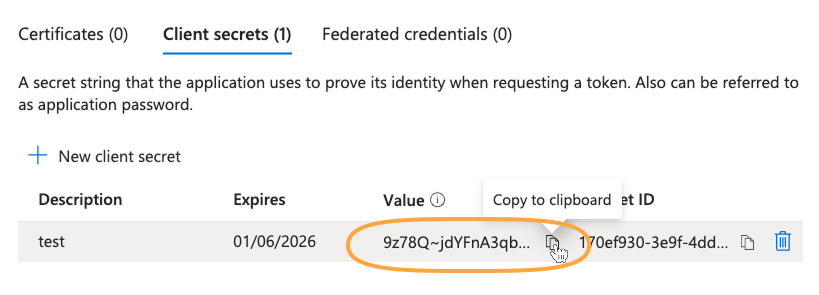
After creating the client secret, copy it’s value. You won’t be able to access this value again if you close the page.
Back in your Anvil app, from the Microsoft API tab, click ‘Set Client Secret’ and paste in the value you copied from Entra.
Test that it works
To check it works, go to the Code view for Form1. Add these lines to the __init__ method:
    anvil.microsoft.auth.login()
    print(anvil.microsoft.auth.get_user_access_token())
If everything is working, you should successfully get an access token.
This checks that your Anvil app is successfully linked to your Entra ID app - if it were not linked, Entra would not provide an access token.
Next up
Access Microsoft APIs
Now you have your Anvil app set up to connect your Entra ID tenant, you can access a whole universe of Microsoft APIs. Read Accessing Microsoft APIs to see how (you’re most of the way there already).
Do you still have questions?
Our Community Forum is full of helpful information and Anvil experts.