Building Layouts from scratch
This feature is optional - you do not need to know HTML to use Anvil!
However, if you do know HTML, or employ a web designer who does, this reference will allow you or them to create HTML layouts into which you can easily drag-and-drop your Anvil components.
In addition to building Layouts from Anvil Forms, you can create Layouts from scratch using HTML. This allows you to build fully custom Layouts for your Anvil Forms.
Creating an HTML Layout
To create an HTML Layout, add a new “Custom HTML Form” to your app.

Creating a new Custom HTML Form.
Click on the Form and in the Properties Panel, click the pencil icon under “html”. This will open up an editor where you can edit the Form’s HTML. As you edit the HTML, you will see the changes appear live in the Form Editor.
If you have an HTML file added as an asset to your app, you can add it from the dropdown menu under html, and it will apply to the Form. You can then edit the HTML in the same way: by clicking the pencil icon to open the HTML editor.

Creating a new Custom HTML Form.
Adding slots
When writing the HTML, you’ll need to define “slots”. Slots define where components can be added to the Layout when it is used by other Forms.
You’ll first need to add a slot from HTML, which is just an element with the anvil-slot attribute added. (Actually, there are other types of HTML slots. See the next section for more details.) You then need to switch to Design mode and drag and drop a Slot from the Toolbox into the HTML slot that you defined. When other Forms use your HTML Form as a Layout, components can be added to this Slot.
<div anvil-slot="default" style="padding:40px; border:2px dashed skyblue">
</div>
Adding a Slot from the toolbox to the HTML element with the anvil-slot attribute.
Types of HTML slots
Anvil Layouts need to have “slots” that define where Anvil components can be added. This way, when the HTML file is used as a Layout, Anvil developers can drag and drop components from the Toolbox to build their Forms. To create a slot in your HTML Layout, you need to add anvil-slot or anvil-slot-repeat as an attribute to an element.
anvil-slot
The simplest way to create a Layout slot is by adding the anvil-slot attribute on an HTML element. Every time a component is dropped into a slot created with the anvil-slot attribute, it will get added inside that HTML element.
<!-- Each component added to the "default" HTML slot
will be inside the same div with a lightblue border -->
<div anvil-slot="default" style="border: 2px solid lightblue">
</div>
A label and a button inside the ‘default’ slot
When a component is dropped into an HTML slot, that component will automatically get a slot container property indicating in which component it is nested:

The slot container property for a component
inside the default HTML slot
anvil-slot-repeat
Another way to create slots is to use the anvil-slot-repeat. When anvil-slot-repeat is added to an element, this element will not appear on your page when the form is blank, but for every component added to that slot, a new copy of that element will be created, and the component will be added to the end of it:
<!-- Each component you drag and drop onto this "default" slot
     goes in a new div with a pink border -->
<div anvil-slot-repeat="default" style="border: 2px solid pink">
</div>
Every component dropped into here
ends up in a new pink-bordered div element.
If you don’t want your components to be added to the end of your anvil-slot-repeat element, you can also specify deeper wrapping. If there is an element with the attribute anvil-component-here inside your anvil-slot-repeat element, the component will go there rather than at the outside of the repeat.
In the example below, we create a box with a pink border for each element, inside which is a box with a blue border, inside which is our component:

Every component dropped into here ends up in
a blue-bordered div inside a pink-bordered div.
Designer prompts and placeholders
You might want to add prompts and placeholders to your Layout that are not visible when the app is run. You can do this by adding the anvil-designer-only class to any element, which will make it so the element is only visible in the Anvil Designer.
<!-- The first div will only be visible while editing the Form in the designer -->
<div class="anvil-designer-only" style="color: gray; font-style: italic;">
     Drop components below
</div>
<div anvil-slot="default" style="border: 2px solid lightblue; padding: 5px"></div>
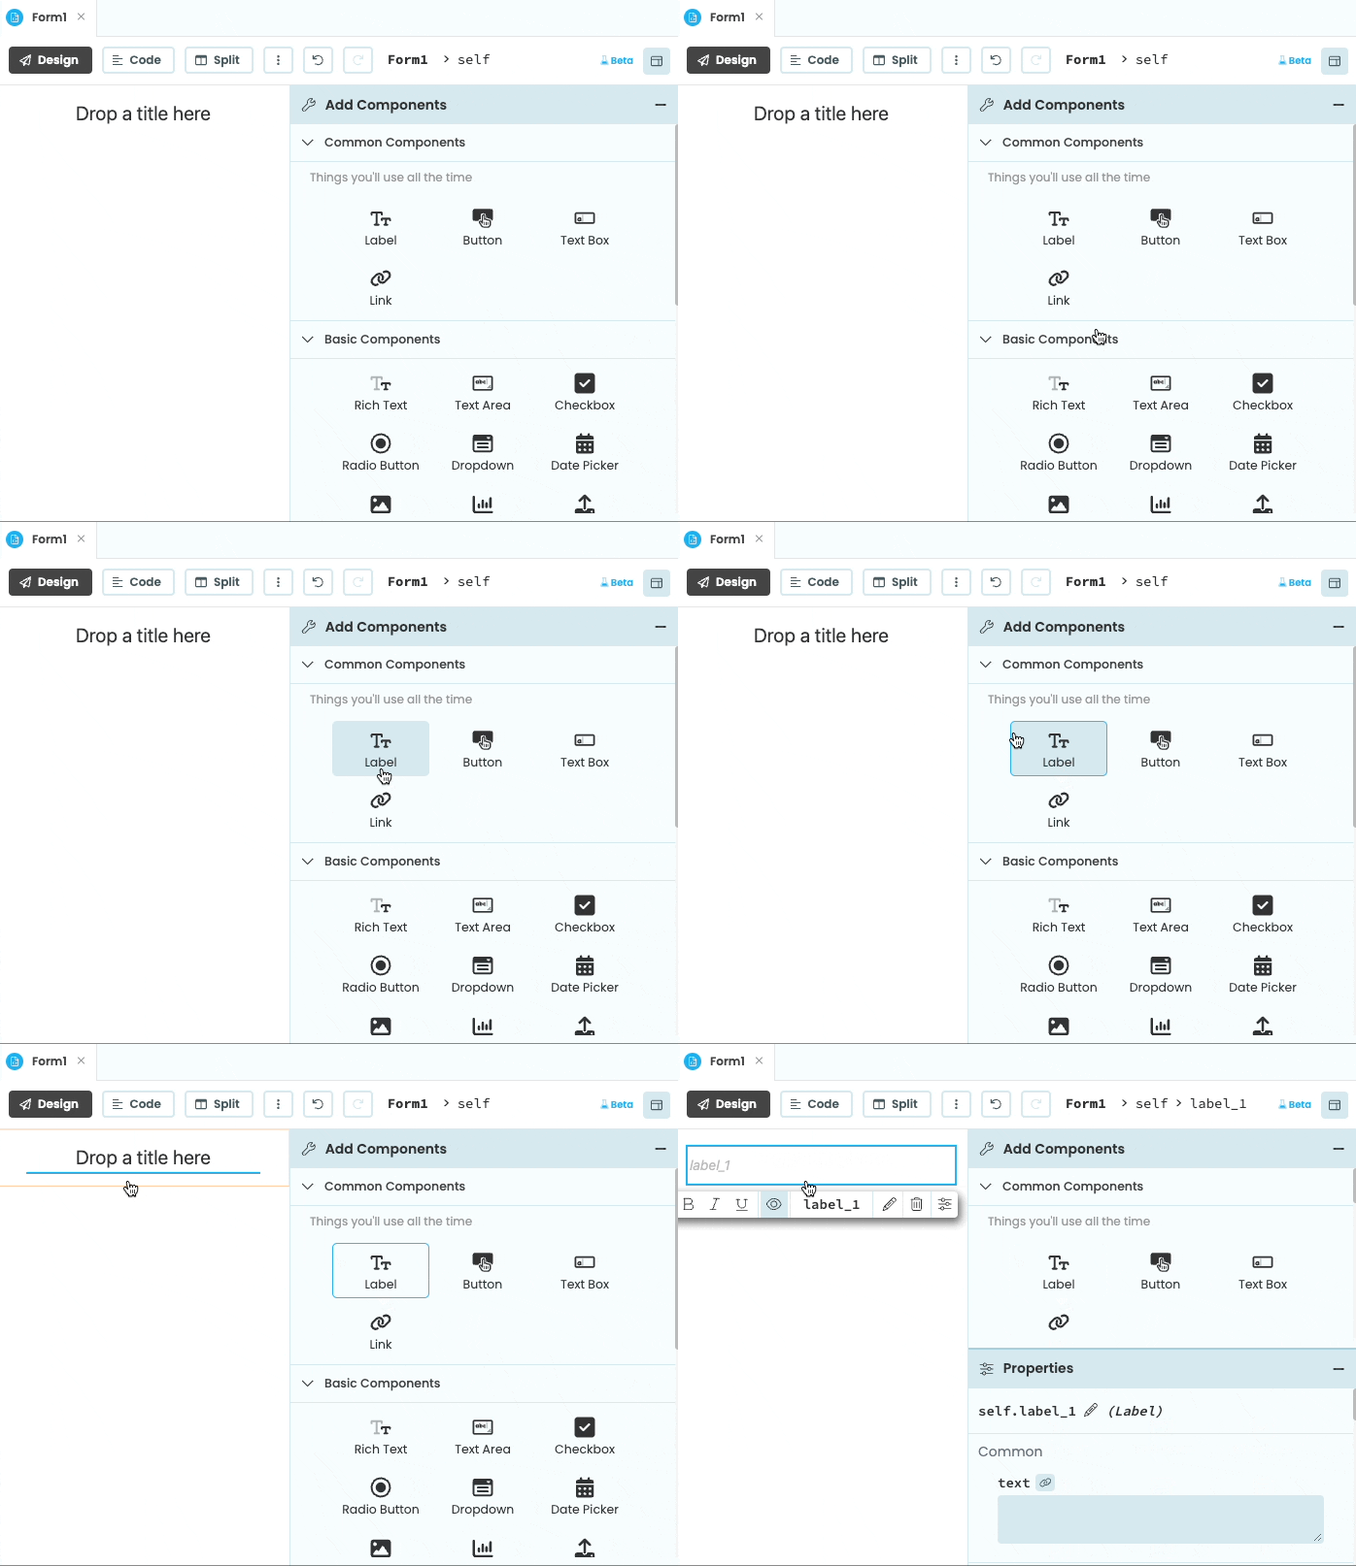
You can also add placeholders that will show up if nothing is added to a slot. You just need to add anvil-if-slot-empty=<name-of-empty-slot> to the placeholder element. For example, in the code block below, there is a a placeholder element that will show up only if the title slot is empty.
<div anvil-slot="title">
    <div anvil-if-slot-empty="title">Drop a title here!</div>
</div>
The placeholder disappears when a component is dropped inside the slot.
Do you still have questions?
Our Community Forum is full of helpful information and Anvil experts.

