 By
By Pictures to Paintings with Python
This web app will turn your photo into a painting. Not just any painting, a painting in the style of your favourite artist. Let me show you how I built it.
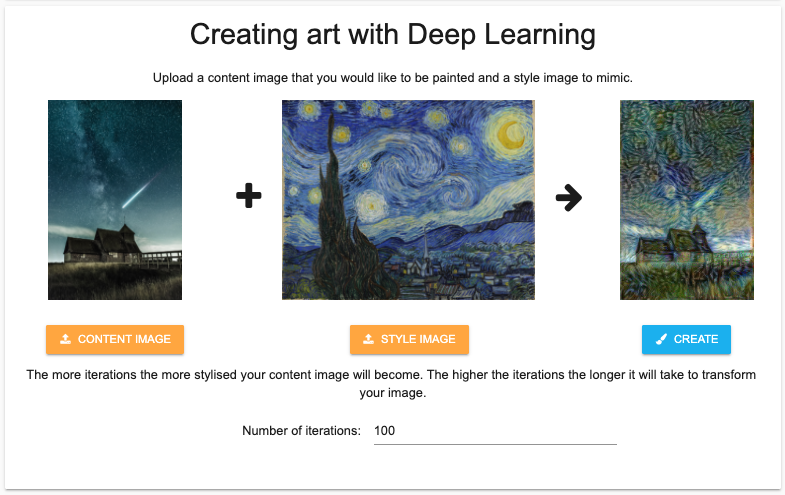
The app uses a neural network to do a ‘style transfer’ - taking the content of one image, and giving it the style of another.
From good ideas to good web apps
I thought a style transfer app would be fun for everyone to use. The good news was, the hard part of building the app had already been done - Raymong Yuan wrote an excellent tutorial. All I had to do was turn his script into a web app.
Anvil makes turning scripts into web apps really easy. I’m going to introduce you to three features of Anvil that make it simple.
Building a web UI
Creating a UI with Anvil’s drag and drop interface let me quickly create a front end.
Note: This guide includes screenshots of the Classic Editor. Since we created this guide, we've released the new Anvil Editor, which is more powerful and easier to use.
All the code in this guide will work, but the Anvil Editor will look a little different to the screenshots you see here!
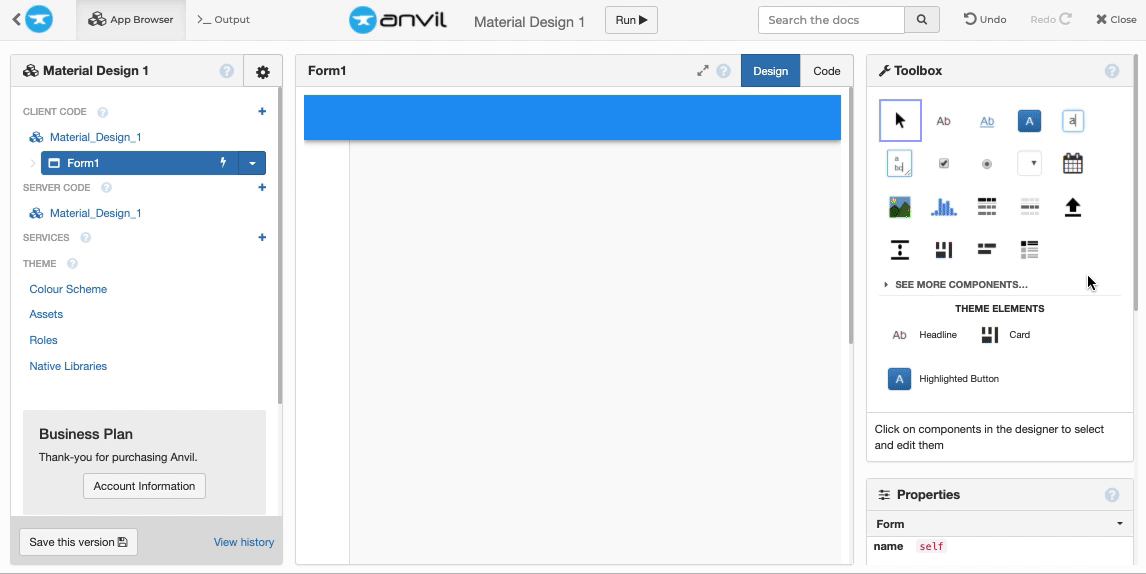
Instead of learning how to create a button using HTML, CSS and JavaScript you can simply place a button where you want and use Python to control how the button behaves.
You can use Anvil’s IDE to build anything from simple web apps to interface with your machine learning model to large-scale commercial apps.
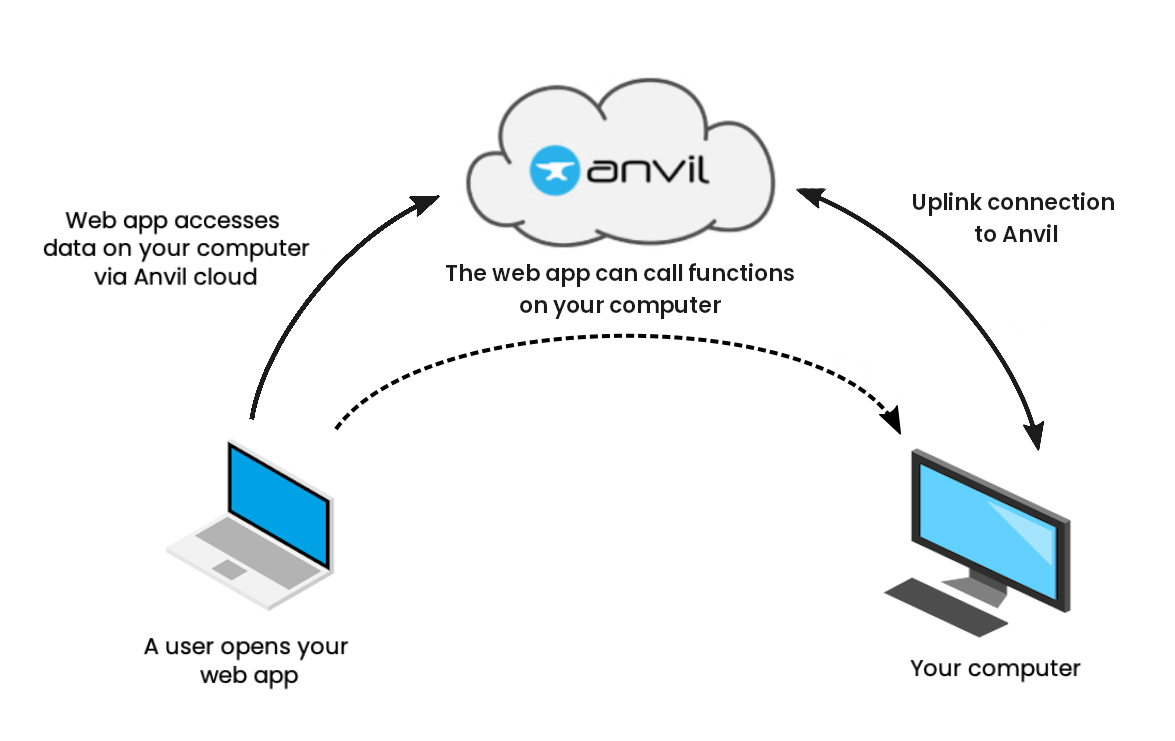
Anvil uplink
The Uplink allows you to run code on any machine from your web app.
It is particularly useful if you have access to a lightning fast GPU or you have a Jupyter notebook in an Anaconda environment set up and ready to go. The Anvil Uplink means there’s no need to change or move your current environment.
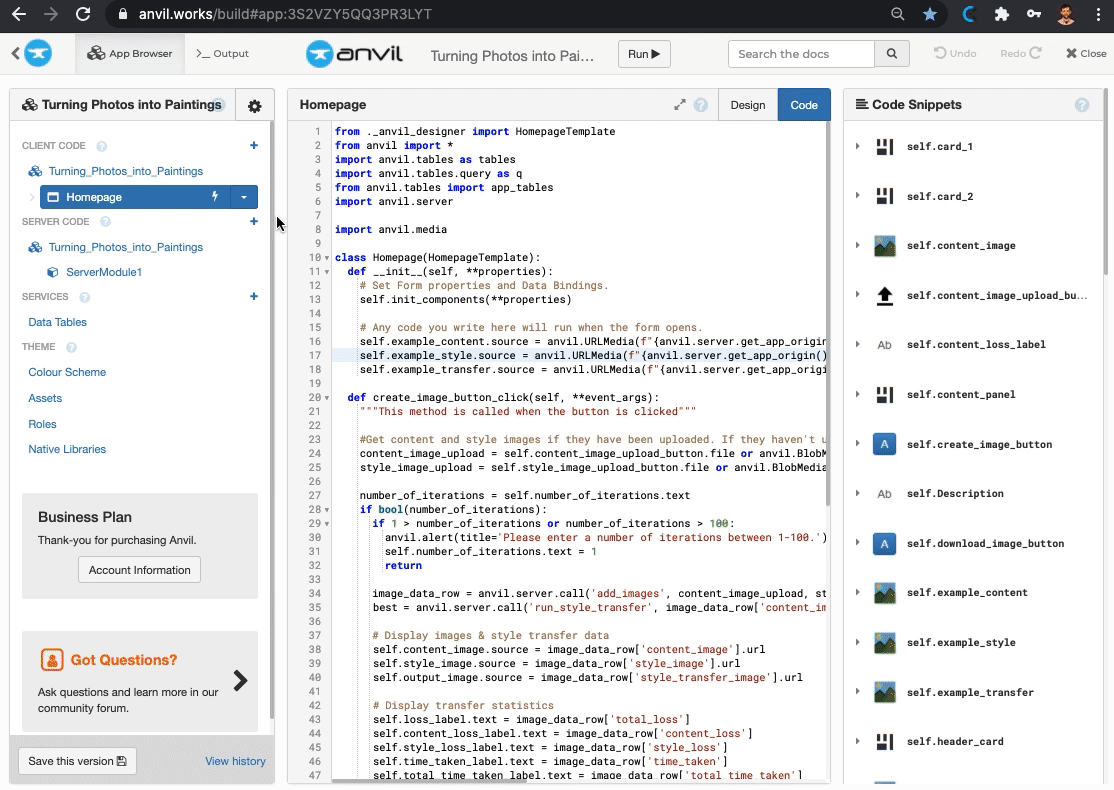
To connect the style transfer script, I added just five lines of code:
# Import the Anvil server and table packages
import anvil.server
from anvil.tables import app_tables
# Connect to my Anvil app using my Uplink key
anvil.server.connect("<your Uplink key>")

# This decorator means I can call this function from the web browser
@anvil.server.callable
def run_style_transfer():
  ...

# wait_forever() keeps the Uplink script available
anvil.server.wait_forever()
And that’s it, my web app can now call functions from my machine’s environment.
Deploying to the web
Anvil’s one-click deployment means the final step of building my app, deployment, couldn’t be simpler. All I had to do was click publish:
With deployment this simple, I was able to get my app online and being used faster than ever.
Want to learn more?
Source code
If you’re interested in how the ‘Turning Photos into Paintings’ app works, below is the clone link for the app, Raymong’s adapted script to connect via the Anvil Uplink and the requirements.txt which contains all the packages required by Raymong’s script.
How do I start building Anvil apps?
It’s pretty easy, actually – and our online editor is free to use! Start with our step-by-step tutorials, or check out our full-size example apps:
Build Database-Backed Apps
Build a Simple Feedback Form
Build a Simple Feedback Form
Build a data-entry app, and learn the techniques fundamental to building any Anvil app. In this tutorial, you will:
- Build your User Interface
- Write client-side Python
- Write server-side Python
- Store data in a database
- Deploy your app
Finally: If you have any questions, or need a hand, please join us in the Anvil Community Forum! We look forward to meeting you there.