Using Leaflet for interactive maps
This little adventure started back when Google decided that maps was not quite enough of a money maker for them and “updated” their pricing for Maps API calls. This had the potential to be a significant cost for my use so I switched over to using open source alternatives.
Luckly, Leaflet is an amazing option!
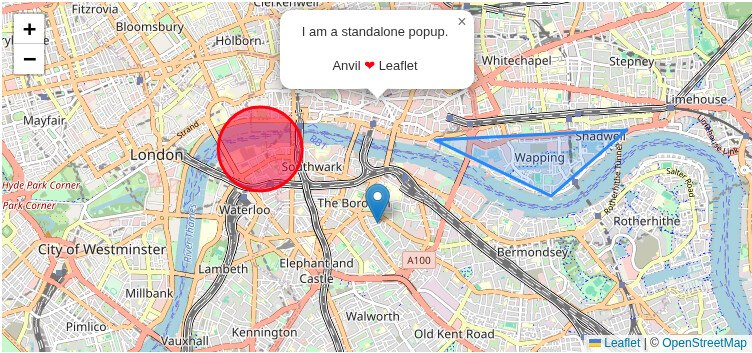
Right into Leaflet Quick Start
To get this running in Anvil we need to do a few little things different.
Add the Leaflet CSS and JS
We are going to add the leaflet CSS and JS to our Native Libraries which will inject this into our app’s <head> section:
# Native Libraries
<link rel="stylesheet" href="https://unpkg.com/leaflet@1.9.4/dist/leaflet.css"
    integrity="sha256-p4NxAoJBhIIN+hmNHrzRCf9tD/miZyoHS5obTRR9BMY="
    crossorigin=""/>

<!-- Make sure you put this AFTER Leaflet's CSS -->
<script src="https://unpkg.com/leaflet@1.9.4/dist/leaflet.js"
    integrity="sha256-20nQCchB9co0qIjJZRGuk2/Z9VM+kNiyxNV1lvTlZBo="
    crossorigin=""></script>
Component
Now we need to create a leaflet map component.
Create a new “Custom HTML” form, here I’m calling mine leaflet_map which I find unoriginal…
In the settings for the form mark it as “use as custom component”.
Component - HTML
Now we can add the <div> element into our form’s html:
<div id="map" anvil-name="map">
    <img src="_/theme/designer_icons/leaflet_icon.png" alt="Leaflet Icon" width="48" height="48" loading="lazy">
</div>


<style>
    #map {
        width: 100%;
        height: 350px;
        display: flex;
        justify-content: center;
        align-items: center;
        background: #EEE;
        z-index: 0;
    }
</style>
The only special Anvil addition is the addition of anvil-name="map" in the <div>. This allows us to easily reference this element without needing to use anvil.js
But, I’m adding a little bit more to the standard tutorial which adds a placeholder leaflet icon before map tiles load. Because, why not? Note: that I’ve added this icon to the assets folder.
Component - Python
This is where your usage can start to really dictate direction. I’m trying to keep things as close to the tutorial as possible.
Not sure if I could make this much simpler:
from ._anvil_designer import leaflet_mapTemplate

from anvil.js.window import leaflet as L


class leaflet_map(leaflet_mapTemplate):
    def __init__(self, **properties):
        self.map_node = self.dom_nodes["map"]
        self.init_components(**properties)
We are really just doing two things:
- Grabbing a reference to the Leaflet library using
anvil.js.window - Grabbing a reference to the map element
<div>for use later as.map_node
Build a map
Now create a new form and drag our newly created leaflet_map component into your form. I’ve renamed the map component to map_1.
Import
We want to use the Leaflet library and rather than remembering:
from anvil.js.window import leaflet as L
We can just grab it from our component
from ..leaflet_map import L
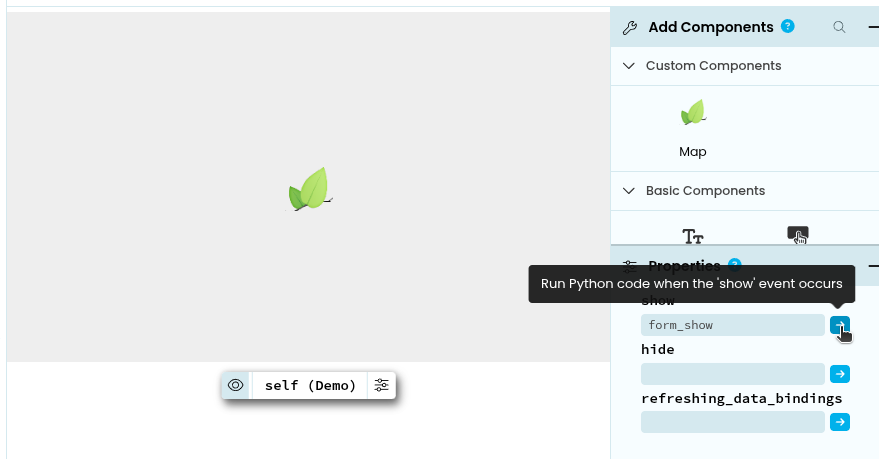
We can just about copy and paste the reset of the tutorial from Leaflet into our new forms show_form method. If this is something you are not familiar with just select the background of your open form in the designer and click the button in “show”
Show Form
We are going to do all of our map building in the show form method. This is not strictly necessary and there is plenty that can be done before the form is shown, however, there are lots of little tile issues that can pop up. I think this comes down to before the map is shown on the page, the size is unknown, so the tiles are incorrect after the map is finally sized. The easiest way around this… Just wait for the map to be on the page, then add everything.
def form_show(self, **event_args):
   """Setting up the map"""
   map = L.map(self.map_1.map_node).setView([51.505, -0.09], 13)
Here is where our reference to .map_node comes in. We are creating a Leaflet map in the <div> element it is referencing.
Honestly, that is really it… You can essentially copy and paste the rest of the tutorial.
Just exclude the var and the ; and wrap the key in the dicts with quotes.
The event example is obviously different if you are going to register a python function. But this really just amounts to:
map.on("click", self.on_map_click)
and creating your event handler:
# ... within your forms class
    def on_map_click(self, e):
        """Dealing with events
        This is our function that we bind on a map click event.
        """
        anvil.alert(f"You clicked the map at\n{e.latlng.toString()}")
Tip
It has been very helpful in my development to use print(dir(some_leaflet_object)) to help understand the object structure. For instance, that event object e in our on_map_click method, you can get the coordinates as floats using e.latlng.lat and e.latlng.lng.
print(dir(e.latlng))
['SERIALIZATION_INFO', ...dunders..., 'clone', 'distanceTo', 'equals', 'get', 'keys', 'lat', 'lng', 'toBounds', 'toString', 'wrap']