
Getting Started with Anvil

This guide will lead you through the creation of your first Anvil app. Together we will build a Guest Book app, and when we're done we will have something that looks like this.
We recommend you open https://anvil.works/ide in a new tab, and follow along with this guide.
Logging In
Open https://anvil.works/ide , and click Sign In on that page to log in with Google.
This is just to identify yourself to Anvil - your apps will not be stored with Google.
Create a blank app
Once you have logged in, the next page will list all your Anvil Apps. You probably don't have any yet, so let's fix that.
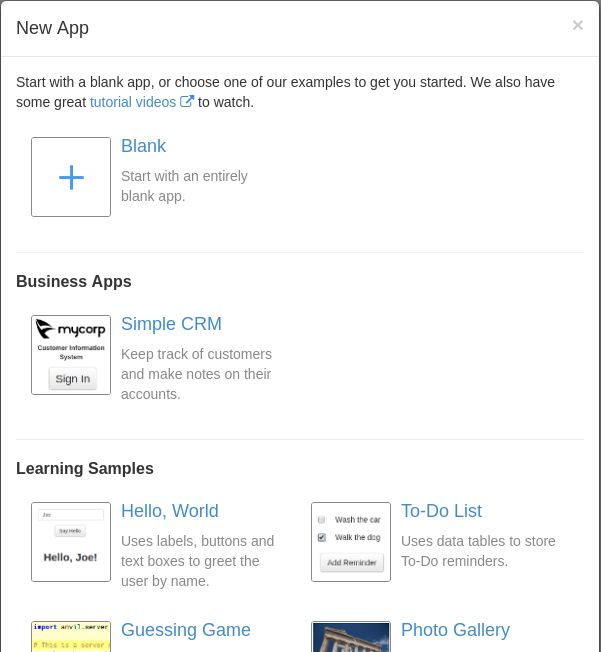
Click Create new app to get started. You get a choice of templates to start from, but we are going to build our guest book app from scratch, so choose "Blank App".
Hello, World!
Now that you've created a blank app, you will find yourself in the Anvil App Editor. You can read more about the App Editor in the Anvil documentation . For now, we're going to go ahead and start building the guest book.

It's traditional for the first program you write to greet you with the message Hello, World!, so let's start there. In Anvil, this will take roughly three clicks as well as typing the message.
The blank app template isn't actually quite blank. You will see in the App Browser on the left of the IDE that your project already contains one Form. Forms are the pages of your app that the user sees. They contain Components, such as labels, buttons and text boxes.
The main panel in the IDE is the Form Editor. This is where you design your form.
First, find the Toolbox in the top-right of your screen, and find the Label component: 
Click and drag the label icon onto the form editor. Once you have placed your new label, you can move and resize it. You will notice that Anvil is helping you to drop the new component onto a hidden grid - this is so that it's easy for you to line up multiple components. When you're happy with its position and size, notice that the Property Table in the bottom-right of the IDE is now displaying all the properties that you can set for the label. We want to change the text property to read "Hello, world!". Your form should look something like this:

Now you are ready to run the app.
Running Your App
The Anvil IDE has two states: Build and Run. We have been working in build mode so far. When you want to test your app, you will need to switch into the Run state. When in the Run state, if anything goes wrong in your code the Output Console will pop up, allowing you to jump straight to the problem and fix it.
Now that your app is ready to run, click Run at the top of the Anvil IDE to switch into the Run state.
What you see now is your running app. Admittedly, it's not very exciting yet. We should make it do something.
User Input
Wouldn't it be nice if your app could greet its users by name? Click Stop in the bar at the top of the IDE, and return to the form designer.
Using the Toolbox again, add a Label , a TextBox  and a Button
  so that your form looks something like the example below. You will need to edit the
 text property of the new label and the button as you did before.

Naming Components

As we will want to refer to the text box and the button from code, let's give them names. Select the text box, and then use the Property Table to set its name property to "txt_name", as in the screenshot on the right. In the same way, rename the button to "btn_greet" and the original label (the one that still reads "Hello, World!") to "lbl_greeting".
There is nothing magic about the lbl_, btn_ and txt_ prefixes to the names. You can call your components anything you want (as long as the names start with a letter and don't contain spaces), but using a prefix that identifies the type of the component can help you keep track of things.
Bringing Your App to Life
Now we need to write some code to wire up our form. When the user enters their name and clicks the button, we will have the app display a greeting.
Double click your "Greet" button. The form editor switches into Code View:

The code you see is what drives your app. Every form has an associated Python class, which you can view by switching the Form Editor into Code View, as you just did.
We want to add an action when the user clicks btn_greet. By double-clicking the button in the designer, we asked anvil to create a new function for us. This function will be
called whenever a user clicks the button at run-time.
The names of our components are important, because now we can refer to them in code. Inside the Form1 class, we can refer to our text box as self.txt_name. This means we can get the text from the box by writing self.txt_name.text.
  def btn_greet_click (self, **event_args):
    # This method is called when the button is clicked
    self.lbl_greeting.text = "Hello %s!" % self.txt_name.text
Replace the btn_greet_click function that Anvil has created for us with the code on the right. Make sure that you don't change anything else - the __init__ function must remain, for instance.
Now you're ready to run your app again. Once it appears, try typing your name in the text box and clicking "Greet". You should see something like this:

Saving Data
Now that we've seen how to add actions to buttons on our form, let's think about the next feature we need for our guest book: storage. We need to be able to save details of those who have visited.
Before we start, let's ask the user for some more interesting information. Select the greeting label (lbl_greeting) and delete it by pressing DELETE on your keyboard. Create a new TextArea  component and an associated label so that your form looks like the updated example below. Name the new TextArea component
 txt_message. You will also want to move the button and change its text property. There is no need to rename it.
You do not need to give names to the 'Enter your name:' and 'Enter a message:' labels. The only reason to name components is if you want to refer to them from the code.

Linking to Google Spreadsheets
To store visitors' details, we will link a new Google Spreadsheet to Anvil. We can do this entirely from inside Anvil. As we want our app to interface with Google, we must add the Google API Service. In the App Browser, click the + next to SERVICES and then choose to add the Google API.

Select the Google API Service you just added, and click Add App File . Anvil will ask for permission to view your Google Drive files, and then you will see a list of all your folders. You could navigate around your Google Drive to choose where to create the file, but for now just click Create File Here to create it in the root folder.
In the next dialog, choose the Spreadsheet file type. Enter the name "Guest Book" and then click Create File
You should see a table showing your Guest Book spreadsheet along with a "Python identifier". This is how we refer to the sheet in code.


To see our new spreadsheet, click View to open the new file in Google Drive.
Now that we know how to refer to that spreadsheet in code, let's try saving visitor data.
Adding Data Rows
Switch back to Anvil, then use the App Browser to switch back to the Form Editor by clicking on Form1.
from anvil import *

# Importing anvil.google.drive allows us to connect to
# our linked spreadsheet.
import anvil.google.drive

class Form1 (Form1Template):
  def btn_greet_click (self, sender, **event_args):
    # This method is called when the button is clicked
    user_name = self.txt_name.text
    msg = self.txt_message.text

    # Adding another row to a worksheet is simple:
    self.guest_sheet.add_row(name=user_name, message=msg)

  def __init__(self):
    # This sets up a variable for every component on this form.
    # For example, if we've drawn a button called "send_button", we can
    # refer to it as self.send_button:
    self.init_components()

    # Set "self.guest_sheet" to the first
    # worksheet of your spreadsheet.
    self.guest_sheet = anvil.google.drive.app_files.guest_book.worksheets[0]
Click the Code button in the header to
switch to Code View, then find your original btn_greet_click function.
This won't work anymore, because we deleted lbl_greet. Replace the code for
the entire form with the code on the right.
Here we are loading the spreadsheet we linked earlier, then adding a row to its first worksheet.

Run your app, enter some text in the boxes, then click the button. You won't see any response in the app (yet), but if you open up the spreadsheet in Google Drive, you should see the data has arrived.
Notice that Anvil has filled in the column headings for you. When you add data, columns are automatically created as necessary.
Loading Data
Our guest book app is starting to take shape. We have built the user interface, and we can save information that our visitors enter. Now, we just need to load and display that information for future visitors.
To do this, we will add a LinearPanel  to the form. Find it in the Toolbox, and add it below the button. When the form loads, we will add one label to the linear panel for every row in our spreadsheet, each displaying the name of the visitor. Linear panels are Containers that arrange their child components vertically, keeping them all lined up. They are ideal for situations like this. Name your new LinearPanel
 lst_visitors. While it's empty, it can be quite hard to see on the form, but you should end up with something that looks like this. The LinearPanel is the selected box at the bottom.

Now we should write some more code to populate the linear panel when our app loads. Click the Code button to switch back into Code View.
Startup Code
  def update_previous_signatures(self):
    # First, we clear out all components from the LinearPanel,
    # so it's completely empty.
    self.lst_visitors.clear()

    # Now, we add a Label to the panel for each row
    # in the spreadsheet.

    for row in self.guest_sheet.list_rows():
      row_label = Label(text=row["name"])
      self.lst_visitors.add_component(row_label)


  def __init__(self):
    # This sets up a variable for every component on this form.
    self.init_components()

    # Set "self.guest_sheet" to the first
    # worksheet of your spreadsheet.
    self.guest_sheet = anvil.google.drive.app_files.guest_book.worksheets[0]

    # Start off by loading previous messages
    self.update_previous_signatures()
On startup, we want to load data from the Google Spreadsheet and display it in lst_visitors. Find the __init__ method in the code - this is the method that runs when Form1 loads. Replace it with the two functions on the right.
You can see that we are loading the spreadsheet as we did when we were saving the data - but instead of adding a row, this time we loop through all the rows, creating a new Label for each one and adding it to the Linear Panel. Notice that we can initialise the properties of each new Label by passing them in as named parameters (row_label = Label(text=row["name"])). We could set any number of properties this way.
For more information about adding components to containers in code, please see the API Reference.

Run your app again. You should see the names of your previous visitors displayed at the bottom of the form:
At this point you may notice that signing the guest book does not cause the list to update immediately. To fix that, add a call to self.update_previous_signatures() at the end of the btn_greet_click function. In any case, restarting the app will cause the list to update.
Custom Components
Forms can also be used as components on other forms. Let's see how this can simplify our app.
At the moment, we just display the name of each previous visitor in a label. If we wanted to display the visitors' messages too, we would need to add a second label per row, and things would start to get messy. We can improve things by designing a new Form as a template for a single row, then adding an instance of that form for each row in our spreadsheet. The benefits should become clear as we progress.
Creating a Template Form
To add a new form, click the + button in the FORMS section of the App Browser. A new form will appear, called Form2. Select it, then give it a more useful name by clicking next to the name, choosing Rename and entering RowTemplate.
Now add two labels to the form, so that it looks like the example below. Name them lbl_name and lbl_message.

  # New initialisation function for RowTemplate class
  def __init__(self, row):
    self.init_components()

    # Save a reference to the row object for later
    self.sheet_row = row

    # Display the name and message
    self.lbl_name.text = row["name"]
    self.lbl_message.text = row["message"]
Switch to the Code View of the RowTemplate form. Notice that RowTemplate has its own Python class, separate from Form1.
When we create new instances of RowTemplate, it needs to know which data row to display, so we'll add a row parameter to the __init__ method. Use the code on the right.
When the form is initialised, we will display data from whatever row we were given in the labels. Now we just need to use our RowTemplate form.
Using a Template Form
from anvil import *

# Import the RowTemplate class, which is
# defined by the RowTemplate form.
# We can use it like any other component.
from RowTemplate import RowTemplate

# Importing anvil.google.drive allows us to connect to
# our linked spreadsheet.
import anvil.google.drive

...

...

for row in self.guest_sheet.list_rows():
  row_form = RowTemplate(row)
  self.lst_visitors.add_component(row_form)

...
Switch back to Form1 and go to Code View. We don't need to modify the layout of the form, we will just change the way data is displayed when the form loads.
This is remarkably easy. Instead of adding a label to lst_visitors for each row of data, let's add a new instance of RowTemplate. Change the code to look like the example on the right. Don't forget the extra import at the top - this allows us to refer to the new RowTemplate form. The for loop in the second block on the right should replace the one in your update_previous_signatures function.
Run the app. You should see one copy of RowTemplate appearing for each previous visitor to your app.
Modifying Data
Now that we have a template form, we can do more than just display data from each row. Let's add a button to the template that allows users to delete rows from the spreadsheet.
Switch back to the RowTemplate designer, move the labels slightly and add a button called btn_delete. Your form should look something like this:

When a user clicks the Delete button, we need to do two things:
- Delete the data row from the spreadsheet
- Remove this instance of the template form from the displayed list.
  def btn_delete_click (self, **event_args):
    # The Delete button has been clicked!
    # First, delete the row from the spreadsheet
    self.sheet_row.delete()

    # Now this entry has been removed
    # from the spreadsheet,
    # remove ourselves from the form.
    self.remove_from_parent()
Double click the button to auto-generate an event-handler method, then replace it with the code on the right. Make sure you do not delete the auto-generated __init__ function.
Notice that the row object we got from the worksheet (via __init__) is more than just a dictionary - we can update data in the row, or delete it (as we do here). For more information about using Google Sheets, see the API reference.
We're done! Run your app, and see that you can now delete data as well as add and view it.
In the drop down menu at the top-right of the App Browser, choose "Share". The link provided allows you to share your guest book with your friends. Send them the link, and watch as the messages arrive!
Next Steps
Congratulations on completing your first Anvil app. We have really only scratched the surface of what is possible with Anvil. Take a look at some of the other template apps for examples of graphics and animation, server-side code, and even physics simulation.
Finally, please sign our Guest Book!