 By
By Anvil for web developers
Ever wondered what it might be like to build, ship and deploy your web apps with nothing but Python? You’ve come to the right place!
In this guide, we’ll run you through Anvil’s key features, and arm you with all the tools you need to build and deploy full-stack, database-backed web apps with nothing but Python.
Table of contents:
- What is Anvil and how does it work?
- How do I build my UI?
- Can I still write HTML and CSS?
- How do I communicate with the server?
- How do I connect to a database?
- How do I deploy my app?
- How do I manage user authentication?
- How do I use HTTP APIs?
- How do I handle version control? Can I use Git?
- How do I use JavaScript?
- How do I run a background task?
- How do I store api keys securely?
- How do I handle routing and navigation?
- What versions of Python can I use?
- Can I use Anvil for free?
What is Anvil and how does it work?
Anvil is a platform for building full-stack web apps with nothing but Python. It has a drag-and-drop UI designer, a web-based Python IDE and a built-in database backed by PostgreSQL.
Anvil lets you run Python in the browser (client-side Python is compiled to Javascript) and provides a full CPython server-side environment. This means you can build full-stack web apps without writing any HTML, CSS or JavaScript. Anvil has a number of out-of-the-box services like one-click user authentication and integration with Stripe. Web apps built with Anvil are instantly hosted in our cloud servers or, if you prefer to manage hosting yourself, we provide onsite installation. For a complete list of features, see here.
Our aim is to make web development simpler and more efficient without compromising on power. We want to provide you with the tools to move faster and iterate quickly, and to lower the costs for delivering professional, full-stack web apps.
Keep reading as we answer the main “How-tos” from a web development perspective. You can also read the docs, view our tutorials, example apps or consult our active community forum.
How do I build my UI?
Your UI is created using ‘Forms’. Forms are effectively the ‘pages’ or ‘views’ of your Anvil app. They can represent an entire page or can be used together to make up different sections of a page. Forms have a visual design that describes how they look, and a Python class that describes how they behave.
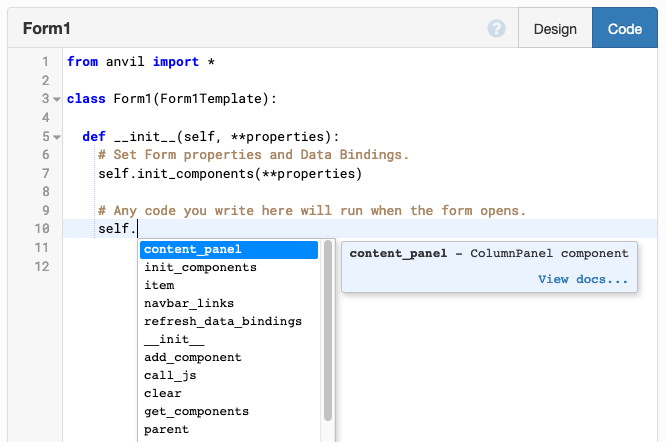
The Form Editor has two modes: ‘design view’ where you edit the visual design, and ‘code view’ where you write client-side Python code that runs in the browser (we compile it to JavaScript for you using the Skulpt compiler). You edit your Python code using Anvil’s web-based Python IDE which has built-in autocomplete:
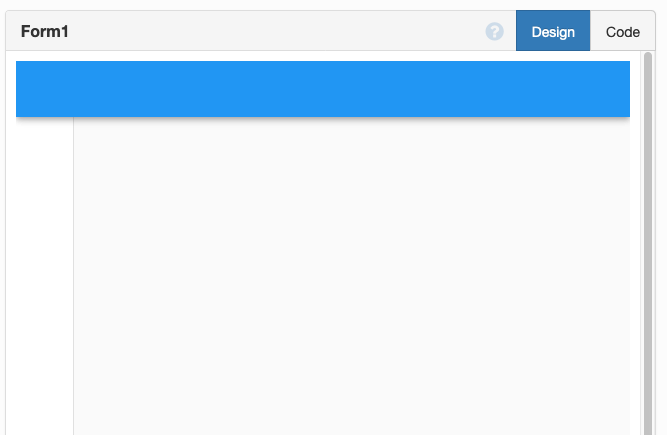
In design view, you create the visual design of your forms by dragging-and-dropping components (buttons, text boxes, images etc.) from the Toolbox onto your Forms.
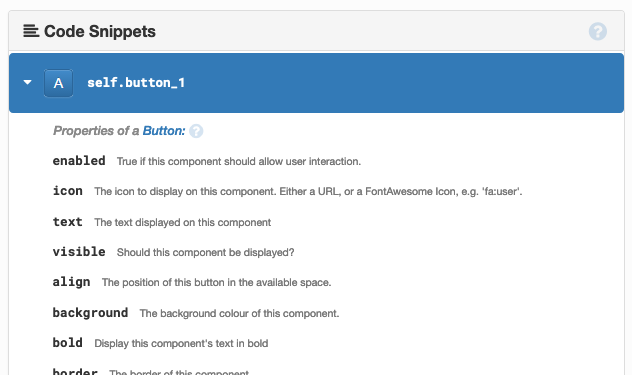
You can customise components placed on your Forms directly in ‘design view’ using the properties panel. You can also read and change their properties in your Python code, while your app is running, as each component that you drag onto your Form is also available as a Python object.
For example, TextBox components have a text property (the text in the box). If you have a TextBox called my_textbox, you can display text in the box using Python like this (self here refers to the Python class that describes the Form):
# Display the text 'Foo' in the TextBox
self.my_textbox.text = 'Foo'
You can see a list of properties that you can update for each component and examples of how you do this with Python by opening ‘code view’ and selecting a component in the code snippets panel on the right hand side.
Traditional web development frameworks describe their user interface with HTML, often with special syntax that describes how dynamic content will be inserted. Because all Anvil’s UI components are represented as Python objects which you can interact with directly, there’s no need to use templating to dynamically insert content into your client-side code - you can do all this with the Python code that runs in your browser.
Event handling
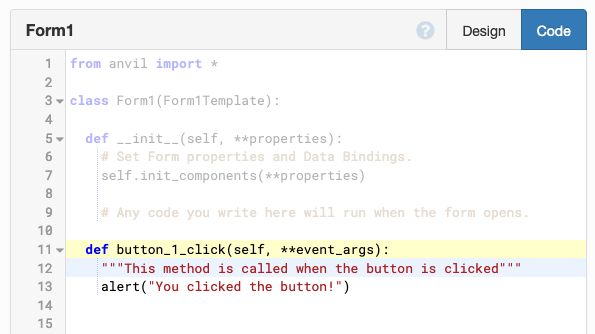
You don’t need to write JavaScript to configure event handlers. You can do this with client-side Python. Double-clicking a component in ‘design view’ creates a Python method that runs when the component is clicked.
You can configure a range of event handlers using the ‘Events’ box at the bottom of the Properties panel in ‘design view’.

Can I still write HTML and CSS?
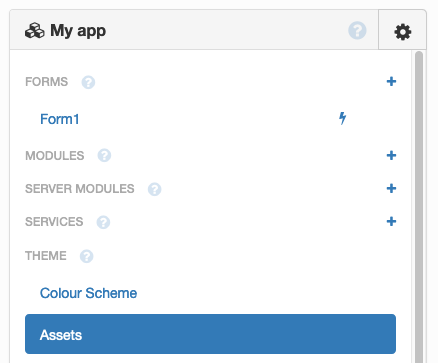
Yes, you can! When you create an Anvil app, you’re prompted to choose a theme (such as “Material Design”). Themes contain assets (HTML templates, CSS stylesheets and images) that you can edit. You can edit an existing theme, or create a new look and feel from scratch. To edit these files, select “Assets” from the App Browser:
Even though you’re customising your app’s HTML and CSS, you can still use Anvil’s drag-and-drop designer. Read our introduction to using custom HTML with Anvil to learn how.
How do I style particular components with CSS?
All UI components also have a ‘role’ property that assigns them a CSS class. For example, a Label with the headline role will have the CSS class .anvil-role-headline, and you can use that to style your components with the headline role.
You can then write CSS rules in a CSS file in the Assets Editor to define how Roles affect components. (For Material Design, “theme.css” is a good place: search for .anvil-role-card for examples). You can configure and add new roles in the Roles Editor (under “Roles” in the App Browser).
How do I communicate with the server?
In Anvil, you write server-side Python code in Server Modules. Server Modules are just Python modules that run in our serverless environment, so you can do anything you can do in Python there.
Because you have Python on both client-side and server-side, you no longer need to make HTTP requests to communicate between client and server. You can call functions in server code from client code, passing arguments and returning values as Python objects. This data still passes over HTTP, of course – we use an encrypted Websocket for client-server communication.
To make a server function available to client-side Python code, decorate it with @anvil.server.callable, like this:
@anvil.server.callable
def guess(number):
  CORRECT_NUMBER = 127

  if number < CORRECT_NUMBER:
    return "Too low!"
  elif number > CORRECT_NUMBER:
    return "Too high!"
  else:
    return "Correct!"
You can then call this function from your client-side Python code, like this:
answer = anvil.server.call('guess', 15)How do I connect to a database?
Anvil has a built-in database, called the Data Tables service. It’s a production-ready database backed by PostgreSQL. You can create tables, edit schema and view and manipulate your data directly in the IDE, and you can query and update it with a pure Python API. If you’re on a Dedicated or Enterprise plan, you can access Anvil’s data tables directly using SQL.
You can also connect to external databases in the normal Python way from inside a Server Module e.g. using PyMySql to connect to a MySQL database.
If you’re using the Data Tables service, you can pass rows (and whole tables) to and from the server as Python objects. For example, here’s a function that returns a database search iterator from a server module to the browser:
# Define a server function to return a search iterator
@anvil.server.callable
def get_people_called_name(name):
    # return all rows for people named 'name'
    return app_tables.people.search(name=name)
# Call it from the client
jane_rows = anvil.server.call('get_people_called_name', 'Jane')This will return a lazy iterator of database rows for all people named Jane.
Then, you can display this in your UI in a label called “label_1”:
self.label_1.text = 'There are {} people called Jane!'.format(len(jane_rows))How do I deploy my app?
Anvil apps are instantly hosted in our cloud servers. As soon as you start building an app, it is hosted on the internet at a private, unguessable URL. When you’re ready to show your app to the world, you can pick a public, meaningful URL, or point your own domain name at your app.
Anvil on-site
If you’re an enterprise user who wants to manage your own hosting, you can install Anvil on your own servers. This allows you to develop and run apps entirely behind your corporate firewall, on servers you control. Anvil on-site runs in Docker, and it typically takes less than five minutes to install. It can be installed on physical servers in-house or in your company’s cloud (eg AWS, Azure, or Google Cloud).
How do I manage user authentication?
Anvil’s Users Service handles user signup and login with a single line of Python. There are various sign-in options in the Users Service, and all can be enabled/disabled:
- username and password
- Microsoft Azure AD and Office 365
Usernames and password hashes are stored automatically in a Data Table.
After enabling the Users Service, you can simply call anvil.users.login_with_form() to launch a login form.
You can get the current logged-in user on the server or on the client, by calling anvil.users.get_user().
If you have Anvil installed on-site, you can also use:
- local Active Directory
- X.509 certificates
Customising login
The Users service is very flexible – you can use the Python APIs to take full control of the authentication system, or build an entirely custom sign-up flow.
How do I use HTTP APIs?
You can expose HTTP or REST APIs of your own, or integrate with external HTTP REST APIs in a few lines of Python.
Expose HTTP or REST APIs
You can build programmatic HTTP APIs by decorating server functions with @anvil.server.http_endpoint, like this:
@anvil.server.http_endpoint('/hello-world')
def hello_world(**q):
  return {'the answer is': 42}
All registered endpoints for your app are accessible at
https://<your-app-id>.anvil.app/_/api/<path> - to find your app id, choose ‘Publish app’ from the gear menu in the IDE.
Integrate against external HTTP REST APIs
You can integrate against REST APIs using the anvil.http module. For example, to make a GET request and store the response, you would do:
import anvil.http

response = anvil.http.request("https://api.mystocks.com/all")
If you’d prefer to use the standard python requests library, you can just import the requests library from inside a Server Module.
How do I handle version control? Can I use Git?
Yes, you can. Each Anvil app is represented by a Git repository. You can manage versions in the Anvil editor, or by cloning your app with git onto your own computer and pushing changes back up to Anvil.
To manage versions of your app in the Anvil Editor, you can use the version history dialog. You can choose a specific version of your app to Publish - visitors to your app will only see this ‘published’ version meaning that you can continue working on your app without disrupting your users.
How do I use JavaScript with Anvil?
You can import external libraries and services by navigating to the “Native Libraries” section of the App Browser. Any HTML you add to the “Native Libraries” section will be inserted into the <head> tag of your app’s HTML. This is a great place to add a <script> tag to pull in an external library (or a .js file in your app’s Assets). You can also use <link> tags to refer to external CSS.
It’s also possible to define Javascript functions and call these from your Python code. Just add a script tag to your HTML template, write your function and call it from Python using Anvil’s call_js method.
Here’s an example that configures an event handler for a button click and calls a javascript function from client-side Python code when the button is clicked:
def button_1_click(self, **event_args):
  # This method is called when the button gets clicked
self.call_js('showJsAlert', 'Hello, world!')<script>
function showJsAlert(message) {
alert(message);
return 42;
}
</script>You can also call Python from Javascript - click here for more information on that.
How do I run a background task?
To define a background task with Anvil, just decorate a Server Module function as @anvil.server.background_task
Then, call anvil.server.launch_background_task('my_task_name', args...) to run the task in the background.
Here’s a tutorial covering Background Tasks in detail.
How do I store API keys securely in my app?
Data can be stored in encrypted form using Anvil’s App Secrets service. This is great for storing API credentials, database passwords, or sensitive personal data. Data is stored using encryption at rest - it stays encrypted until it’s needed. All encryption is performed with 128-bit AES-GCM. This standard encryption operation avoids many common cryptographic pitfalls. Click here for more on the encryption architecture.
You can store passwords or API keys encrypted in your app – for example, I could store my GitHub password in a secret called “github_password”, and use it in my app, like this:
username = "github_username"
password = anvil.secrets.get_secret("github_password")

r = anvil.http.request("https://api.github.com/user/repos", json=True,
                     username=username, password=password)
How do I handle routing and navigation?
You’re probably used to thinking about what to display to the user in terms of pages. You configure routes which handle HTTP requests and decide what content to display to the user.
In Anvil, this is done using Forms. Anvil’s Forms are the building blocks that make up your web app. To change the UI completely, you display a new Form by calling the function open_form(<name of new Form>). When you do this, the new Form takes over completely - the old form is no longer visible. Instead of configuring routes and handling HTTP requests, you use simple Python functions to change the content being displayed to your users.
A Form can be a complete page or you can use lots of Forms together to form different sections of a page. Using several forms to make up one page is particularly useful if certain UI elements are displayed over and over again, for example if all your pages share the same top-level navigation.
Click here for more information on navigation.
You might want to create a Form that displays data specific to a row or table from your database, for example viewing a ‘my account’ page that shows data for a specific user from the ‘users’ table in your database.
In Anvil, you do this by passing extra parameters into open_form(), which then passes these parameters to the new form’s constructor.
For example, you can pass a database object to a form’s constructor and initialise this object in your new Form, for example:
- Change the
__init__method to expect an extrauserparameter, and store the user on the Form asself.user.
class MyNewForm(MyNewFormTemplate):
  def __init__(self, selected_user, **properties): # Add the selected user parameter
    # Set Form properties and Data Bindings.
    self.init_components(**properties)

    # Any code you write here will run before the form opens.
self.user = user- Open the Form from a different Form, passing a database row to MyNewForm’s constructor:
jane_row = app_tables.people.get(Name="Jane Smith")
open_form(MyNewForm, jane_row) # Pass a database row to MyNewForm's constructor- Display content specific to the
user, for example, set the title of the page equal to the user’s full name:
self.heading_1.text = "{} {}".format(self.user['first_name'], self.user['last_name'])What versions of Python can I use?
You can choose to run your app’s Server Modules in full CPython 2.7 or 3.7, if you’re on a paid plan. Here, you have access to any Python library you can pip install. For a full list of packages, or to request a new package, see here.
The free plan uses a Python PyPy Sandbox for Server Module code. This is available in Python 3.6 or Python 2.7. Free plan users wishing to use a python library unavailable in the Basic Python environment can use the Uplink to connect to code running outside Anvil - it will run in whatever version of Python you are using with the Uplink, and with access to any Python libraries you have installed locally.
Client-side Python is compiled to Javascript, using the Skulpt compiler. Skulpt supports “approximately Python 3.7", although there are some operations and libraries that are not supported.
Can I use Anvil for free?
Yes! Anvil has a free forever plan with no restrictions on how many web apps you can build.
Next steps
To learn more about Anvil, check out our tutorials, example apps, or sign up and start building right away!